Lord of Mysteries Ray Bieber Boss Guide Lv52 (2026)
Ray Bieber is the second challenge of the Antigonus dungeon, and the fight that most parties underestimate. On paper it looks like a plain burn — in practice it is a discipline check: one clown that walks toward your stacked position every 20 to 30 seconds, a maze you must navigate to break the boss shield, and a second maze section that adds teleport traps, black holes and a faster clown.
Everything on this page comes from one recorded clear with the game running its in-game English interface, so every mechanic name below — the nameplate, the banners, the objective text — is readable directly on the frames. The 3.4K DPS reference is the creator’s own measured number from this run.
Verification rule
[unverified] / 〔待核验〕 marks a detail the footage or cited sources could not confirm — the marker stays inline so you know exactly which claims to double-check.
Stage-by-Stage Walkthrough With Frames
Key Takeaways Before You Pull
- ◆This is a DPS check first: the creator’s team topped the meter at 3.4K DPS on a training dummy before the pull — mechanics done well shorten the race.
- ◆At 80% health Ray Bieber summons a clown that applies the sanity drain — the wipe cause most parties never notice.
- ◆The clown walks toward your stacked position every 20–30 seconds; the tank keeps turning the boss so the DPS stand outside the drain.
- ◆Maze one: navigate to the marked area to break Ray Bieber’s shield, and watch the ground for teleport traps.
- ◆Maze two adds a second clown that moves every 10–15 seconds plus random black holes — step into one and you go back to the start.
- ◆When the laser phase starts, the whole party stacks behind the tank and lets him hold the boss.
Verified gameplay source
How to Clear the Antigonus Ray Boss Lv52 (Full Guide)
- 01
Read the nameplate before the pull
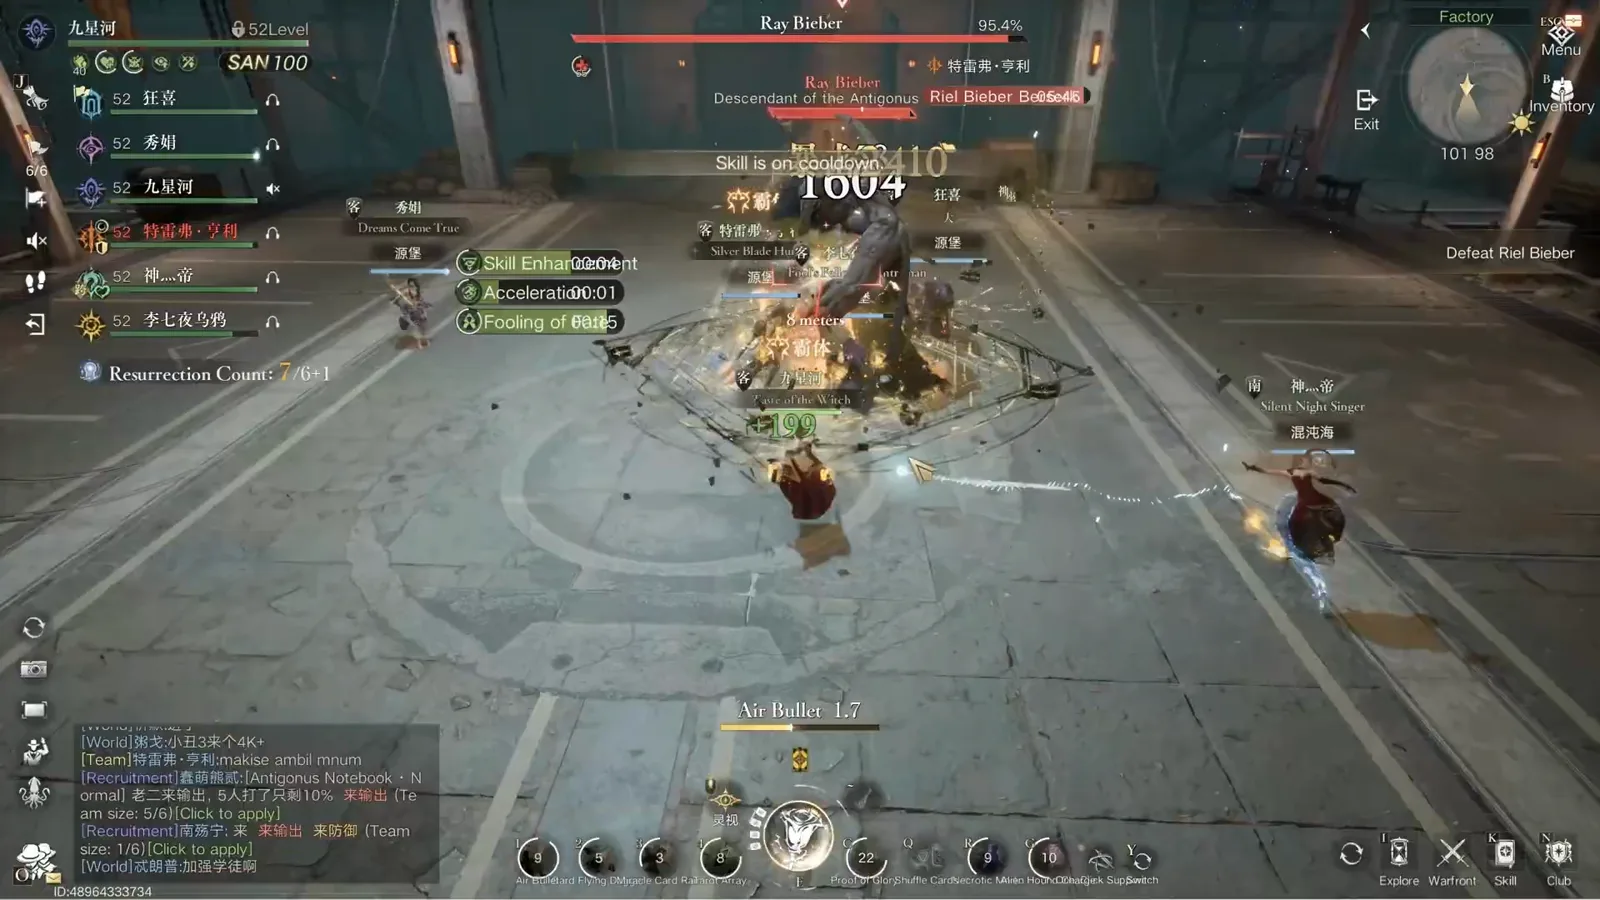
The fight opens in the Factory arena and the nameplate already tells you who you are fighting: “Ray Bieber — Descendant of the Antigonus Family”, level 52. Note the small conflicts in the game’s own English text — the objective tracker on the right says “Defeat Riel Bieber”. The buff bar on the left shows the fight’s economy: Acceleration, two stacks of Bastion Power and Fooling of Fate. The resurrection counter above it (7 of 6 used in this attempt) is a quiet reminder that this dungeon is allowed to hurt.
The pull: nameplate, buff bar and the objective that spells the boss’s name differently.Watch from 0:35 - 02
Phase one is pure dodge discipline
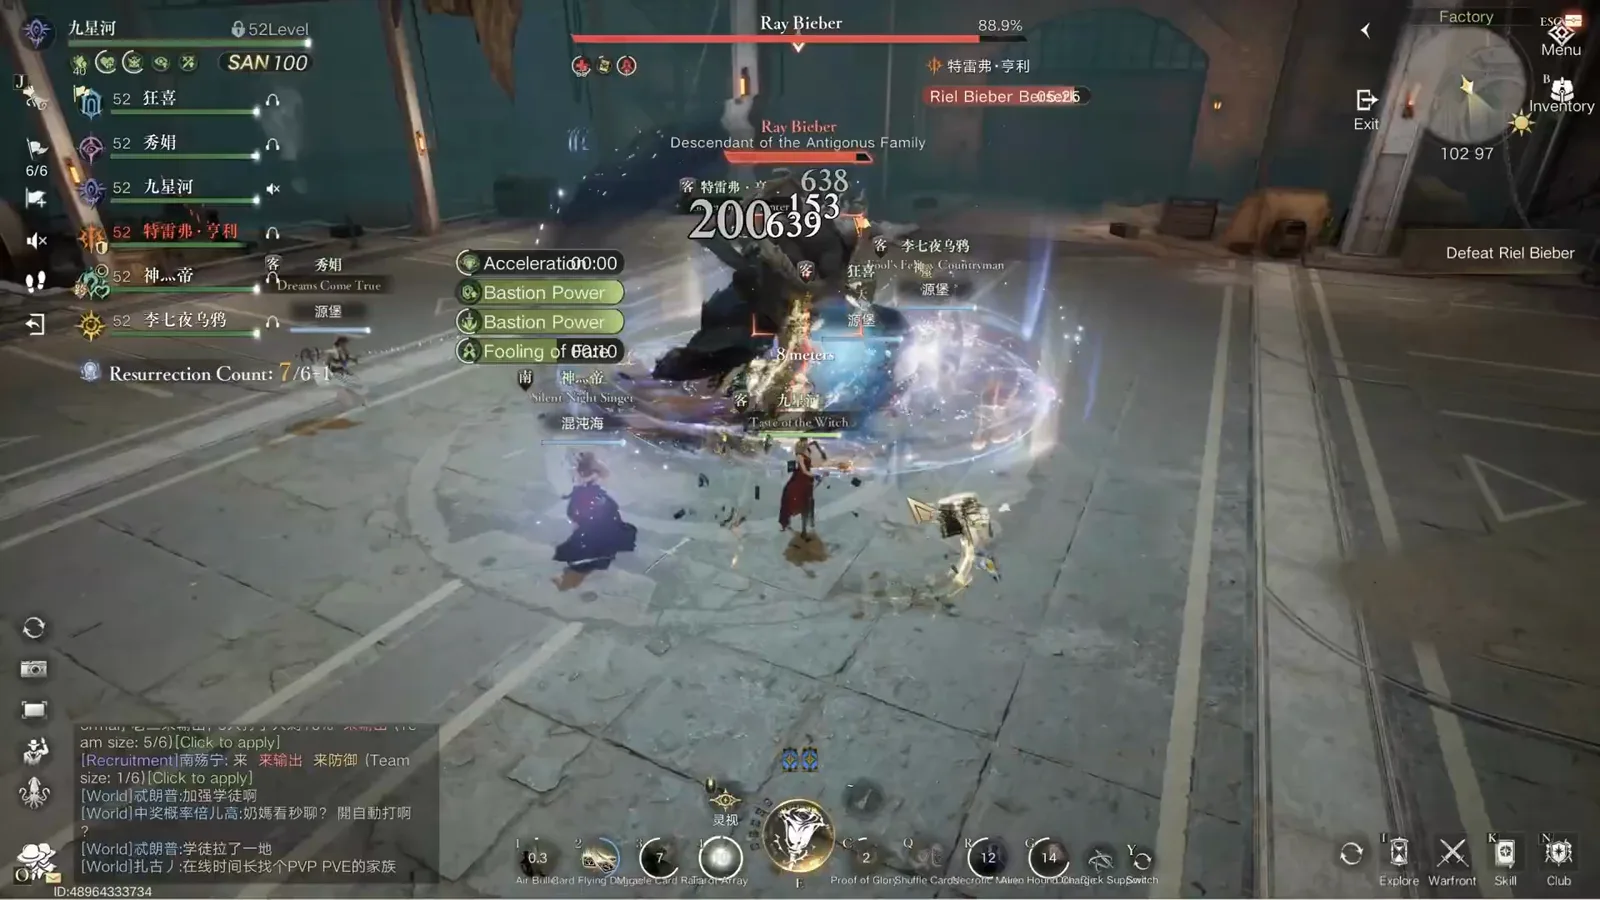
Until 80% there is nothing to manage except not standing in things. The most common hit is this diagonal beam: it sweeps a straight line across the arena floor and leaves roughly a second to sidestep once you see the cast. The party here keeps its stacked formation and steps out together, which keeps the healer’s attention on the tank. Every hit you dodge in this phase is DPS time you will want back during the maze sections.
The recurring beam sweep: watch the cast, step out as a group.Watch from 1:20 - 03
Respect the ring stances
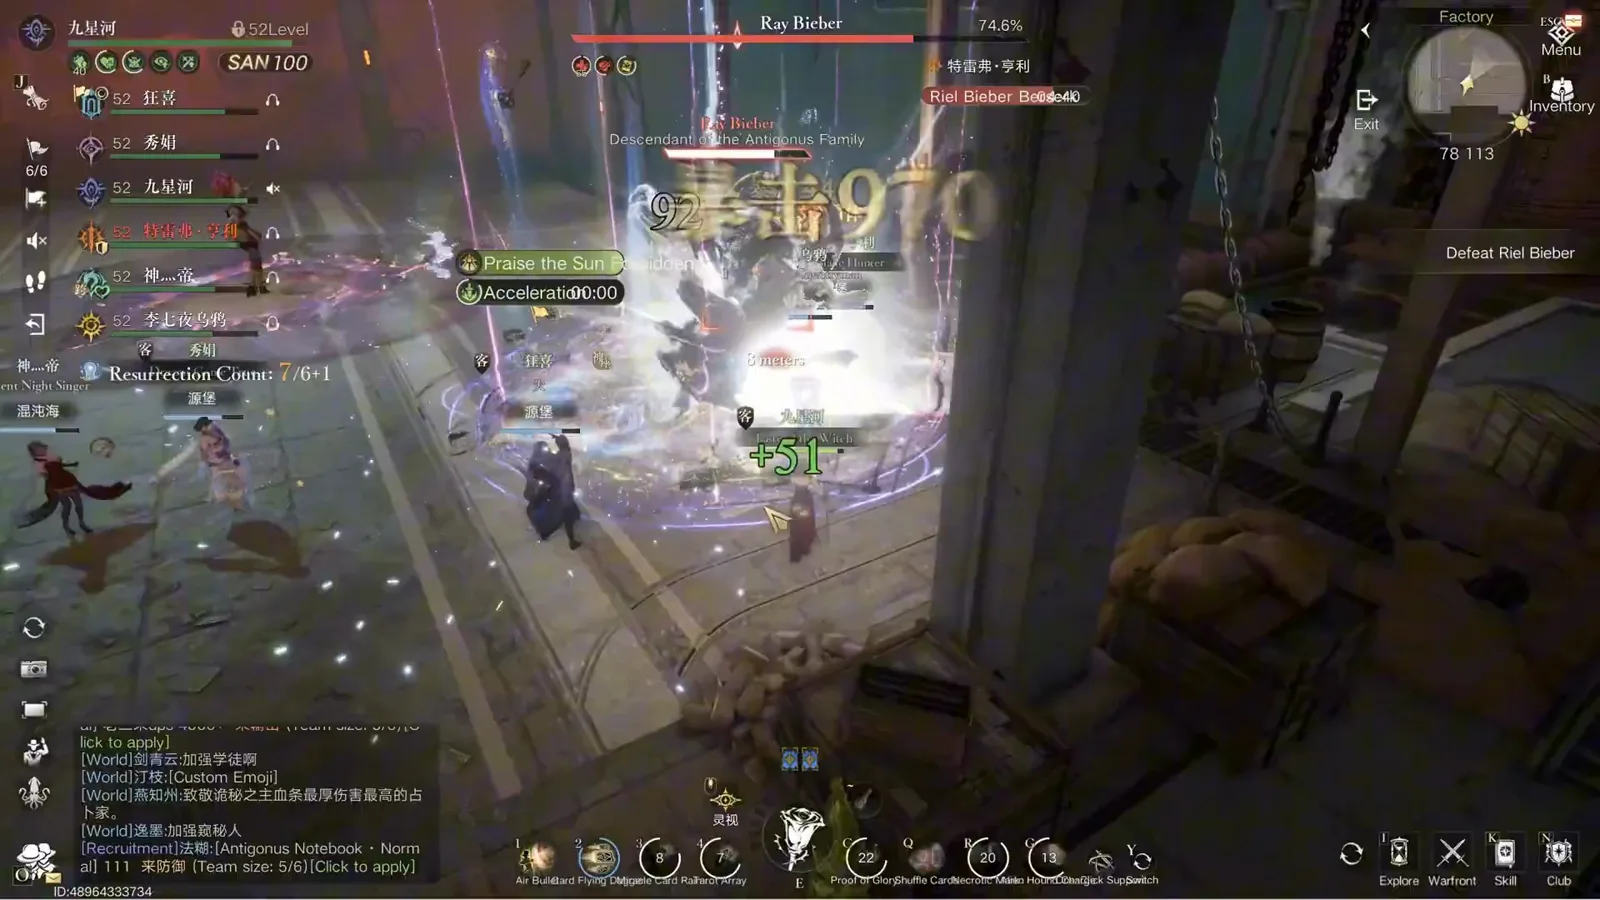
Between beam sweeps the boss parks in ring stances like this one — a lightning ring that punishes melee range for a few seconds. The raid in the recording holds to the left side and lets the tank keep the boss’s facing away from the group. Nothing here kills a competent party outright, but every unnecessary hit chips SAN, and SAN pressure is exactly what the clown phase will amplify later.
Lightning ring stance: the raid holds left while the tank owns the boss’s facing.Watch from 1:40 - 04
At 80% the first clown arrives
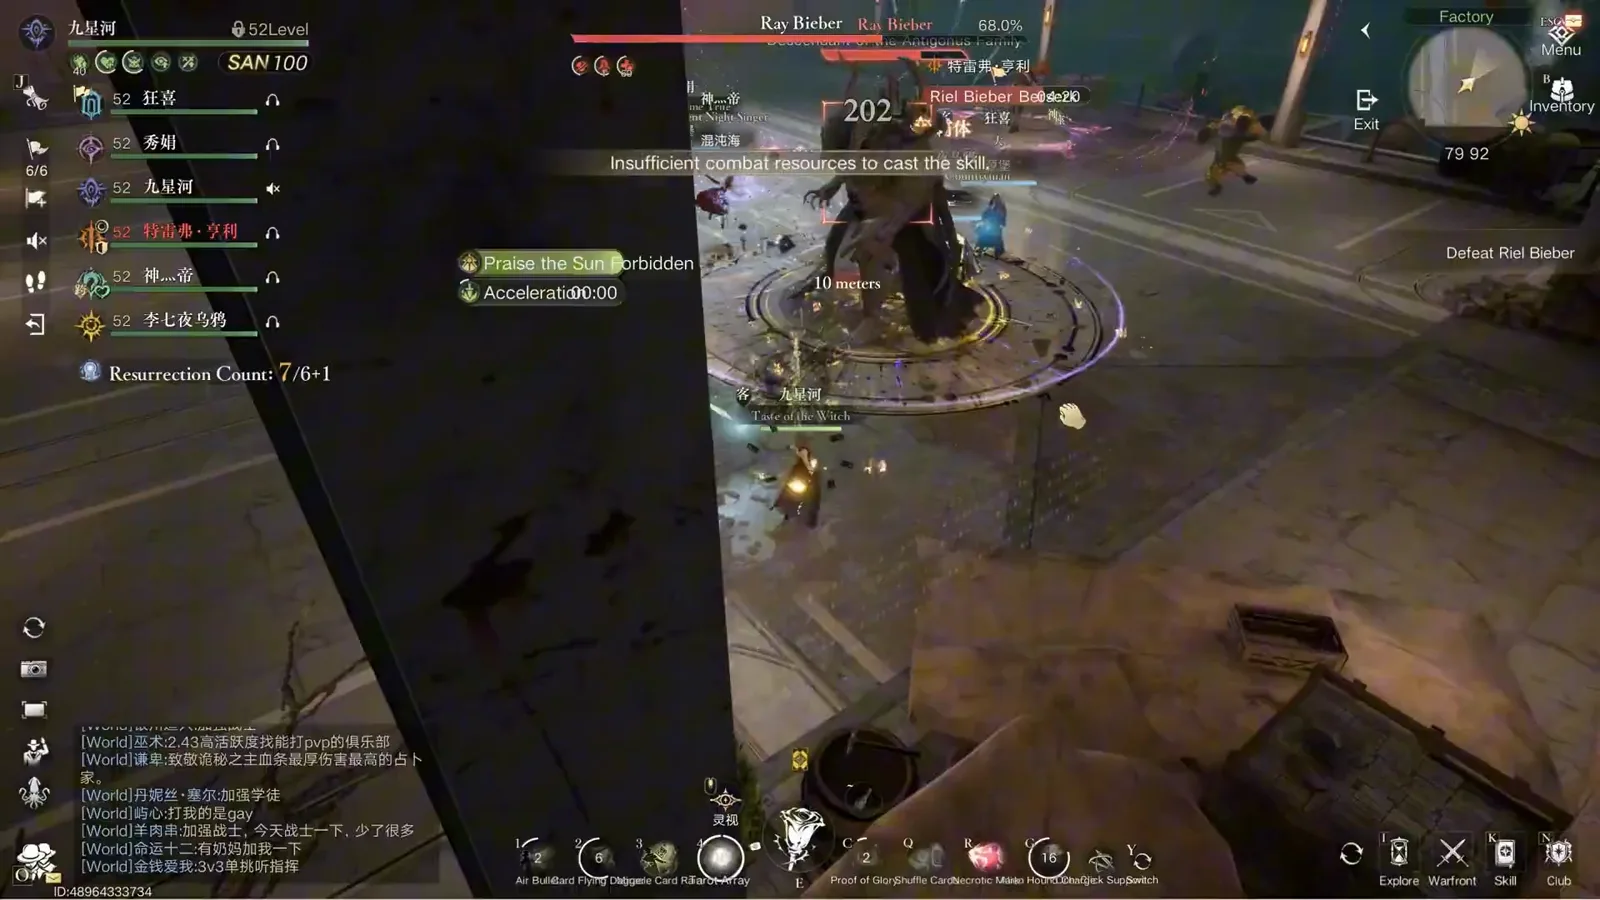
The flash in this frame is the 80% trigger: Ray Bieber summons a clown add, and from this moment the fight has a second clock. The clown’s job is to walk toward the party’s stacked position and apply a sanity drain — the transcript is blunt that this is the wipe cause most teams never identify. The add is not a burn target in this phase; it is a routing problem you solve with the boss’s facing, which is the next step.
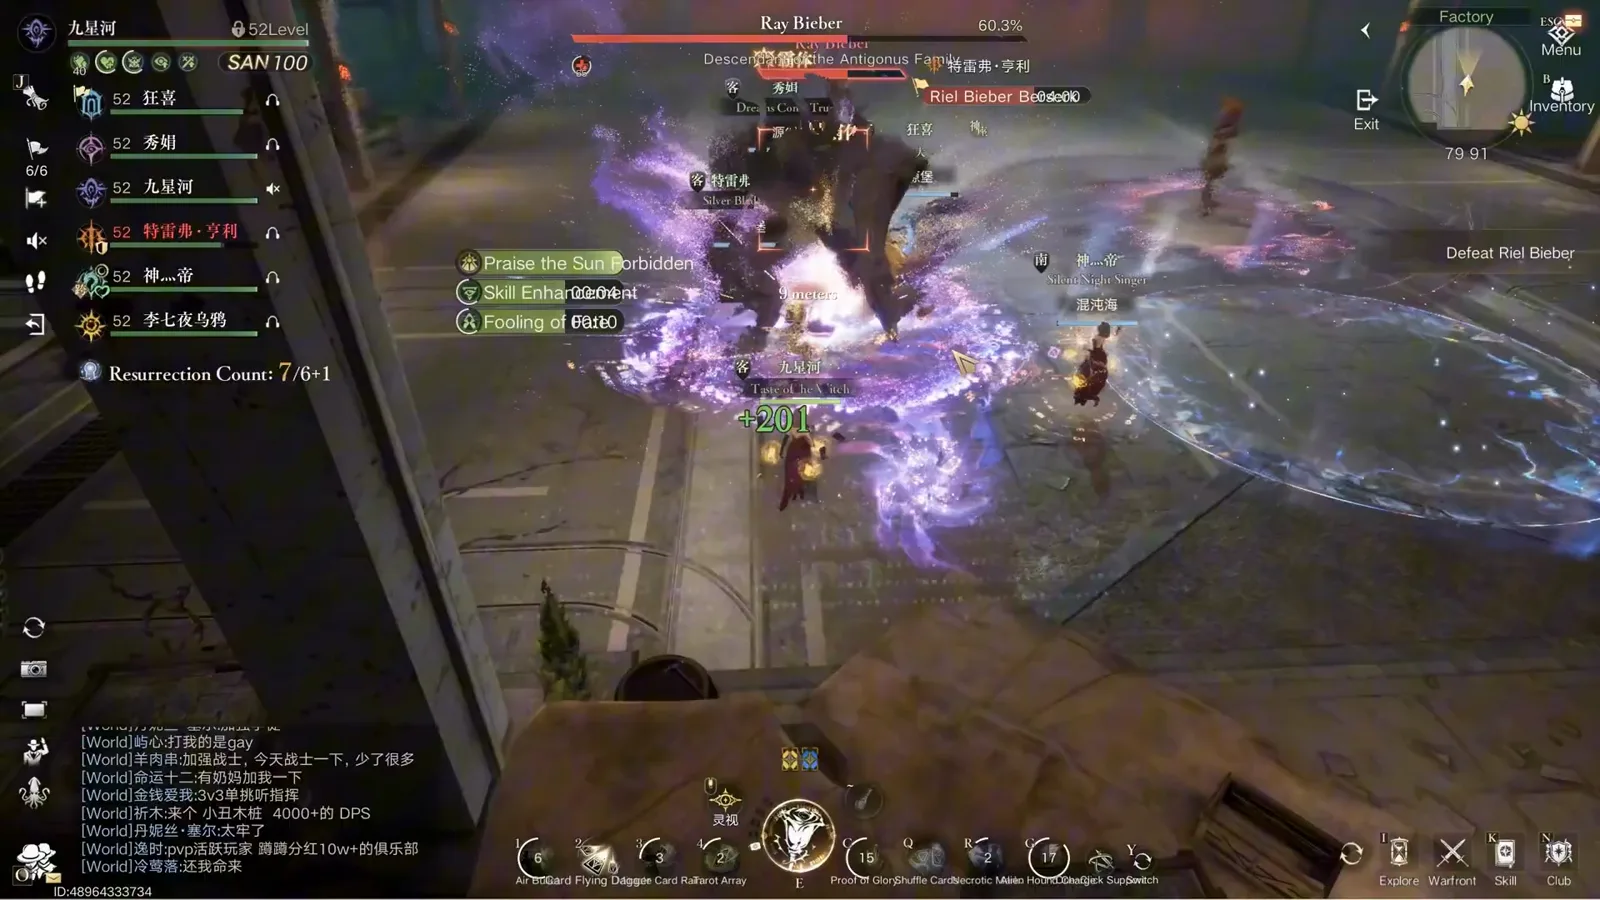
The 80% flash: the clown spawns and the sanity drain clock starts.Watch from 2:00 - 05
Maze one: run to break the shield
At the phase change the fight moves into a maze of glowing blue walls, and the banner says exactly what to do: “Navigate the maze as soon as possible and break Ray Bieber’s shield!” The countdown in this frame (26 seconds) is the whole mechanic — reach the marked area before it expires or the shield stays up and your damage is wasted. The recording’s party moves as one blob; splitting up in the maze is how people meet the teleport traps alone.
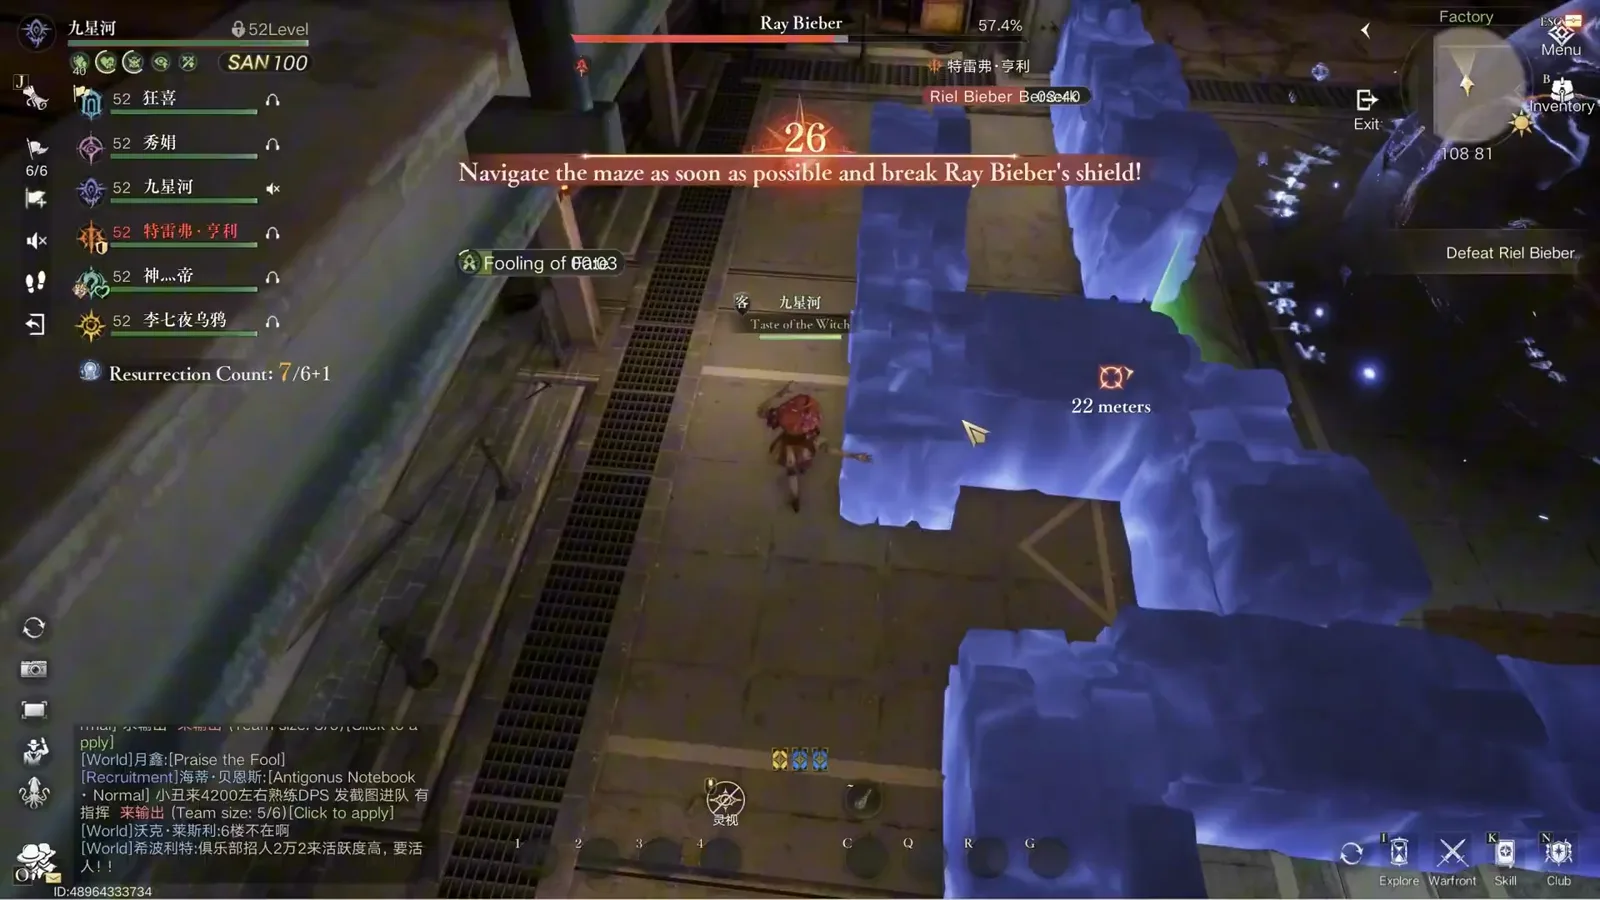
Maze one: 26 seconds on the clock, one path, move as a blob.Watch from 2:18 - 06
The sanity sphere follows you into the maze
This translucent dome pressing down on the party is the sanity mechanic made visible — the clown’s drain rendered as a sphere that swallows the group’s position while the shield-break countdown keeps running. The lesson from the recording: the maze does not pause the sanity pressure. Keep the blob tight, keep moving toward the objective, and let the tank’s facing work (next step) keep the drain off the DPS.
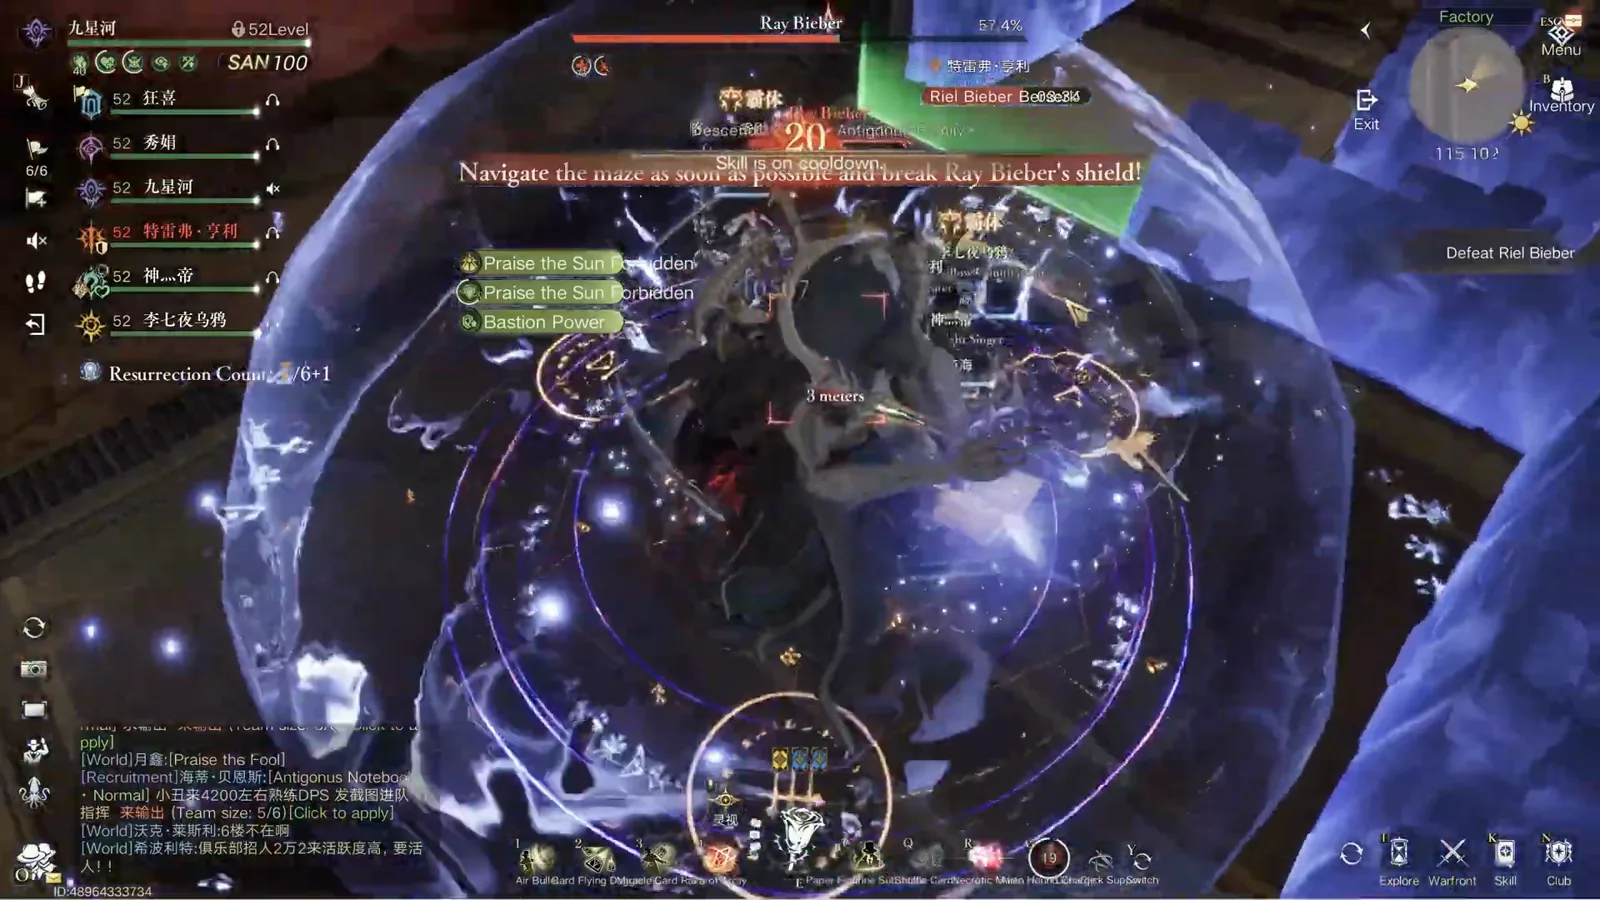
The sanity dome: the drain follows your position — keep the blob tight.Watch from 2:26 - 07
The tank’s real job: keep turning the boss
Here is the mechanic that decides whether the clown phase is dangerous. The clown walks toward wherever the party is stacked, on a 20–30 second cadence. The tank’s answer is to keep rotating Ray Bieber’s facing so the DPS never stand where the drain lands. In this frame the boss is mid-turn, orange ring layers flaring, while the damage stays on target. If your tank parks the boss facing the raid, this fight stops being a DPS check and becomes a heal check.
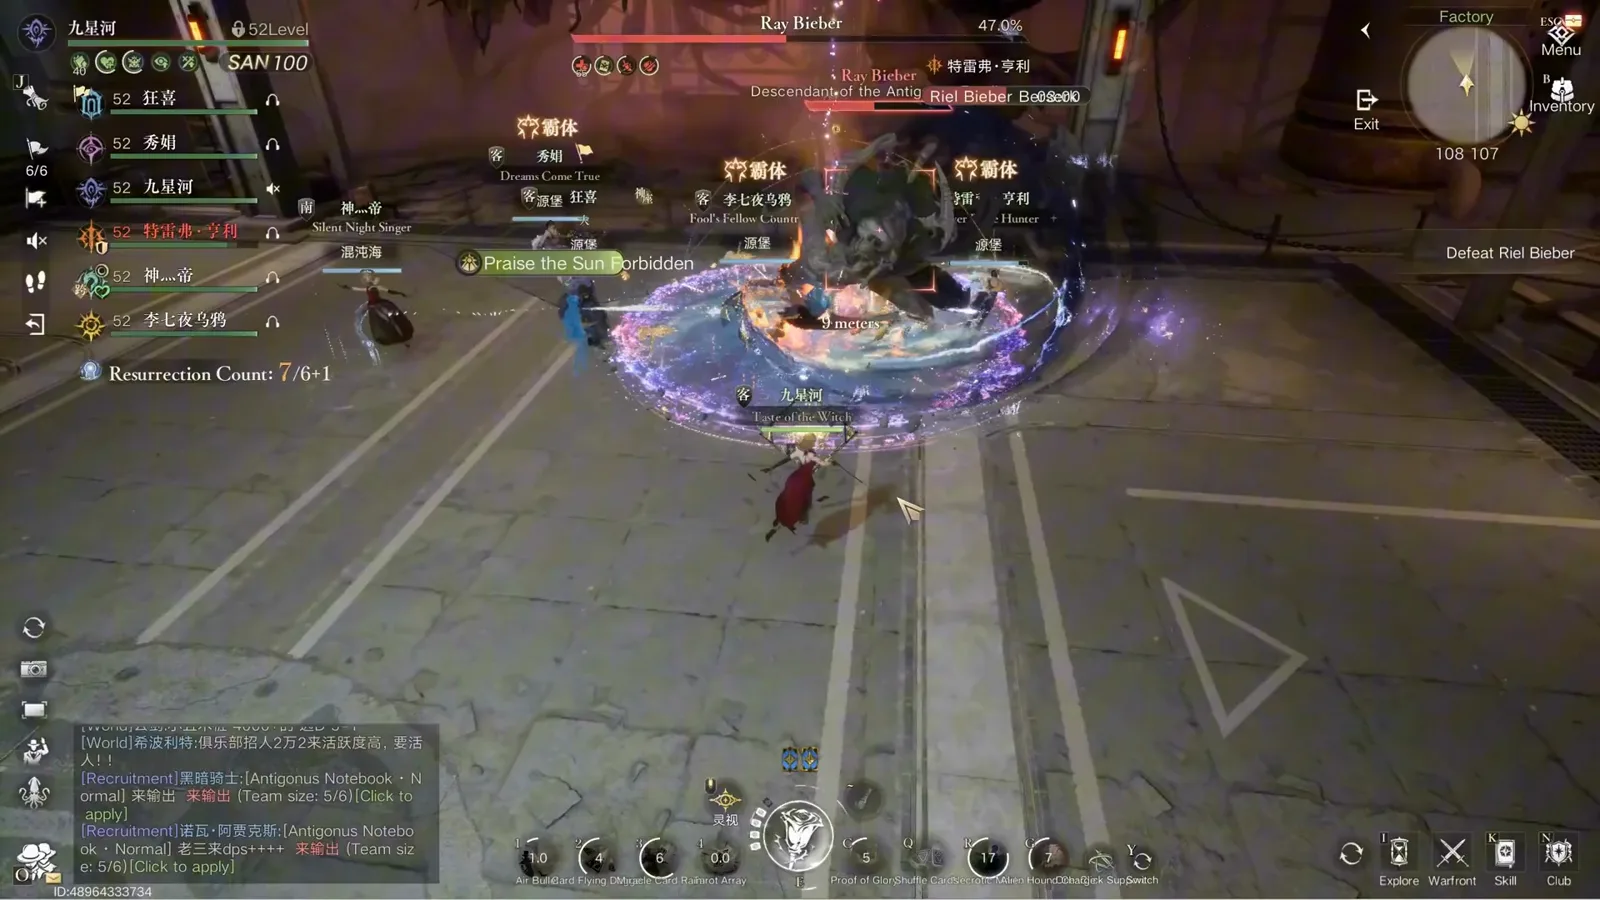
Mid-turn: the tank owns the boss’s facing on a 20–30 second cadence.Watch from 3:00 - 08
Gold circles: reposition, do not overlap
The golden ring around the boss in this frame is the positional AoE the fight uses to force movement during the burn windows. The recording’s rule of thumb is the one shared by every shared-damage circle in the game: someone soaks it, nobody doubles up. “Insufficient combat resources” flashes on screen when a cast is starved — a reminder that the fight also taxes your resource economy while you are busy walking.
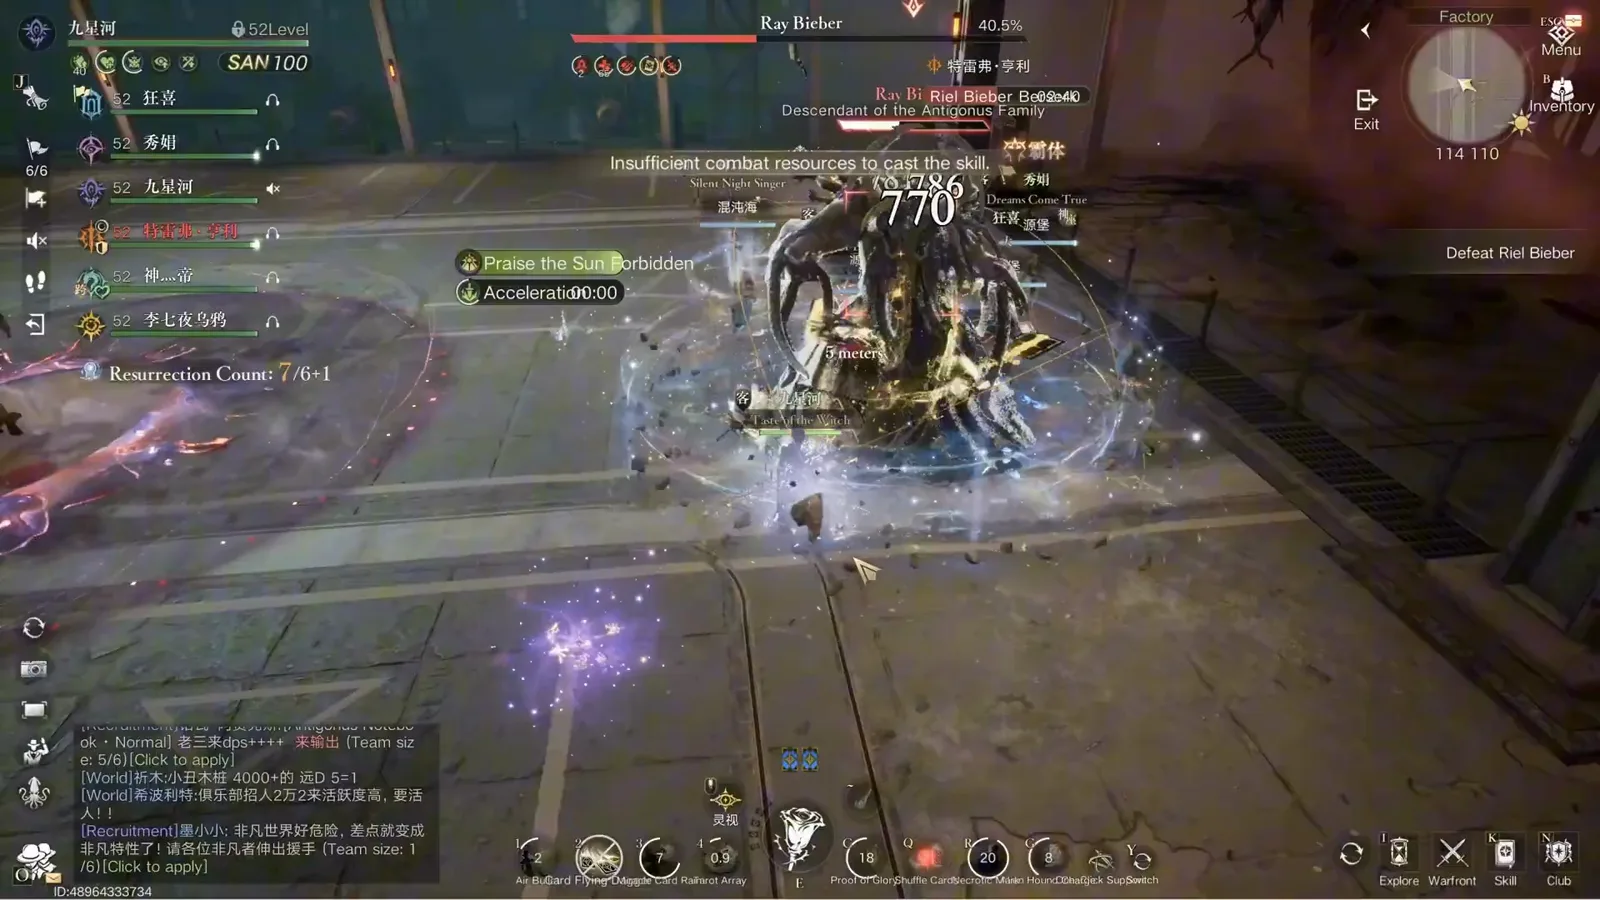
Gold ring: one soak, no overlaps, keep the burn running.Watch from 3:20 - 09
Maze two: the teleport trap warning
The second maze section upgrades the banner with the trap callout: “Navigate the maze to break Ray Bieber’s shield, watch out for the Teleport Trap on the ground!” The traps are ground plates that bounce you back toward the entrance — in a 30-second window that is the difference between breaking the shield and watching it stand. The boss title card at the bottom (“The Sorcerer, Kingdom of Night”) marks this as the phase-two version of the maze.
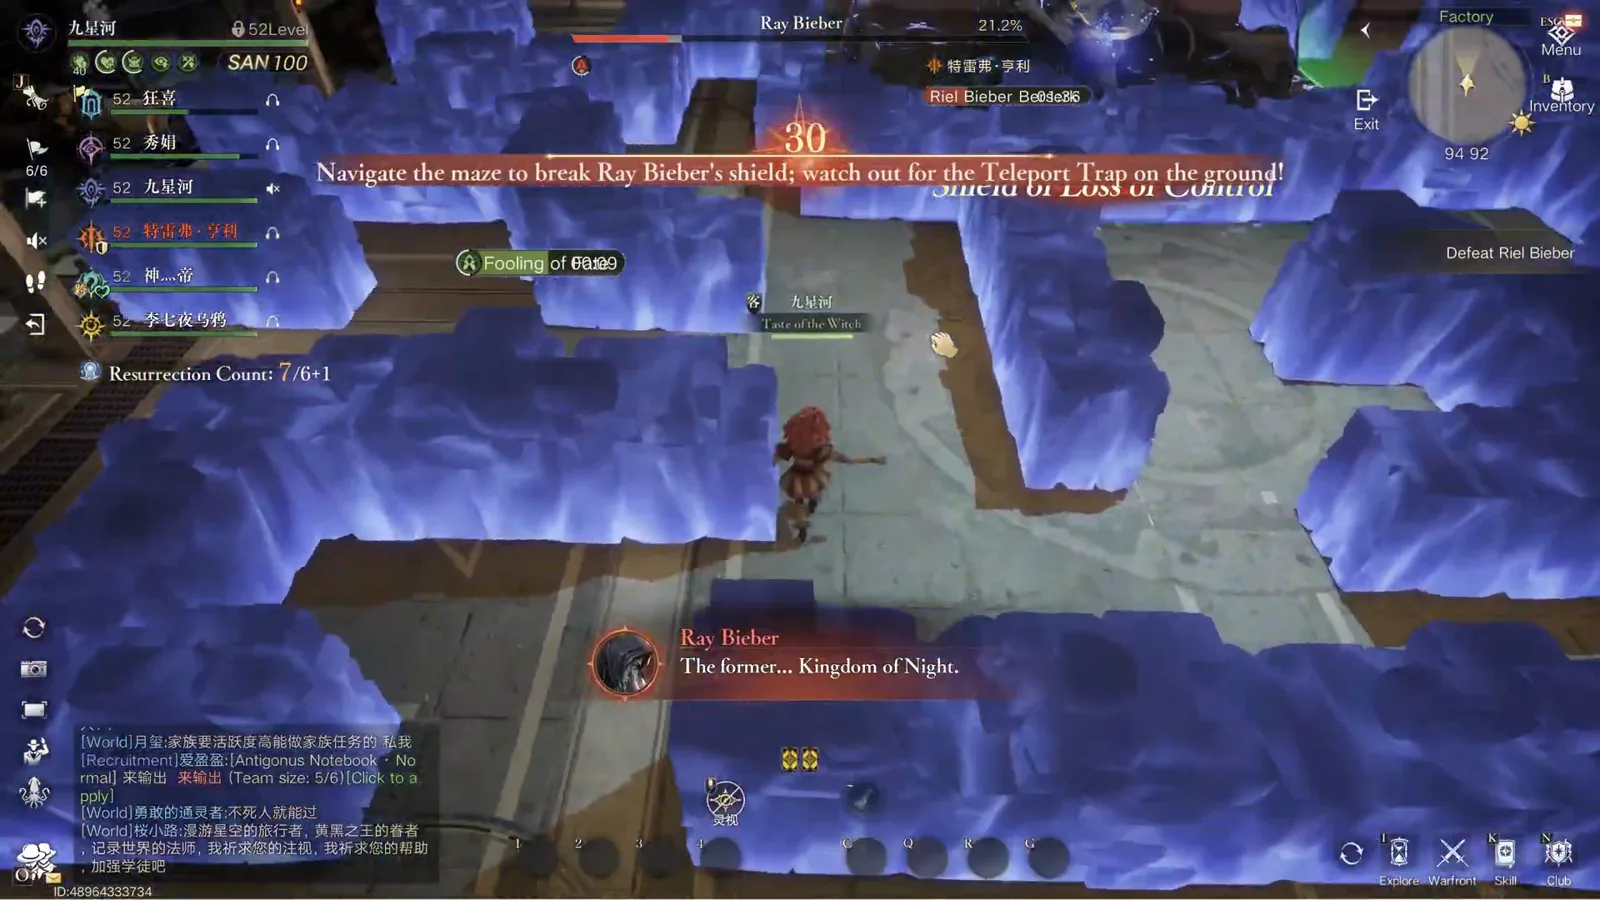
Maze two, same clock: now the floor itself sends you backward.Watch from 4:22 - 10
Black holes: one step in, back to the start
The swirling dark sphere in this frame is the maze’s second trap type: a random black hole that teleports anyone it touches back to the section start. It spawns without a personal warning, so the blob’s path matters more than reactions — walk the lanes, keep the sphere in view, and never corner yourself against a wall with one behind you. The recording loses a few seconds here exactly once; that once is the difference the DPS gate cares about.
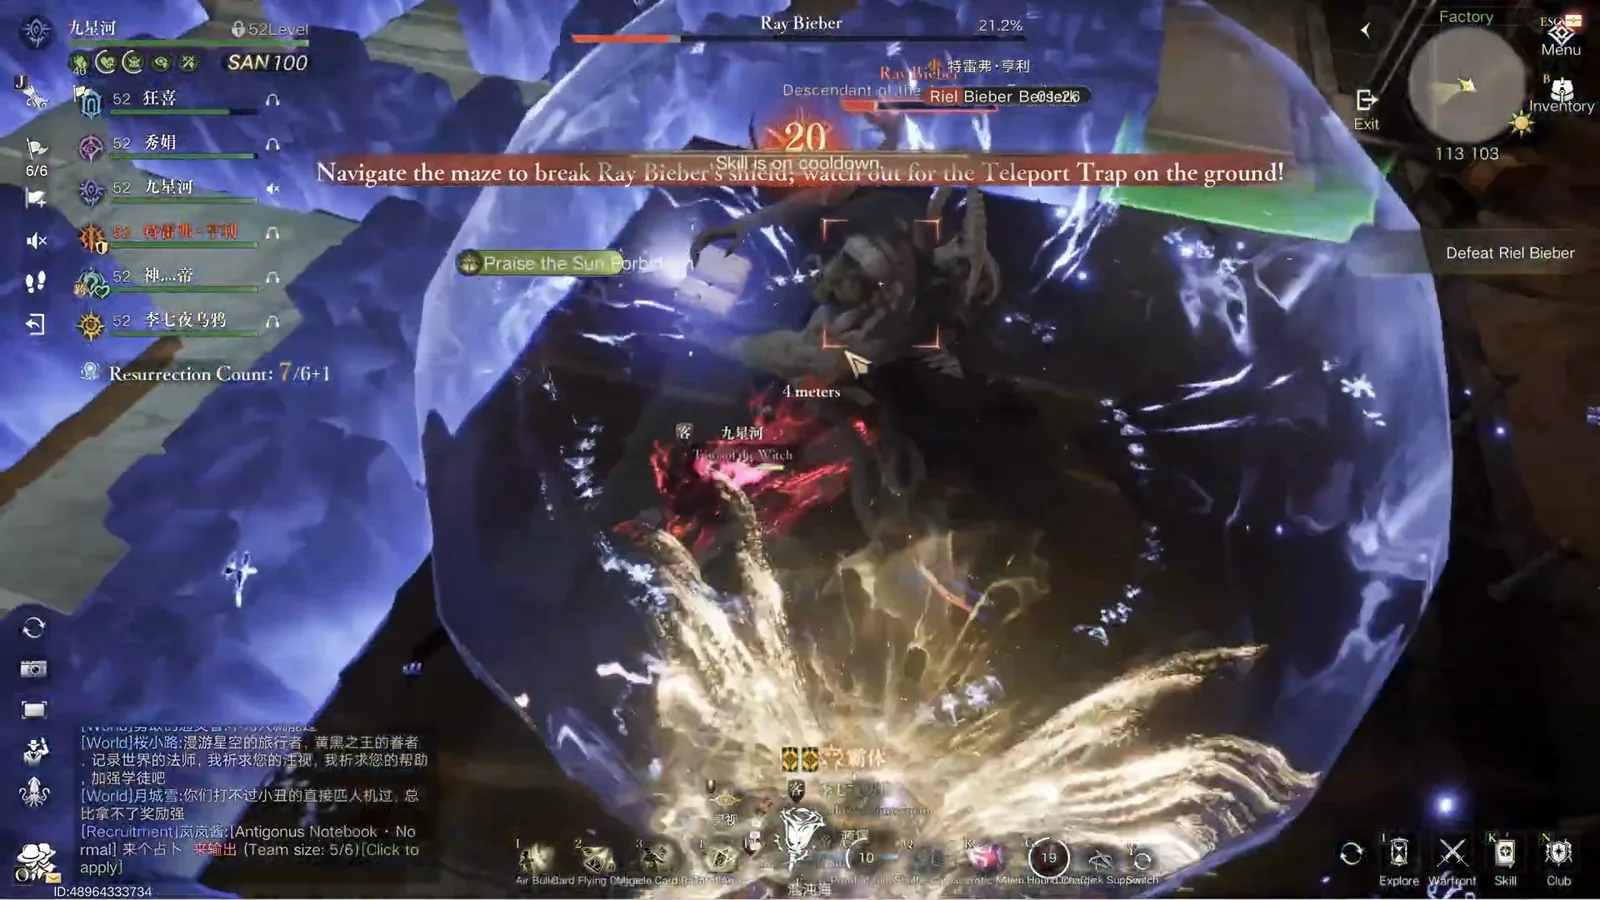
The black hole: random spawn, instant ride back to the start.Watch from 4:34 - 11
Burn windows in the red maze
When the shield is down the fight hands you a burn window and a boss quote to go with it — the card in this frame is Ray Bieber declaring the Antigonus family’s glory while the maze glows red around him. These windows are where the 3.4K DPS baseline pays off: the party in the recording pushes real damage here because nobody is dodging, nobody is walking, and the clown routing is already handled.
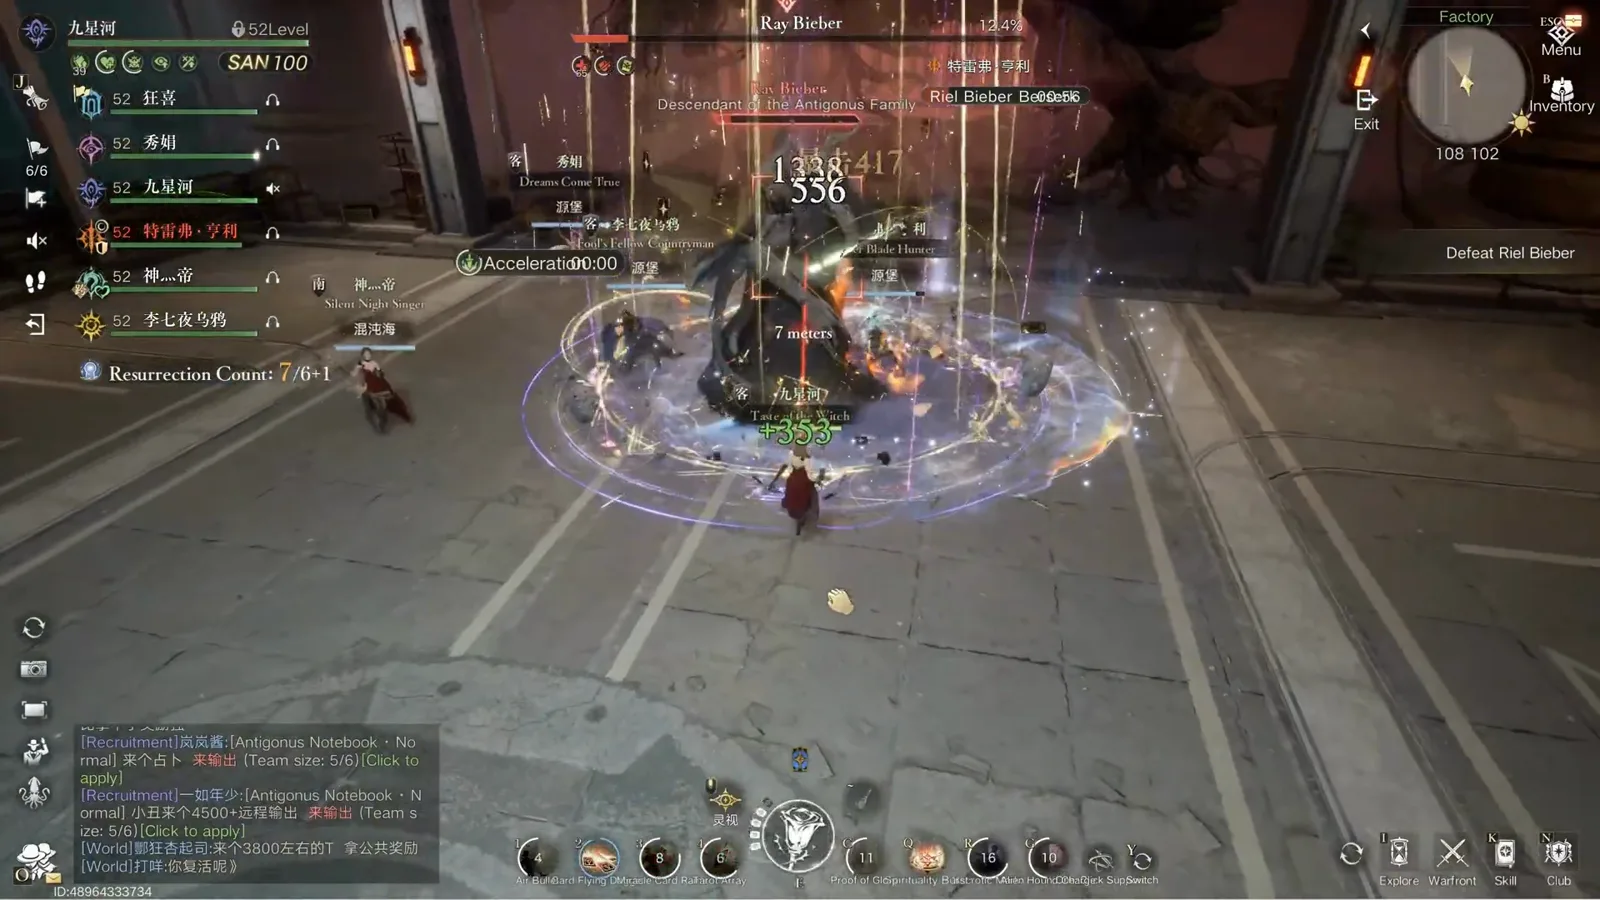
Shield down: the red maze is where the DPS baseline pays off.Watch from 5:00 - 12
Second clown, faster cadence — stack behind the tank
The second clown moves every 10–15 seconds, twice the cadence of the first, and the boss starts firing lasers at the same time. The recording’s answer is the stack you see here: the whole party in melee behind the tank, letting his facing and his body do the routing. Spread parties eat both the laser volleys and the drain; stacked parties behind a turning tank eat almost nothing.
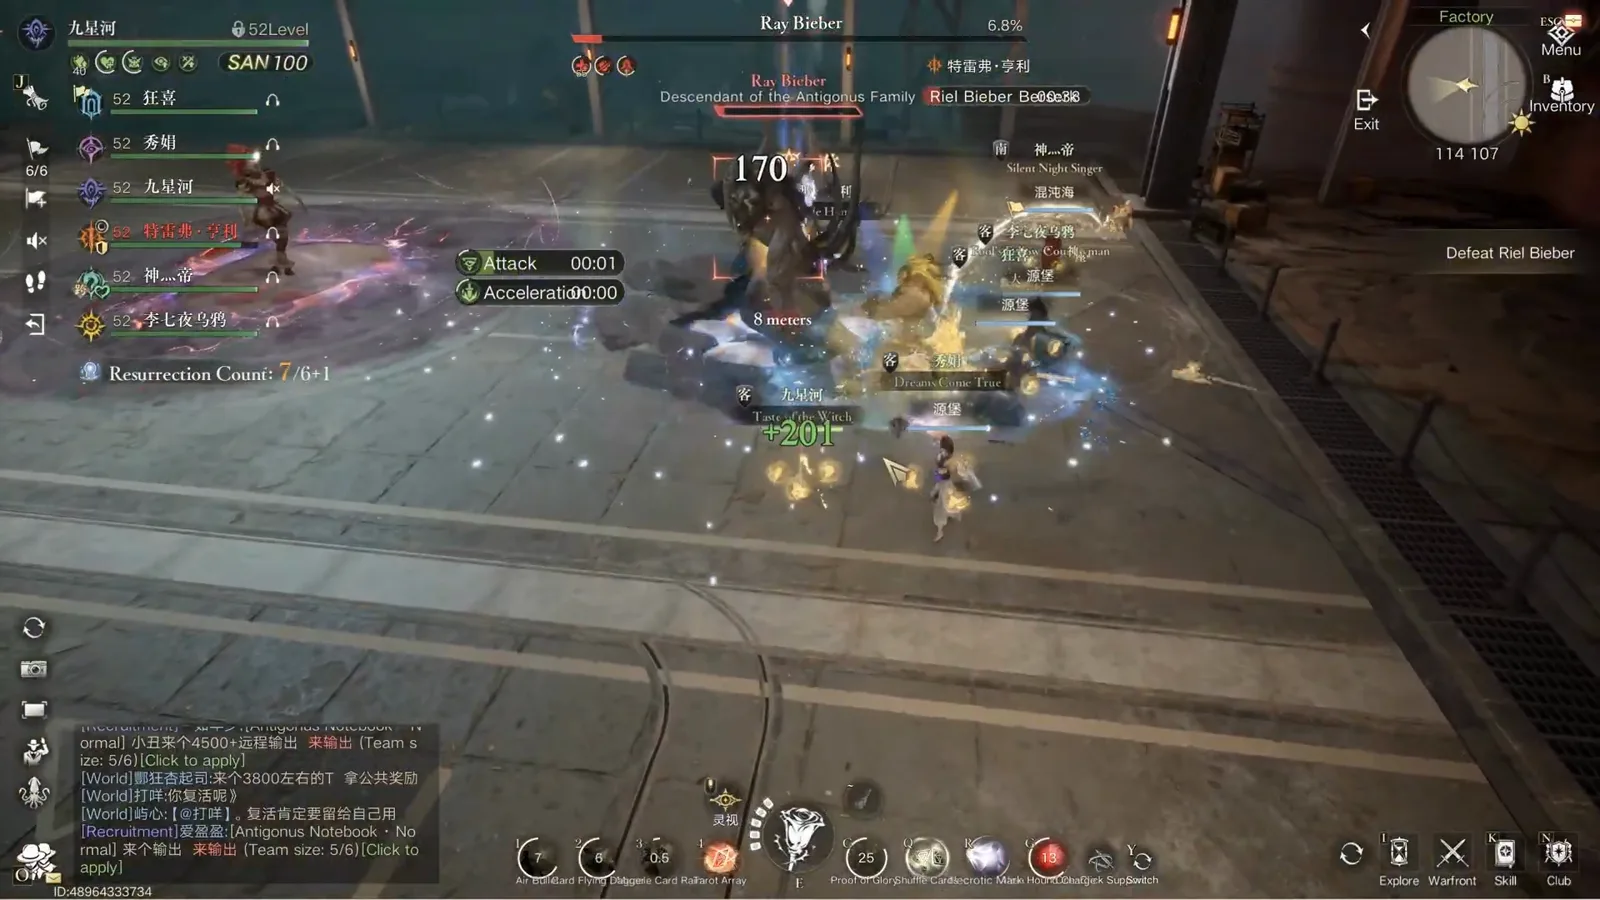
The endgame stack: behind the tank, inside his facing, under the lasers.Watch from 5:22 - 13
The clear panel
The fight ends where discipline met the DPS gate: a “Stage Challenge Victory” panel, the Brilliant Stars damage card reading 1,099,600, and the auction window distributing an Honor: Lost Notebook among other drops. If your attempts keep dying to the sanity drain rather than the timer, replay the 80% moment — the clown, not the boss, is what this dungeon tests.
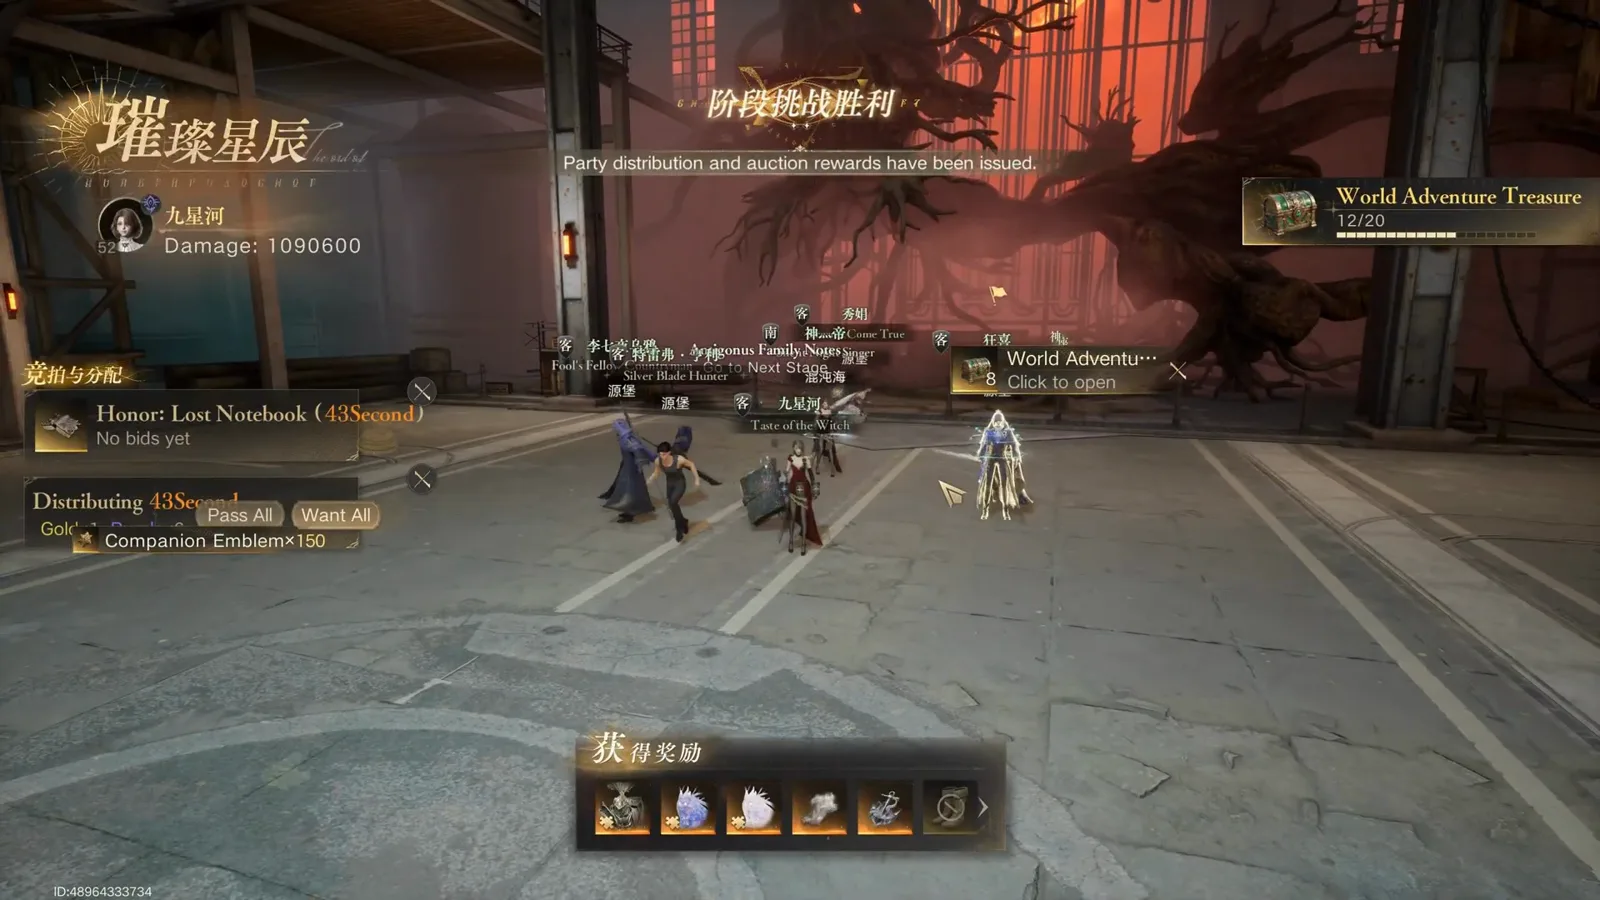
Cleared: the damage card and the auction window close the loop.Watch from 5:53
Every frame on this page is captured from the linked recording; the timestamps under each step jump to that exact second. The 3.4K DPS figure is the creator’s own measured number from this run — a community reference value, not an official design target. Mechanics described here are what the recording demonstrates on this difficulty. The game’s own English text spells the boss’s name two ways (Ray Bieber on the nameplate, Riel Bieber on the objective); both refer to the same encounter.
Ray Bieber FAQ
- Q1.Who is Ray Bieber in the Antigonus dungeon?
- He is the second challenge boss of the Antigonus dungeon, level 52, a six-player instance set in the Factory area. The nameplate reads “Ray Bieber — Descendant of the Antigonus Family”, while the objective tracker spells it “Riel Bieber” — the game’s own text is inconsistent, so both searches refer to this fight.
- Q2.Why does my party keep wiping around 80% health?
- That is when the first clown spawns and starts applying the sanity drain. The add walks toward your stacked position every 20–30 seconds; if the tank is not actively turning the boss so the drain misses your DPS, SAN pressure compounds until it kills you. It is the wipe cause the recording’s creator says most teams never identify.
- Q3.How do I break Ray Bieber’s shield?
- Navigate the maze. Both maze sections put your party on a countdown (about 26–30 seconds) to reach the marked area; arriving in time drops the shield and reopens the burn. The first maze’s banner says “navigate the maze as soon as possible”, the second adds the teleport-trap warning.
- Q4.What do the teleport traps and black holes do?
- Both send you backward. The teleport traps are ground plates in the second maze that bounce you toward the entrance, and the random black holes teleport anyone they touch back to the section start. Neither is damage — they are time thieves, and the shield countdown is a timer.
- Q5.How much DPS do I need for this fight?
- The creator measured 3.4K DPS as the top performer of the recorded run and treats it as the working baseline — a community-measured number, not an official gate. The fight rewards mechanics done cleanly more than raw numbers: every second not spent dodging or walking the maze is damage.
- Q6.Is the second clown different from the first?
- Only in speed. The first clown walks its route on a 20–30 second cadence; the second moves every 10–15 seconds — twice as fast — and arrives alongside the boss’s laser phase. The countermeasure is the same stack-behind-the-tank formation, just held more tightly.