Lord of Mysteries Faceless Johnny Boss Guide (2026)
“Faceless” Johnny is an abyss-demon ritual fight in a six-player dungeon, and almost everything that can wipe you here is written on the screen: the red objective banner, the Soul Stripping debuff timer, the Ensure Sacrifice Survival trackers, and a Redemption Offering counter that ends at 4/4. The fight is less about damage and more about keeping four Innocent Sacrifice NPCs alive through red mist, blight ground and demon targeting.
Every frame below comes from one recorded clear with the in-game English interface active, so the mechanic names you see — Moon Ring of Slaughter, Scapegoat, Cold-blooded Intimidation — are the game’s own. The recording was captured before the global launch, so treat exact numbers as evidence of the mechanic, not as current-balance claims.
Verification rule
[unverified] / 〔待核验〕 marks a detail the footage or cited sources could not confirm — the marker stays inline so you know exactly which claims to double-check.
Stage-by-Stage Walkthrough With Frames
Key Takeaways Before You Pull
- ◆Bring at least 1 tank, 1 healer and 4 DPS; the tank drags Johnny into a corner so his AoE stops hitting the party.
- ◆Red mist near the boss means move out immediately — the damage-over-time starts about one second later.
- ◆The fight orbits the four Innocent Sacrifices: stack on a sacrifice to split the damage aimed at it.
- ◆Marked with the red rune circle? Run to a corner away from teammates — your position turns into blight ground.
- ◆Keep all four sacrifices alive; the recording’s rule is blunt — lose them and the boss wipes the party outright.
- ◆The on-screen trackers (Ensure Sacrifice Survival, Redemption Offering Count) are this fight’s real HUD — call from them, not from memory.
Verified gameplay source
How to Beat Faceless Johnny Mechanics Guide (6P Dungeon)
- 01
The pull: put the demon in a corner
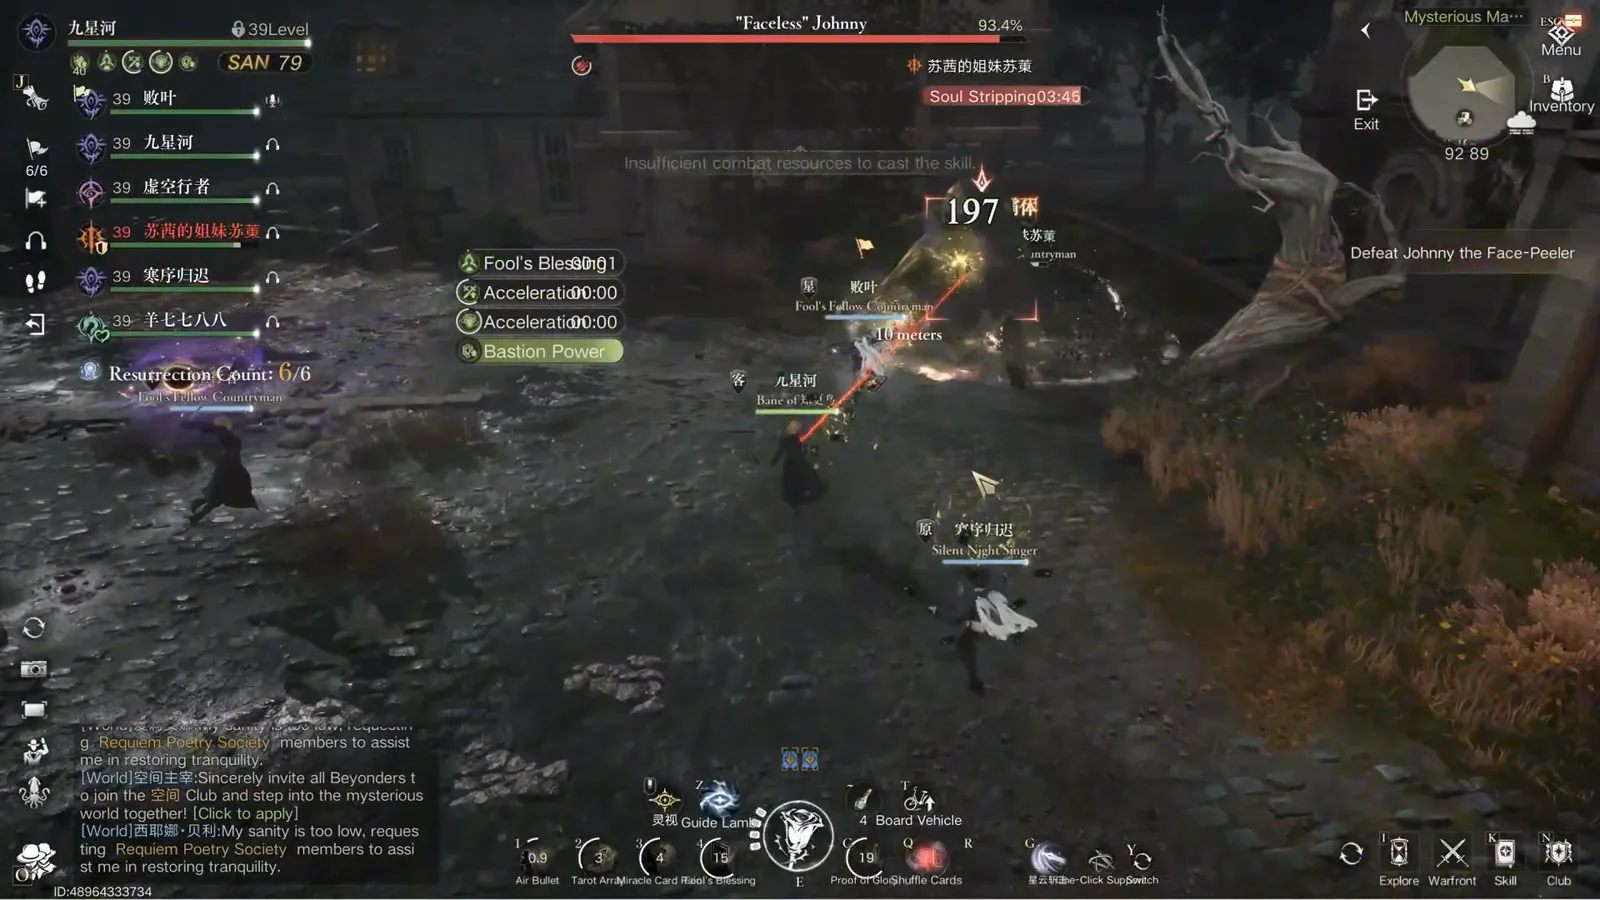
The standard comp for this six-player dungeon is at least one tank, one healer and four DPS, and the first job belongs to the tank: drag “Faceless” Johnny into a corner so his area damage stops touching the rest of the party. This frame is the pull — the nameplate up top, the Abyss of Desire skill name over a red targeting circle, and the dungeon tag in the top right (the recording shows it truncated as “Mysterious Ma…”; the full label is cut off in the footage).
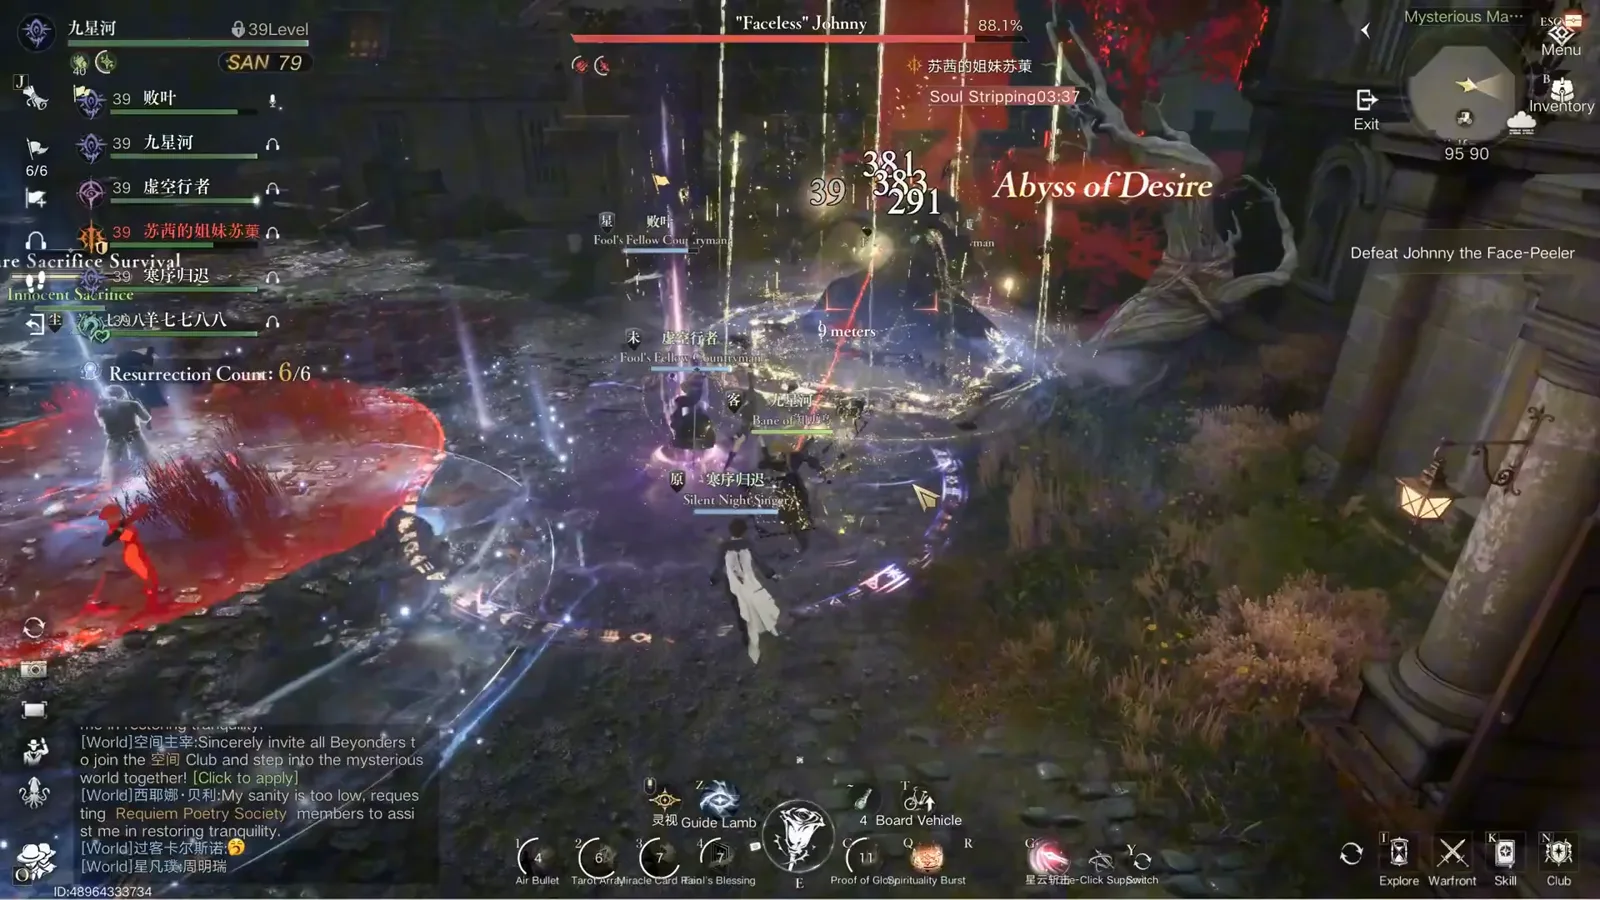
The pull: tank owns the corner, everyone else owns the middle.Watch from 0:20 - 02
Red mist: move now, the DoT starts in about a second
The red ring flooding the ground in this frame is Moon Ring of Slaughter, the fight’s signature mist. Standing in it hits hard, and the transcript’s warning is timing-critical: the lingering damage-over-time begins roughly one second after the mist appears. Treat any red bloom near Johnny as an immediate move order — the parties that die here are the ones that finish their cast first.
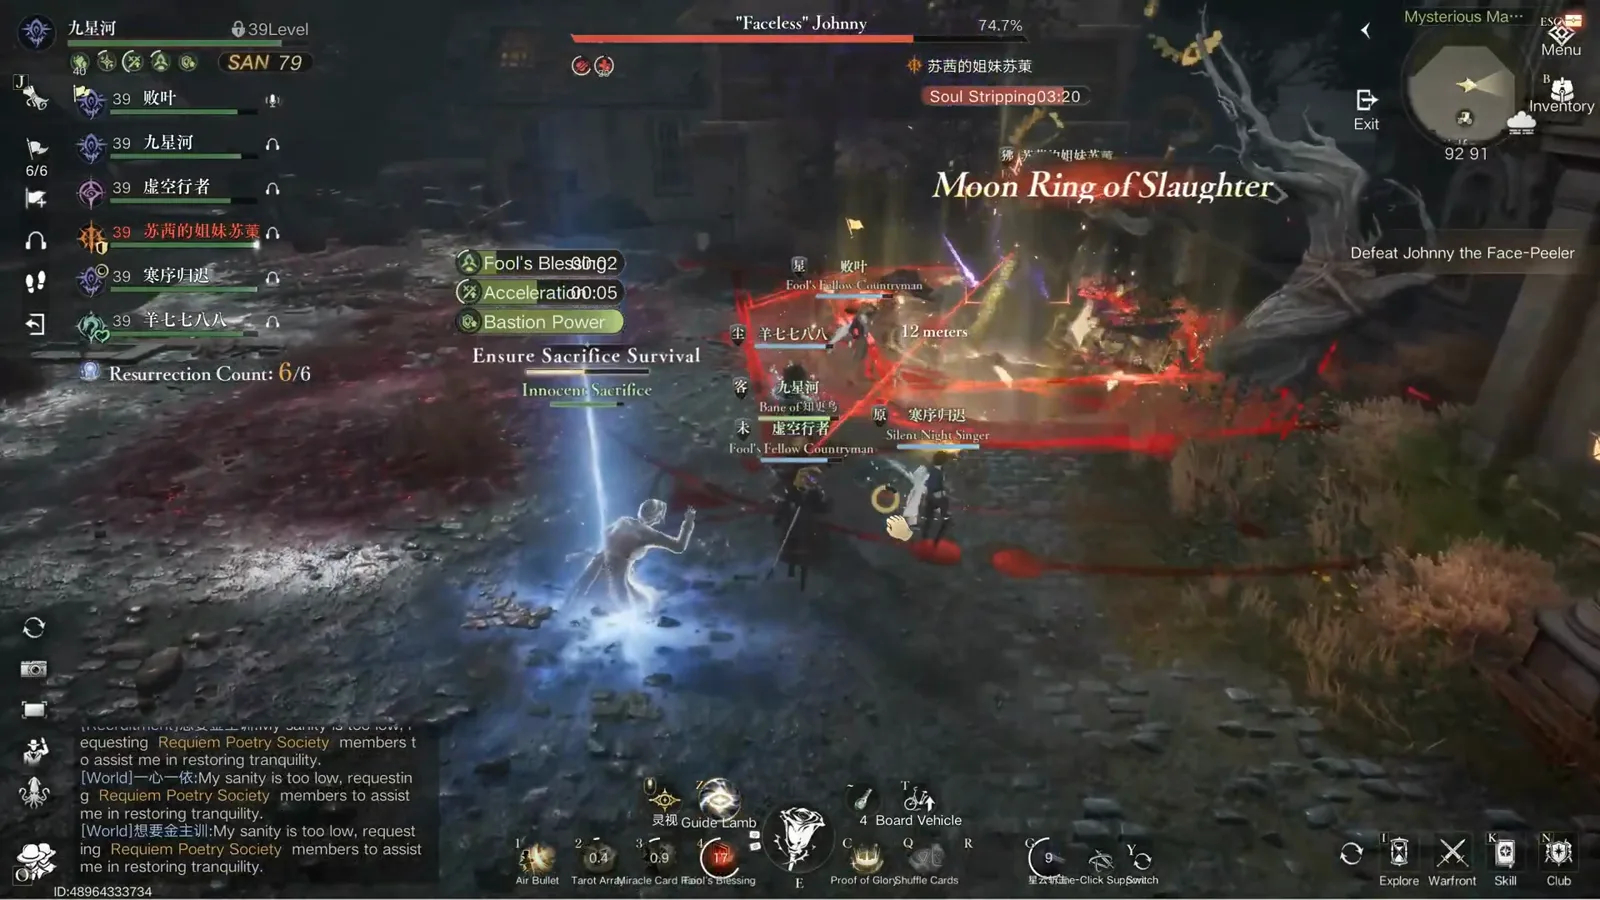
Moon Ring of Slaughter: red mist now, damage-over-time one second later.Watch from 0:37 - 03
Meet the Innocent Sacrifice
This NPC is the fight. The Innocent Sacrifice stands in the ritual area with a “Sacrifice Ritual” label over the phase, and the demons would very much like it dead. Every mechanic from here on — the soaks, the blight ground, the trackers on the right edge of your screen — exists to answer one question: are all the sacrifices still standing?
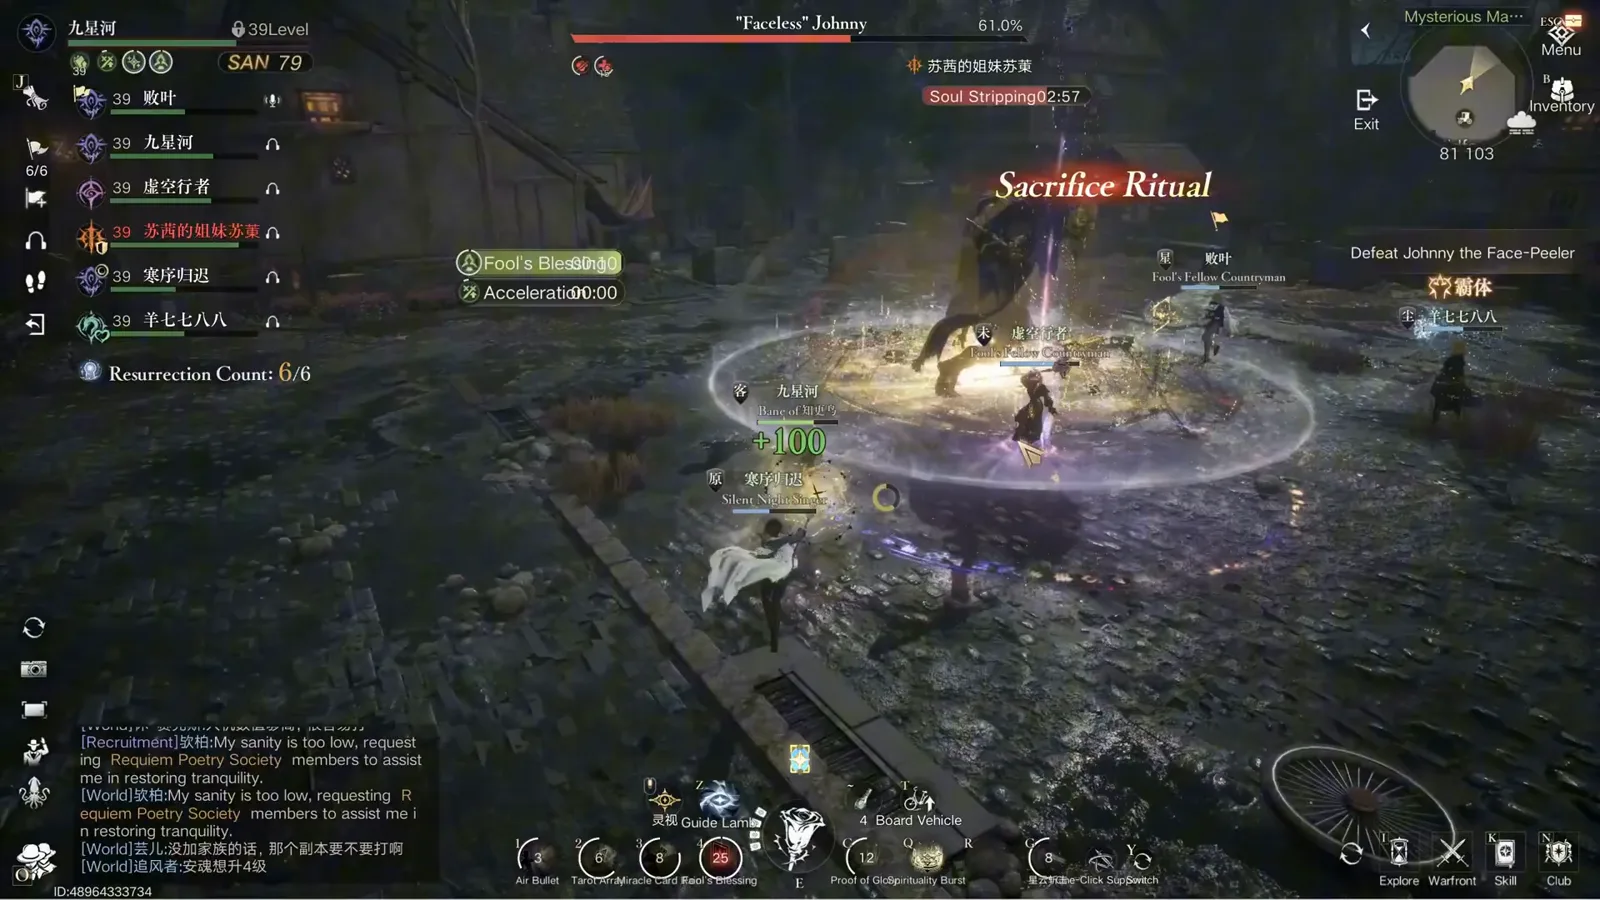
The Innocent Sacrifice: the NPC the whole fight is about.Watch from 1:00 - 04
The banner is the fight plan
Few fights state their own rules this plainly. The red banner reads: “Kill the demon, protect the innocent sacrifice, and end the ritual!” — with a countdown, the boss nameplate, and the Soul Stripping debuff timer (02:35 here) all in the same frame. Read the banner once per attempt and you know your priority stack: demon damage, sacrifice survival, ritual completion.
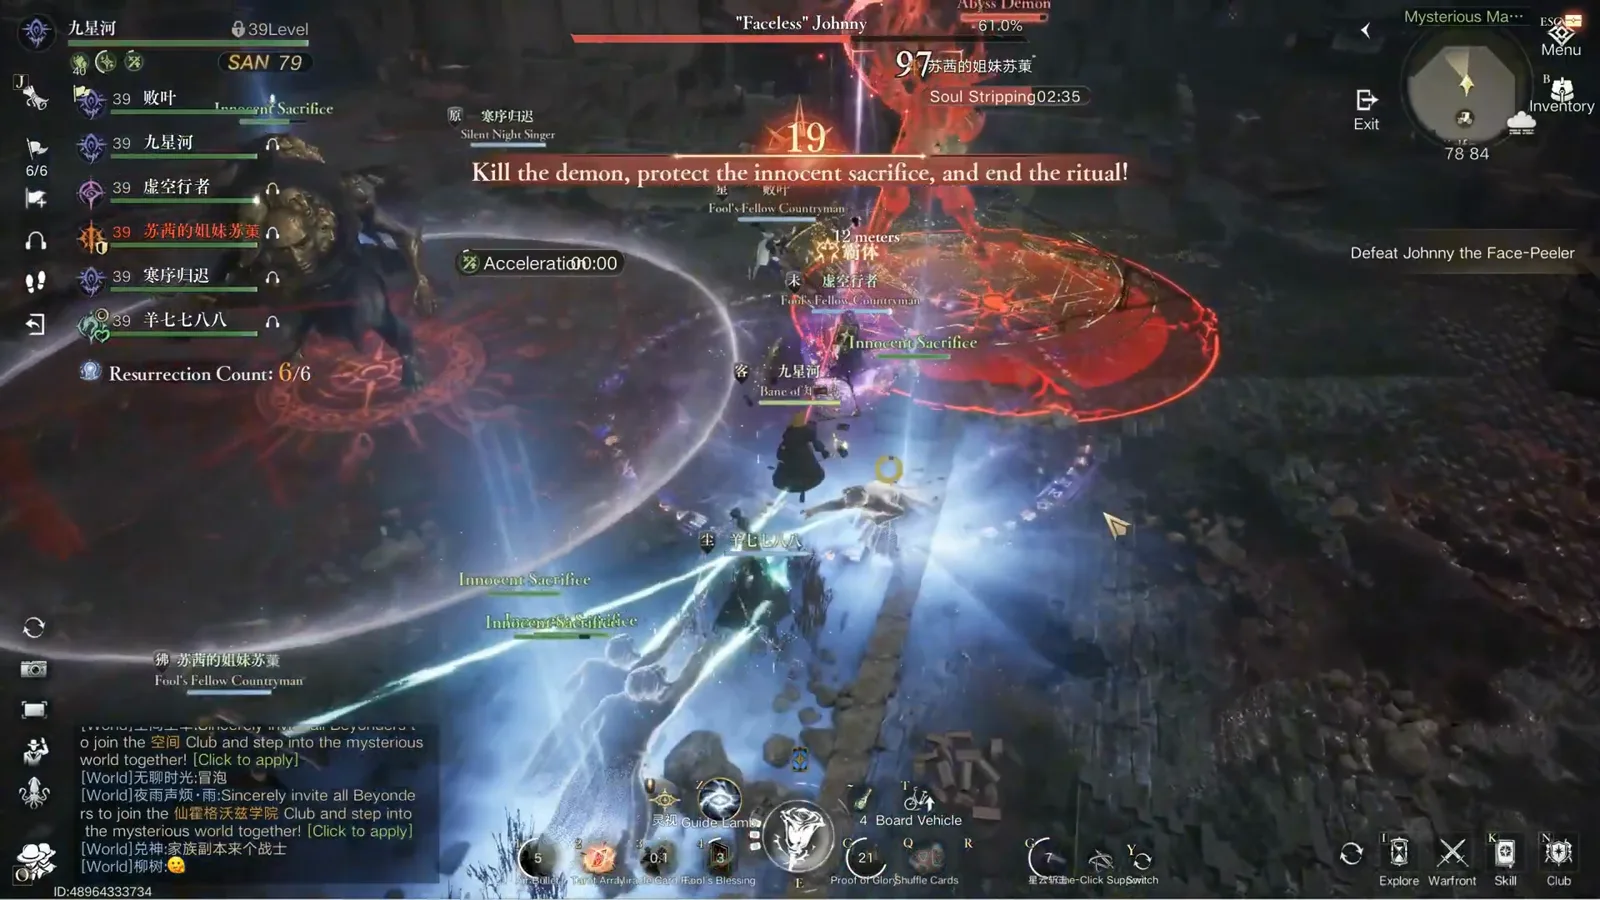
Objective, nameplate, Soul Stripping timer: the plan in one line.Watch from 1:22 - 05
Stack on the sacrifice to split the damage
When the demons aim at a sacrifice, the counter is geometry: the party stacks around the NPC so the hit is shared instead of fatal. In this frame the group is bundled around the gold sacrifice figure while the countdown banner runs above. Two rules from the recording: arrive before the damage lands, and leave together — a straggler standing in the next red mist is how soaks turn into deaths.
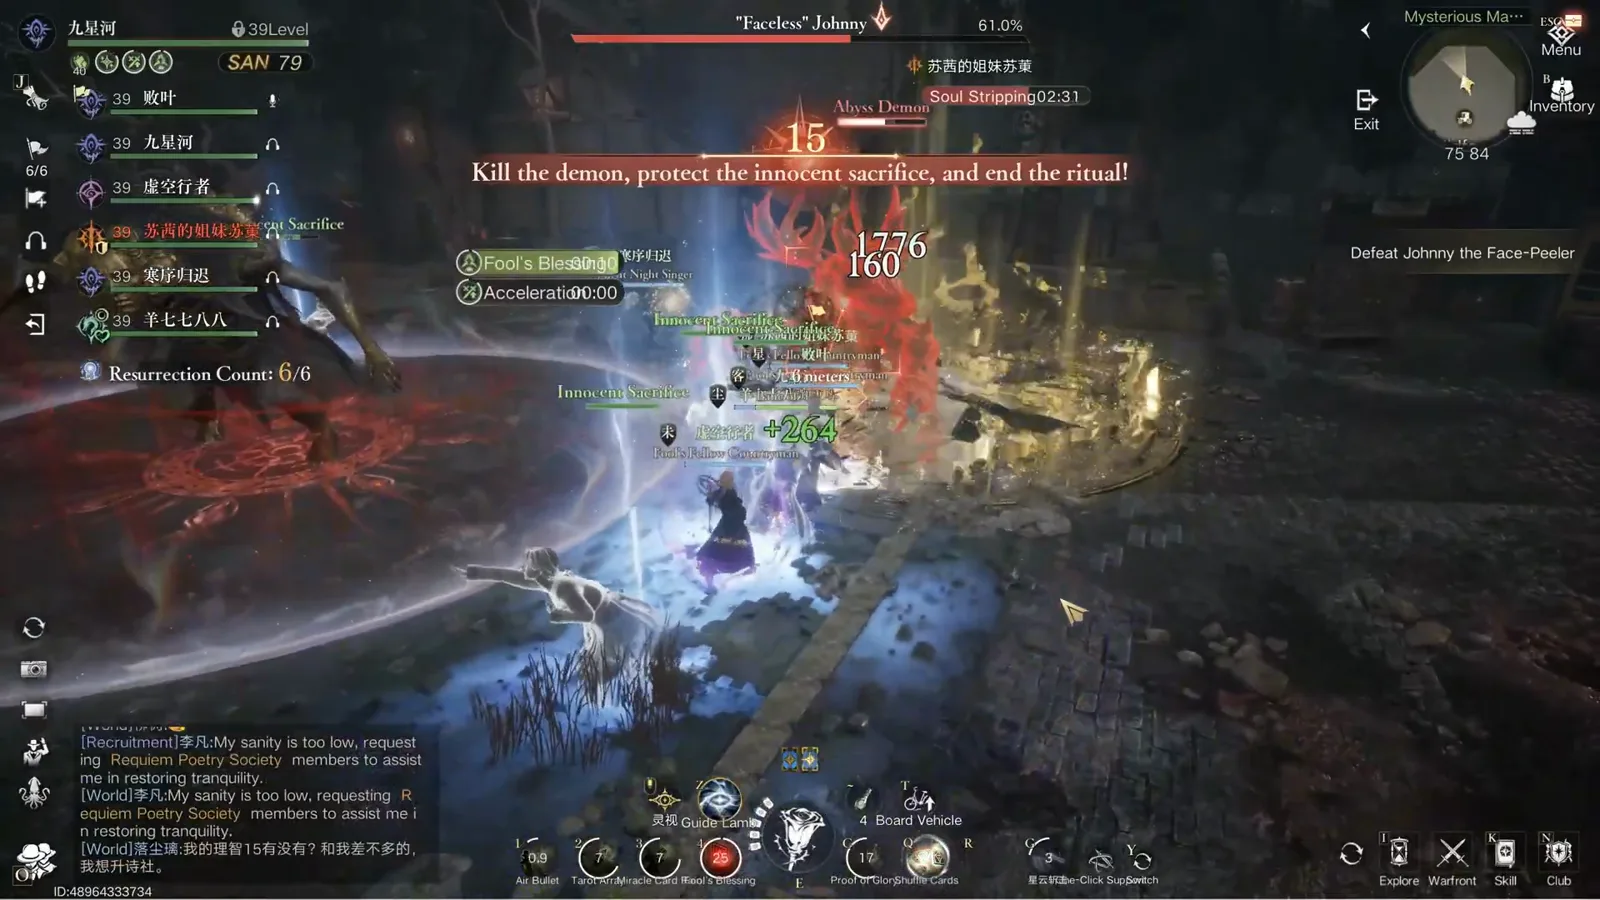
The soak: everyone in, split the hit, leave as one group.Watch from 1:26 - 06
When the sacrifice’s shield is on cooldown
This banner is the fight’s stress signal: “The sacrifice has guaranteed… successfully returned… Shield is on cooldown.” Translation — the automatic protection just got used, and until it is back, raw soaking is the only thing between the sacrifice and a chunk of lethal damage. The Super Armor Damage Reflection buff in the same frame is the party’s own counterplay window: hit harder while the demon is spent.
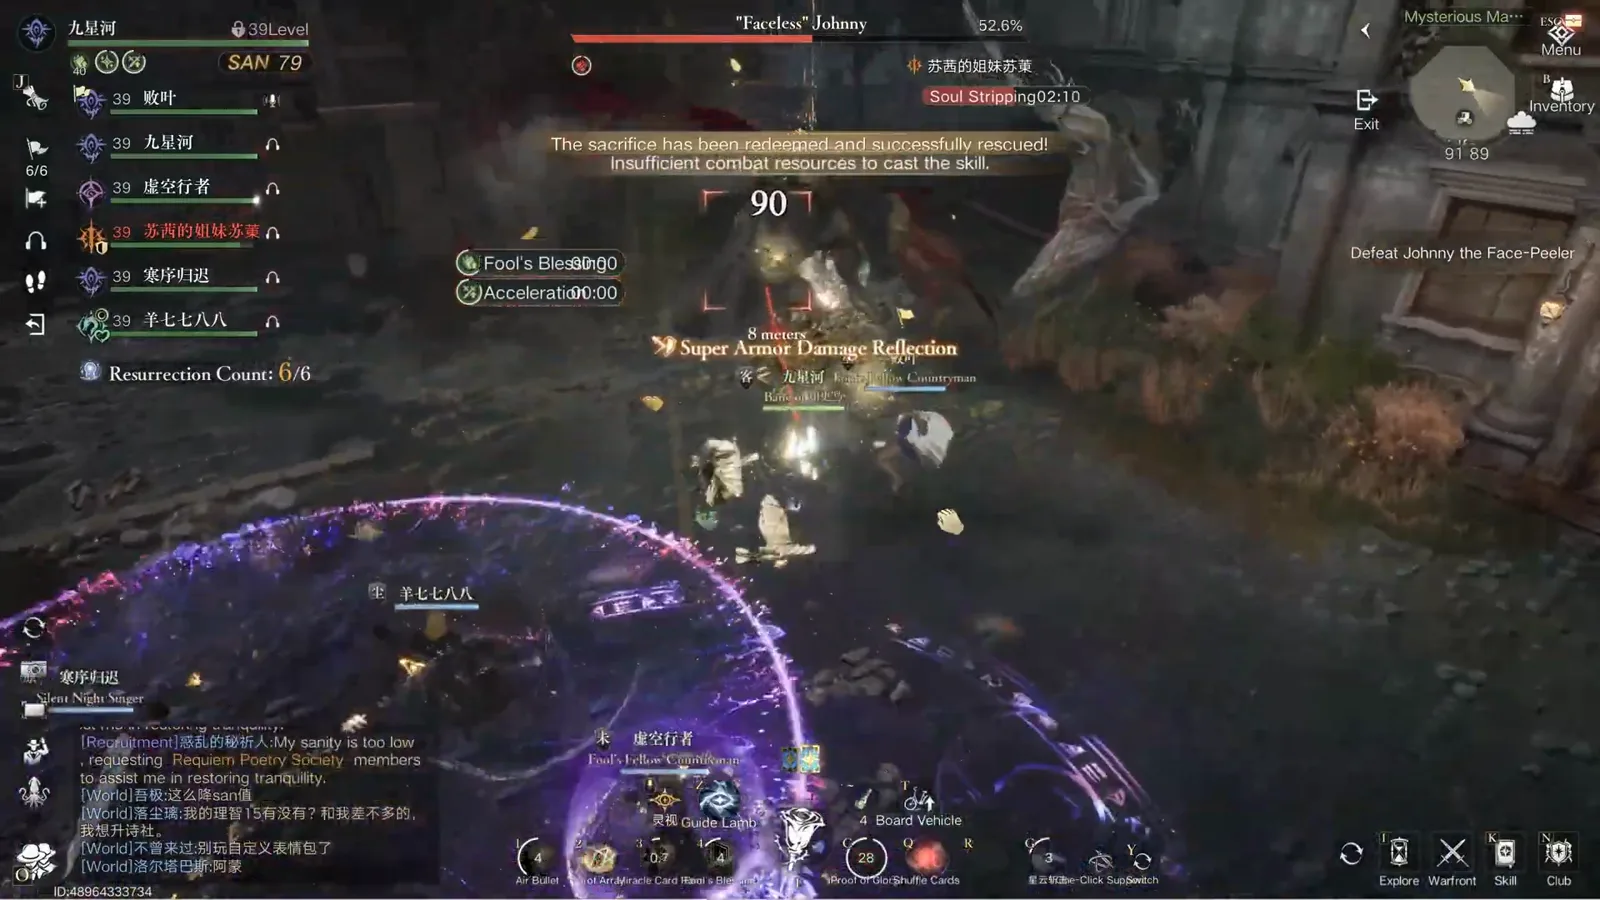
Shield on cooldown: your soak discipline carries the gap.Watch from 1:47 - 07
The red rune circle and the Scapegoat mark
When a player gets marked, the red rune circle blooms on the ground and the Scapegoat label goes live. The rule is the same one every blight mechanic uses: run to a corner away from teammates, because the marked ground turns into lingering poison that chains damage into anyone standing near it. The white swirl in this frame is the mark’s detonation; the empty corner around it is why nobody else died.
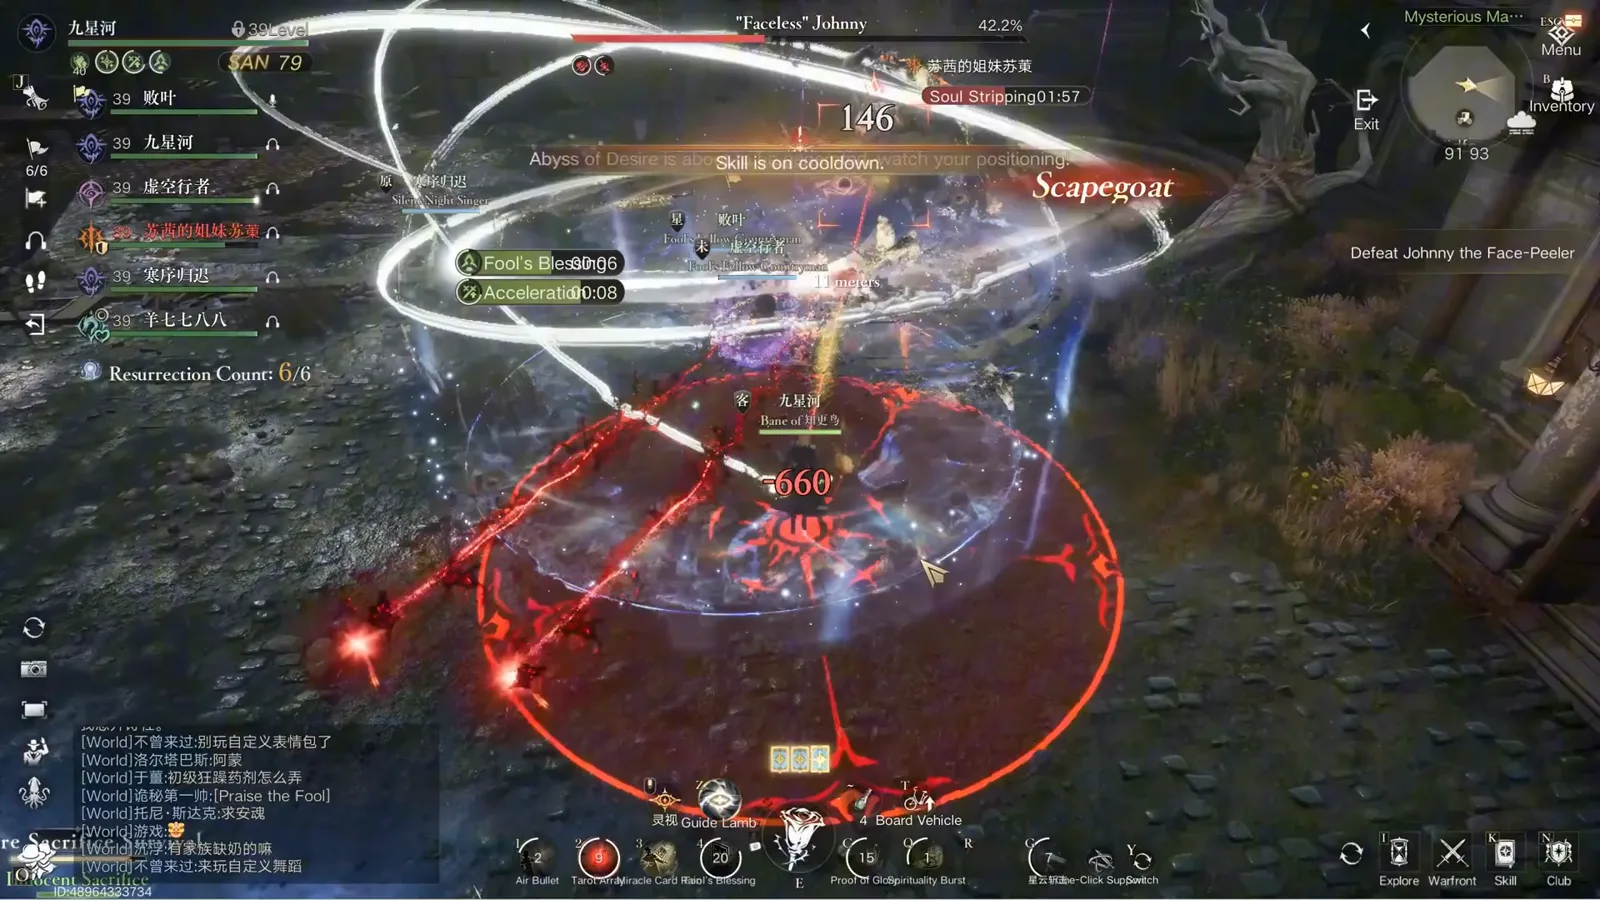
Scapegoat: take the mark to a corner, leave the blight behind.Watch from 2:00 - 08
Read the survival trackers every second
The right edge of the screen is this fight’s true health bar: one “Ensure Sacrifice Survival” line per sacrifice, live at all times. The party in the recording glances here after every mechanic — it is how you notice a sacrifice bleeding out from blight ticks before the wipe screen explains it to you. If a tracker drops, the next red AoE near that NPC is your emergency, not your damage window.
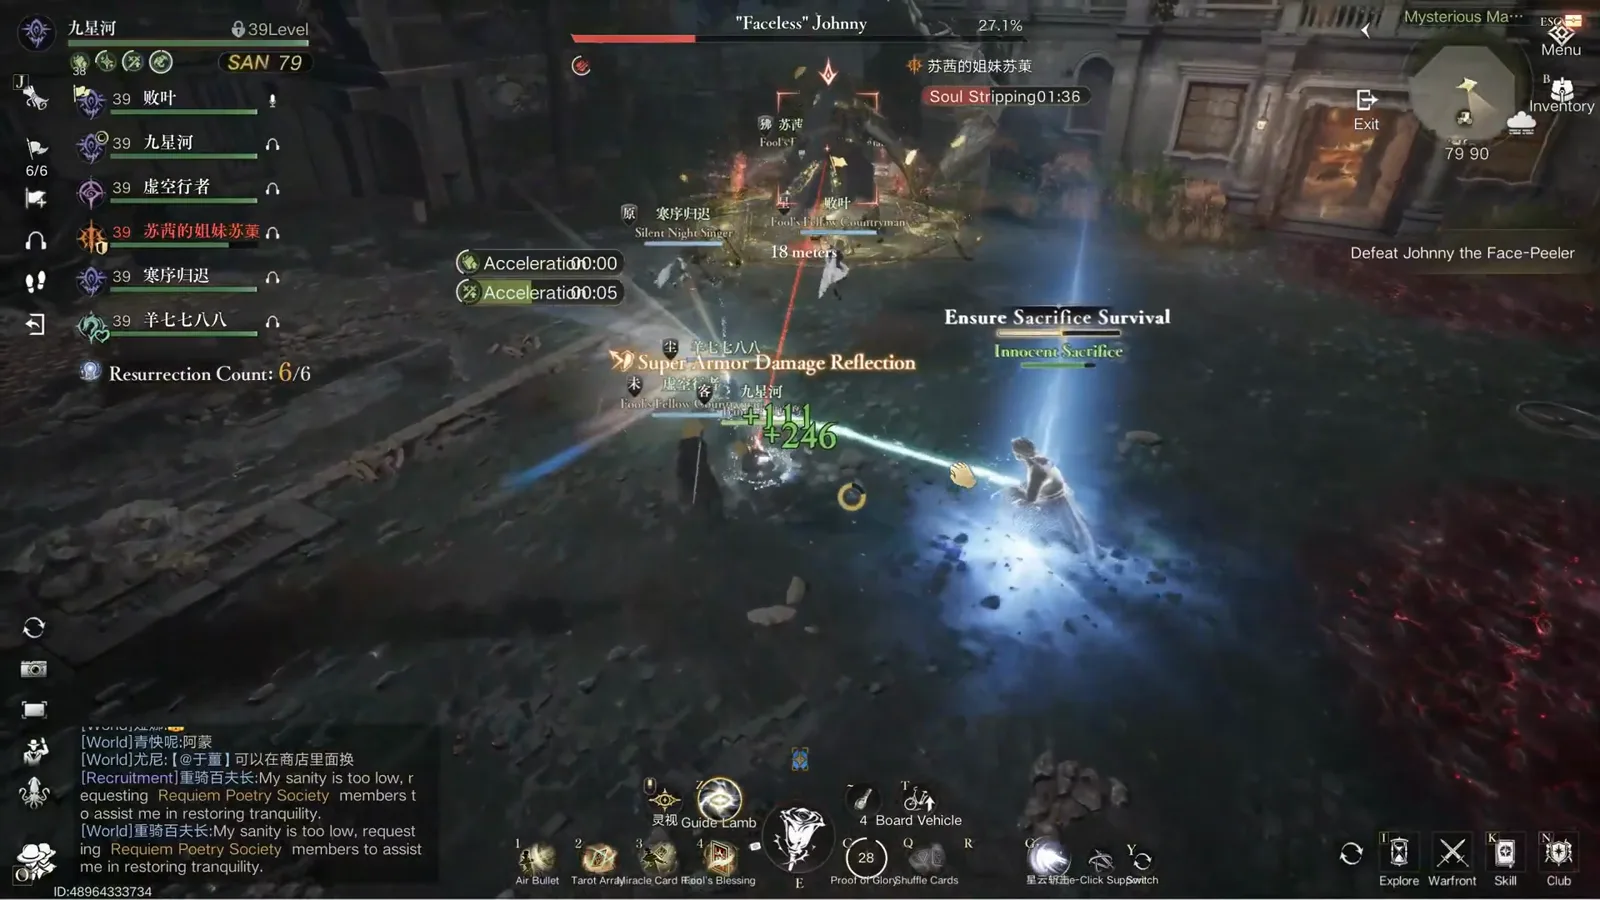
The real HUD: one survival line per sacrifice, always live.Watch from 2:21 - 09
Late phase: physically pull the sacrifice out of danger
The hardest stretch of the fight says its own instruction: “Guide the innocent sacrifice to complete the ritual! Johnny is attacking the innocent sacrifice. Move the sacrifice away from danger!” The demons’ red AoE now lands on the sacrifices themselves, and any blight it leaves chains into the others. Players body-block and drag the NPCs out of the red circles while the Redemption Offering Count (0/4 here) tracks how many rituals completed.
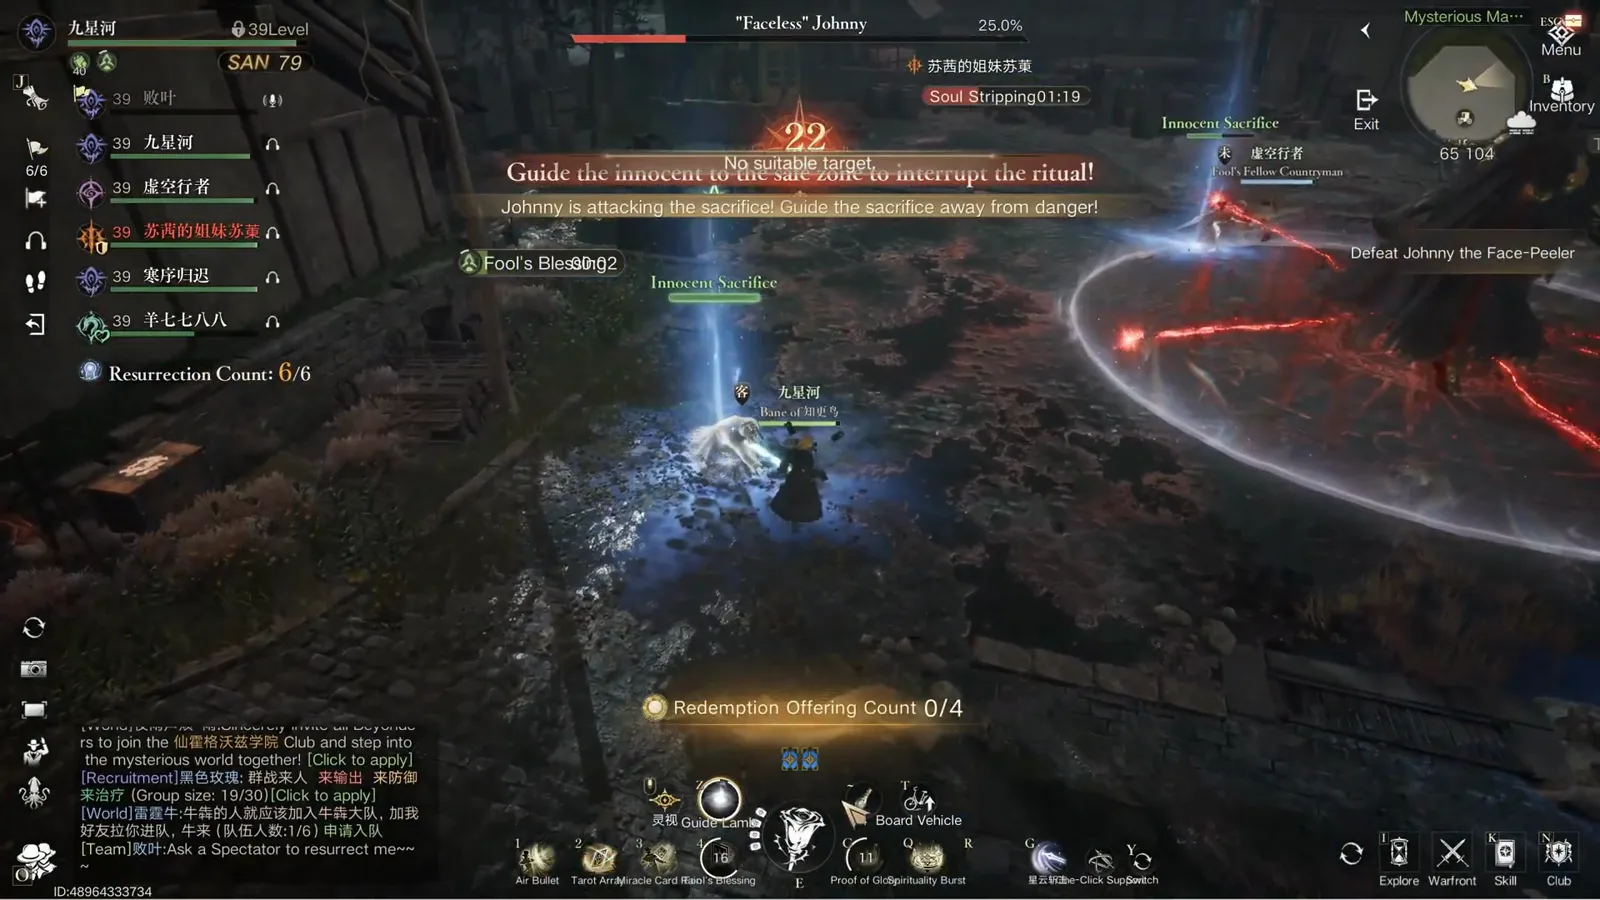
The hard part: move the sacrifice, complete the ritual, watch the 0/4 counter.Watch from 2:38 - 10
Blight circles multiply in the late phase
By the end of the ritual the floor starts stacking red rune circles — two live in this frame, each one a patch of blight that damages anything standing in it, sacrifice or player. The paired “Ensure Sacrifice Survival” trackers beside them are the routing map: keep the NPCs in clean floor, keep the circles between you and nothing you need to stand in. This is the phase the recording’s group calls the hardest.
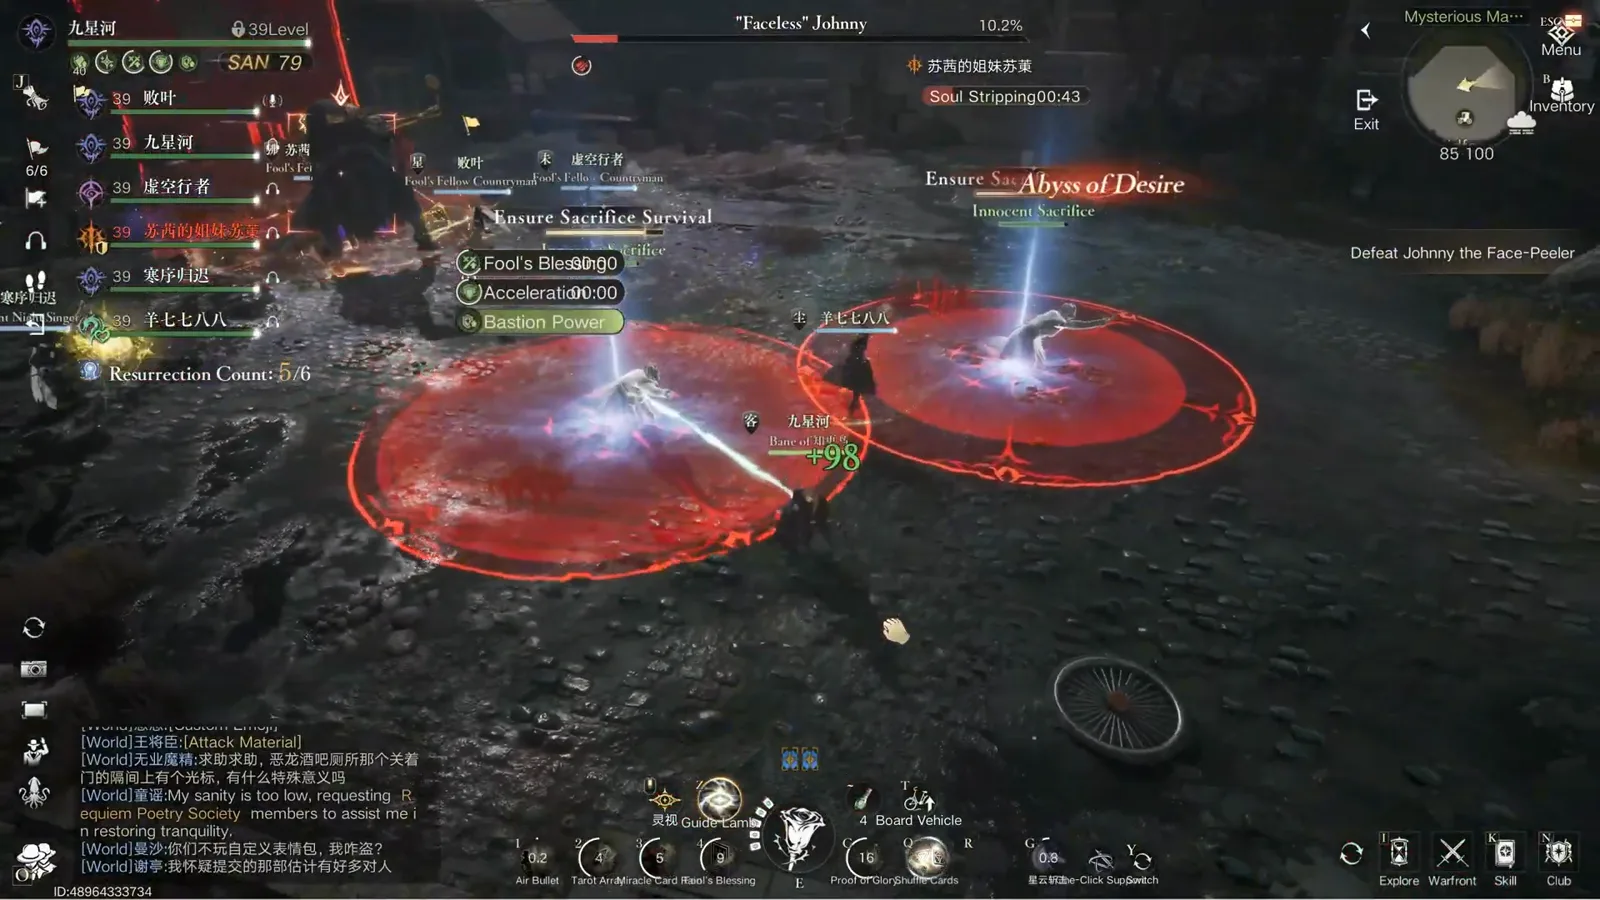
Two circles live: clean floor for the NPCs, nothing else matters.Watch from 3:14 - 11
The kill window
With the sacrifices alive and the ritual complete, Johnny finally just dies. The white implosion in this frame is the kill burst rolling over the party while Cold-blooded Intimidation — one of his last-gasp buffs — still ticks. This is the payoff for every early mist you dodged: a boss at low health with no mechanics left to answer.
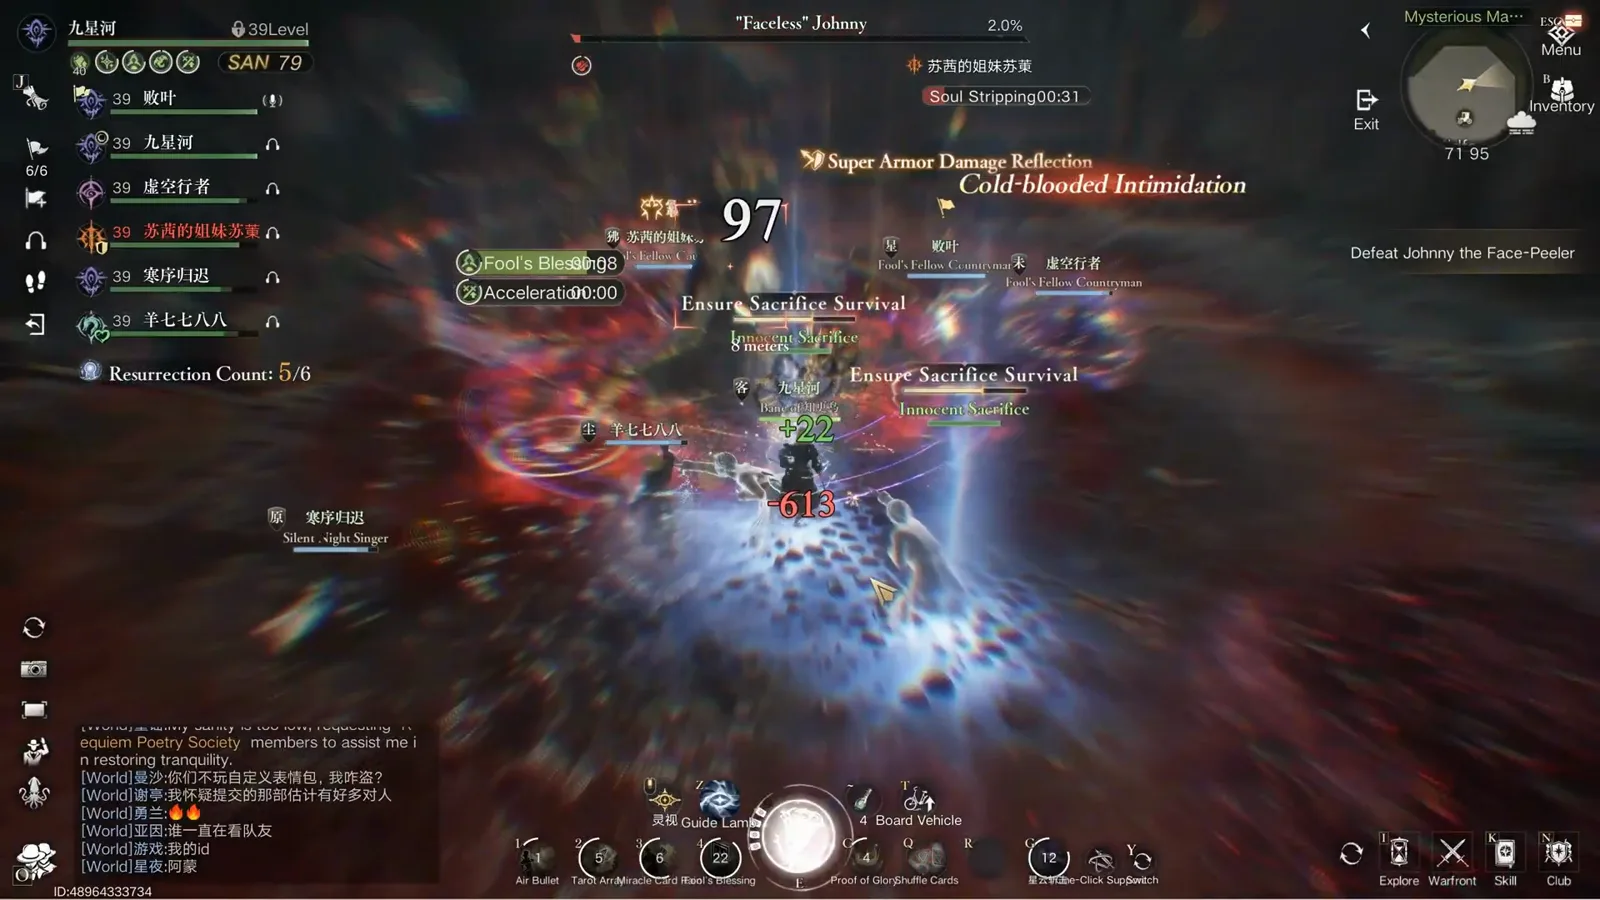
The implosion: all four sacrifices standing, the demon goes down.Watch from 3:26 - 12
The recap and the loot
The run closes with the end-of-run damage recap — the Brilliant Stars card reading 271,194 in this recording — and the loot drop (a Warm Leather here). One honest caveat from the source: this video was recorded before the global launch, so treat the exact figures as proof of the mechanics rather than today’s balance. The routing — corner the boss, soak the sacrifices, respect the mist — is the transferable part.
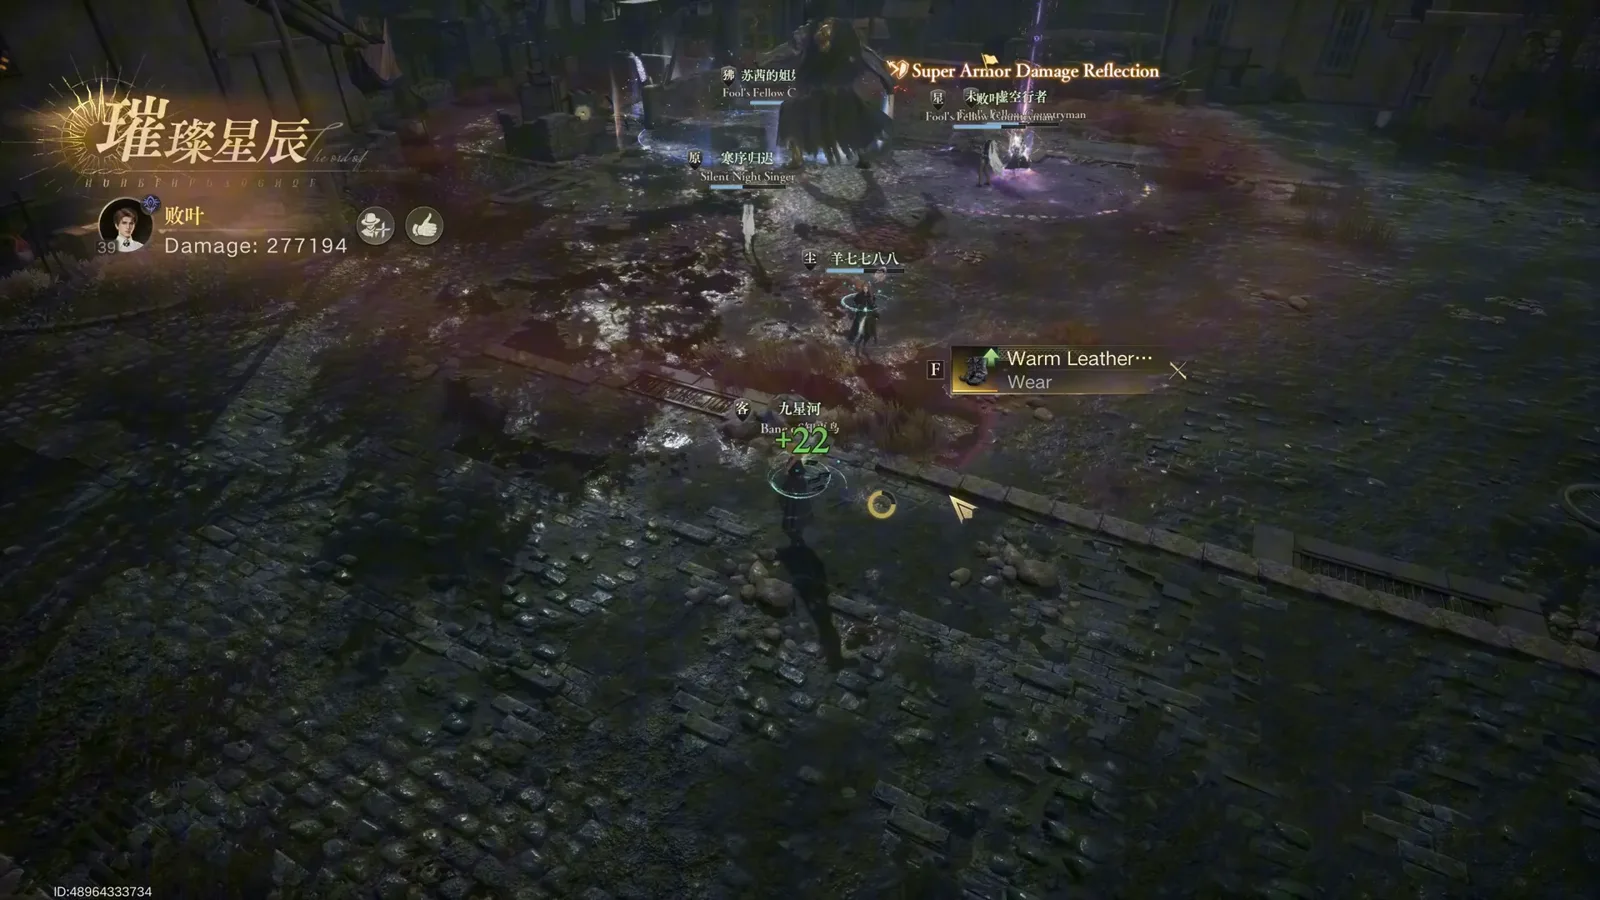
Cleared: damage recap and the loot drop close the run.Watch from 3:30
Every frame on this page is captured from the linked recording; the timestamps under each step jump to that exact second. The recording predates the global launch, so exact damage and health numbers are evidence of the mechanic, not current-balance claims. Mechanic names (Moon Ring of Slaughter, Scapegoat, Ensure Sacrifice Survival) are read directly from the game’s in-game English interface.
Faceless Johnny FAQ
- Q1.What party size does Faceless Johnny need?
- He is a six-player dungeon boss, and the recording runs at least 1 tank, 1 healer and 4 DPS. The tank’s first job is positional: drag Johnny into a corner so his area damage stops reaching the party and the sacrifice NPCs.
- Q2.What does the red mist around Johnny do?
- The mist (Moon Ring of Slaughter) hits hard on contact and then applies a lingering damage-over-time that starts roughly one second after the mist appears. The practical rule: leave the mist the moment you see it, and finish your casts somewhere else.
- Q3.Why do the sacrifices matter so much?
- The fight is a protection escort: four Innocent Sacrifice NPCs must stay alive while the ritual completes, and the recording’s creator is blunt that losing them lets the boss wipe the party outright. The “Ensure Sacrifice Survival” trackers on the right edge of the screen show their status at all times.
- Q4.What should I do when I get the red rune circle?
- Take it to a corner away from your teammates. The marked ground turns into blight that keeps damaging anyone who stands in it, so the mark is only dangerous when it is shared. The “Scapegoat” label on the mark is your cue to move.
- Q5.What is the Soul Stripping debuff on the boss frames?
- It is the fight’s visible timer mechanic — a debuff with its own countdown (02:35 and 01:19 in the captured frames) that sits above the party buffs. Treat it as part of the fight’s clock alongside the objective banner’s countdown.
- Q6.Which dungeon is this, exactly?
- It is a six-player dungeon boss fight against “Faceless” Johnny, an Abyss Demon; the quest text names him “Johnny the Face-Peeler”. The recording’s dungeon tag is truncated (“Mysterious Ma…”), so the instance’s full in-game label is [unverified] — the mechanics above are from the fight itself, not the tag.