Lord of Mysteries Offspring Guardian Boss Guide 2026
Offspring Guardian — 子嗣守护 — is the fourth boss of the May Manor Castle 12-player raid, and the recording behind this page treats it as the simplest fight in the wing: two dodge patterns repeated two or three times, one spawn phase, one rotation phase, and a damage check holding the whole thing together. That reputation is earned, but it hides the part that ends runs — the two share-soaks and the raid-wide hits that follow them, where one late heal or one dead DPS costs the whole raid a shared resurrection.
This walkthrough follows a single recorded clear by M Y A N E E — published as a CN-server run — second by second. Every frame below is a capture of that run, and every step deep-links back to the moment it happened. Numbers read off the frames and numbers the recording speaks are reported as exactly that, and the claims the recording cannot settle — including the creator's spoken DPS figures — sit in the pending-verification ledger. The name mismatch matters most here: the English client prints this boss as 'Offspring Protection', and this site's May Manor raid overview already uses 'Offspring Projection' for a different encounter.
Verification rule
[unverified] / 〔待核验〕 marks a detail the footage or cited sources could not confirm — the marker stays inline so you know exactly which claims to double-check.
Offspring Guardian walkthrough: every pattern in order
Key takeaways for the Offspring Guardian fight
- ◆Two patterns carry the first half of the fight, and they repeat two or three times. Learn the corner for the half-map sweep and the single crossing for the locked AoE and phase one stops being dangerous.
- ◆The first pattern is a half-arena sweep into a straight-line slash aimed at one ranged DPS. Leave the sweep, then take the corner the line does not cross.
- ◆The second pattern locks an AoE onto players standing near the boss and then swaps the affected ground. Cross it once and never let the same player clip it twice.
- ◆Both follow-ups are raid-wide hits. The group splits into two teams of four for the share-soak, and the healer puts both teams back to full immediately after — once for the soak, once after the fifth pattern's cut scene.
- ◆Phase three is triggered by a voice line, not a cast bar: when the professor starts talking, three offspring spawn and the group stands behind them with the camera rotating.
- ◆Phase four is the run-killer — step in and out of the ground ring while walking counter-clockwise — and the last quarter is pure damage with a nearly empty shared resurrection pool, so stop taking greedy lines.
Verified gameplay source
M Y A N E E — 12 Player Raid: Offspring Protection Mechanics
- 01
Read the boss bar and the berserk clock first
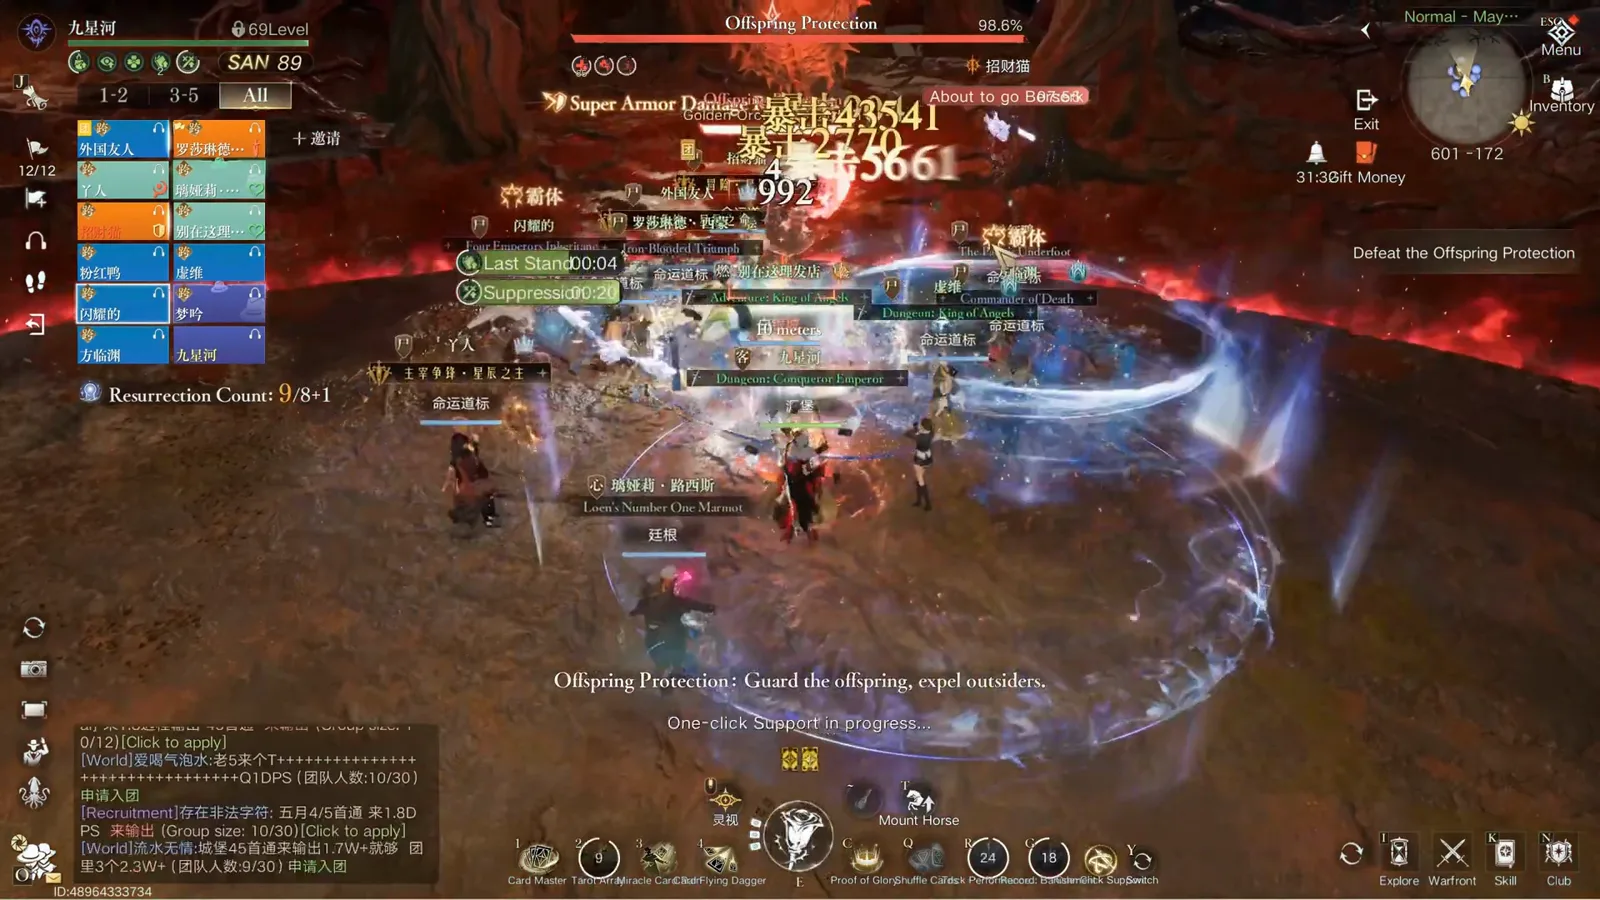
The encounter is 'Offspring Protection' in the English client, with 'Golden Orchard Guardian' printed under the health bar — the fourth boss of the May Manor Castle raid. The pull frame catches the raid stacked on the boss at 96.4% with the 'About to go Berserk' warning already ticking beside the bar, and the left-hand HUD reading 'Resurrection Count: 9/8+1'. Read both before you commit: the berserk clock is the real timer on this fight, and the resurrection pool belongs to all twelve players, so every death is a raid resource rather than a personal one.
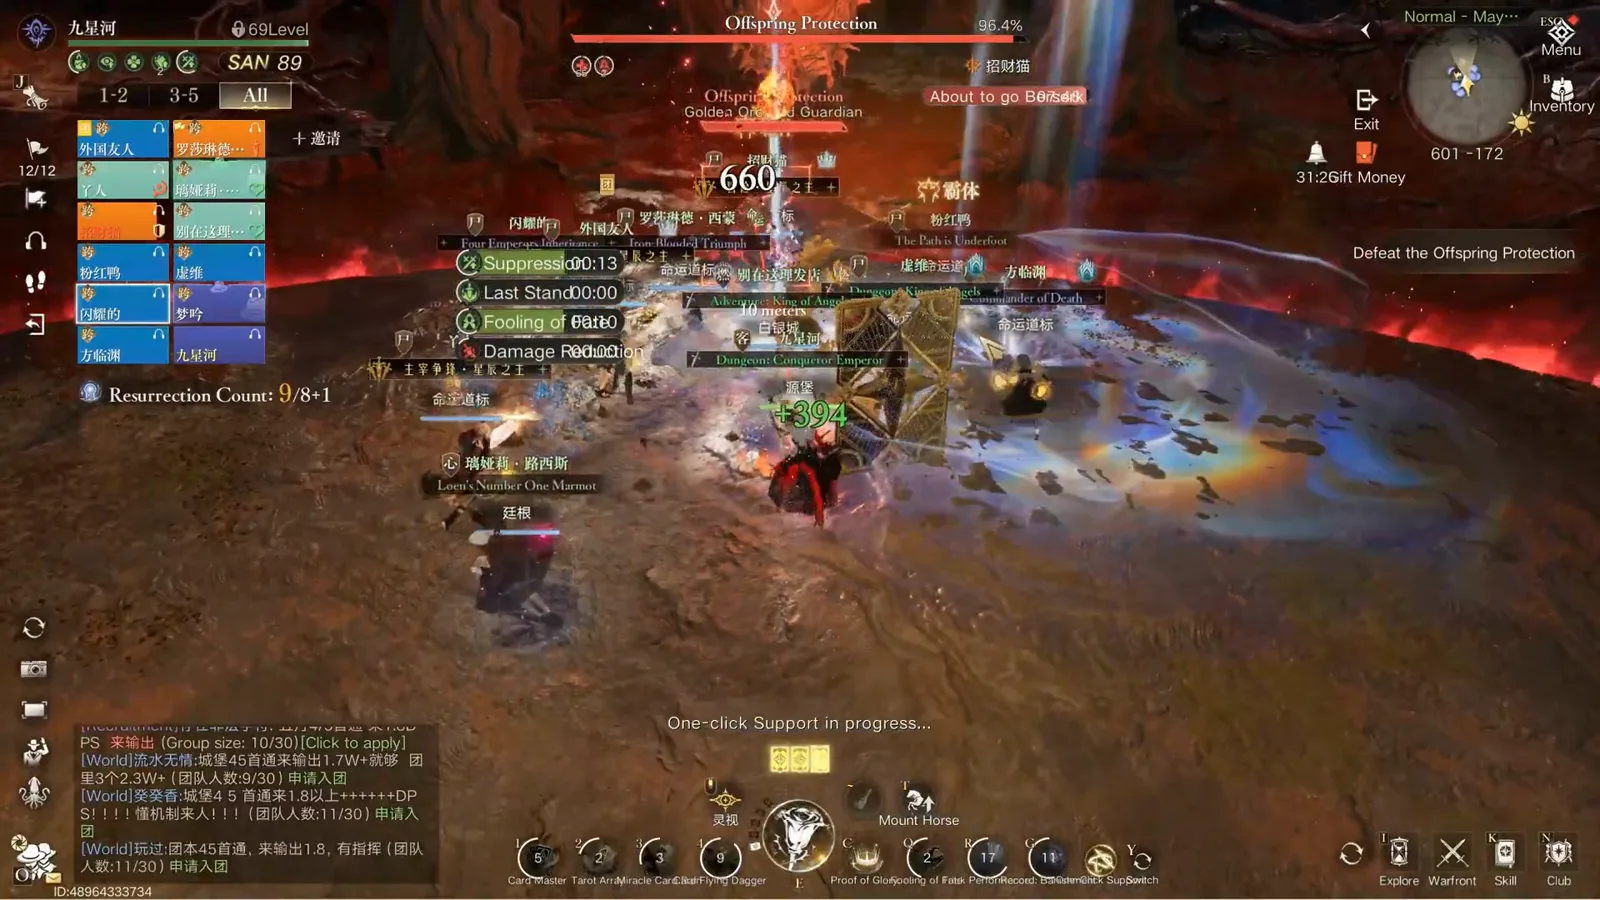
Two things to read at the pull: the berserk warning next to the health bar, and the shared resurrection count in the left HUD.Watch from 0:09 - 02
First pattern: half-map sweep into a straight-line slash
The opening pattern is a wide earth sweep that covers half the arena, followed immediately by a straight-line slash that picks one ranged DPS and fires through them. The recording's rule is to leave the sweep and stand in the corner the line does not cross, so the second half never touches a teammate. The in-game subtitle names the swing — 'Earth, refine. Great Sword Slash.' — while a red 'Earth Tremor' tag sits on the boss, which is your cue that both halves of the pattern are still coming.
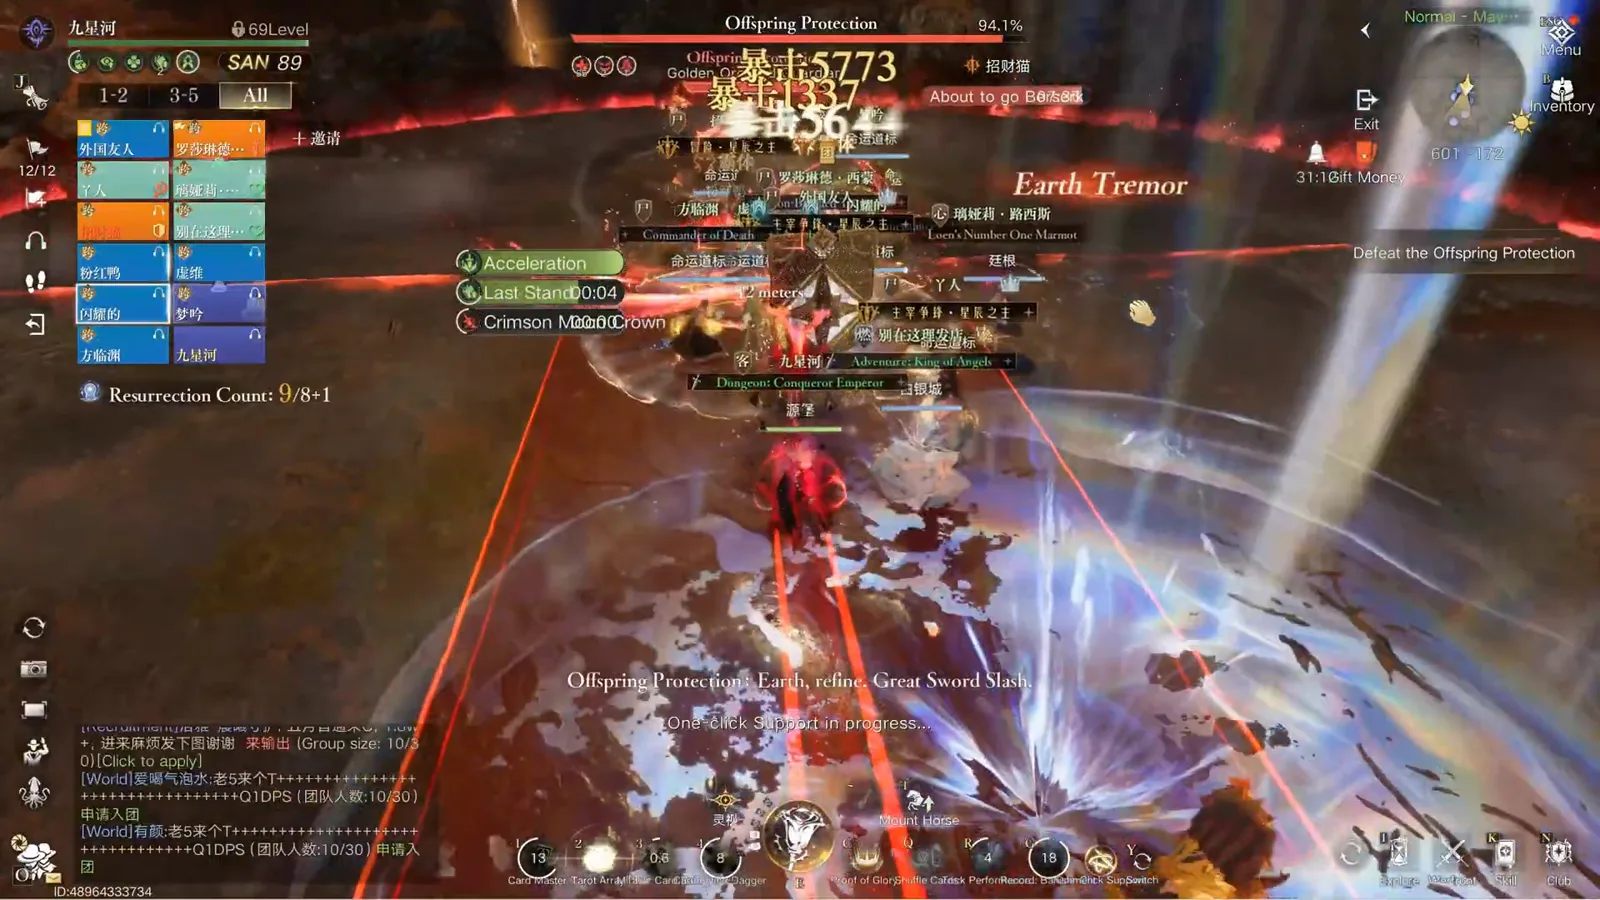
The sweep is the half you leave; the straight line is the half you position around, because it is aimed at one player.Watch from 0:22 - 03
Second pattern: a locked-on AoE that swaps ground
The second pattern paints an area around the group and then moves it — 'the affected areas will alternate, so get ready to switch,' as the narrator puts it. The footage catches the group's own callout in the chat box: stay near the boss so the red AoE locks on, then move through it once and do not get hit twice. One crossing is survivable; the same player clipping the same spot twice is how this pattern kills, so move as a body and keep the melee and ranged halves of the raid on the same side of the circle.
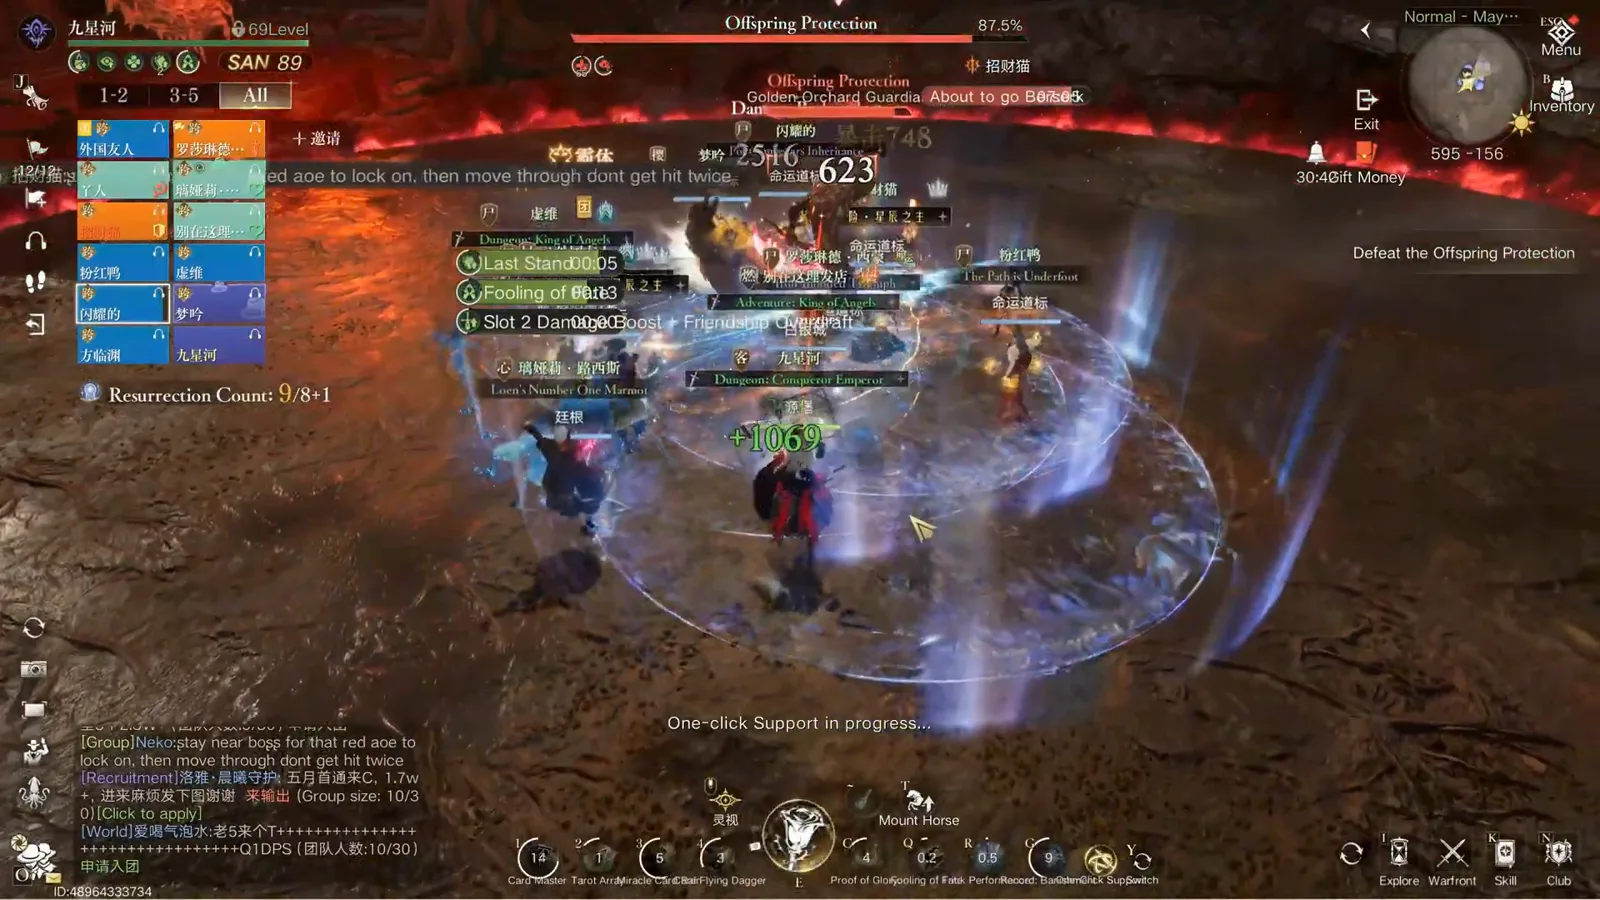
The group's own chat line in the recording spells out the rule: let it lock on near the boss, then cross it a single time.Watch from 0:52 - 04
Split into two teams of four and share the damage
What follows the swap is a share-soak. The client prints the requirement itself — 'Split into two teams and gather to share the damage' over twin golden circles, with 'Requires 4 people to share the damage' underneath — and the narrator says the same thing in plain words: four players in each circle or it hurts. Fix your two groups before the pull. The circles are not flexible, and an under-filled one drops the whole hit on three players.
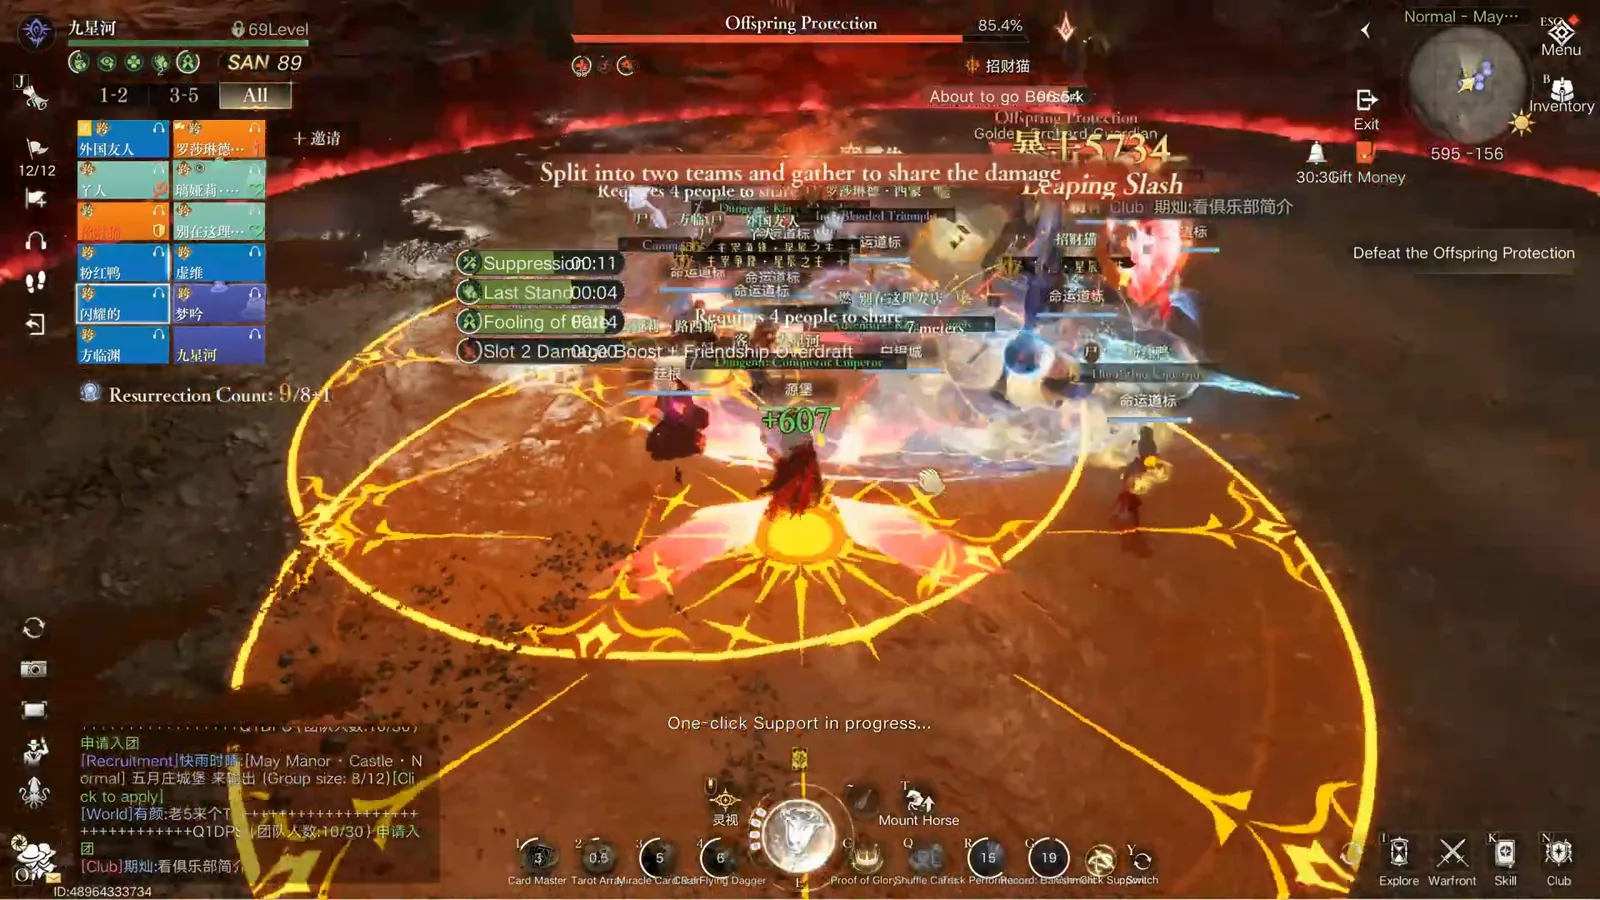
In-game text rather than a guide overlay: the client asks for two teams and four bodies per circle.Watch from 1:03 - 05
The death that eats your shared resurrections
This is the clip the narrator tells you not to repeat. Standing in the wrong half of the sweep kills the recording player, and the frame shows the price: a resurrection prompt offering to 'awaken you from the Subconscious Ocean', plus a damage-source recap listing the killing blows as an earth ability and a golem hit from the boss, both landing in one window. The HUD has already ticked from 9/8+1 down to 8/8+1. Nothing in this fight is such a tight damage race that you cannot afford to move first — the sweep resolves before the line, so movement is free.
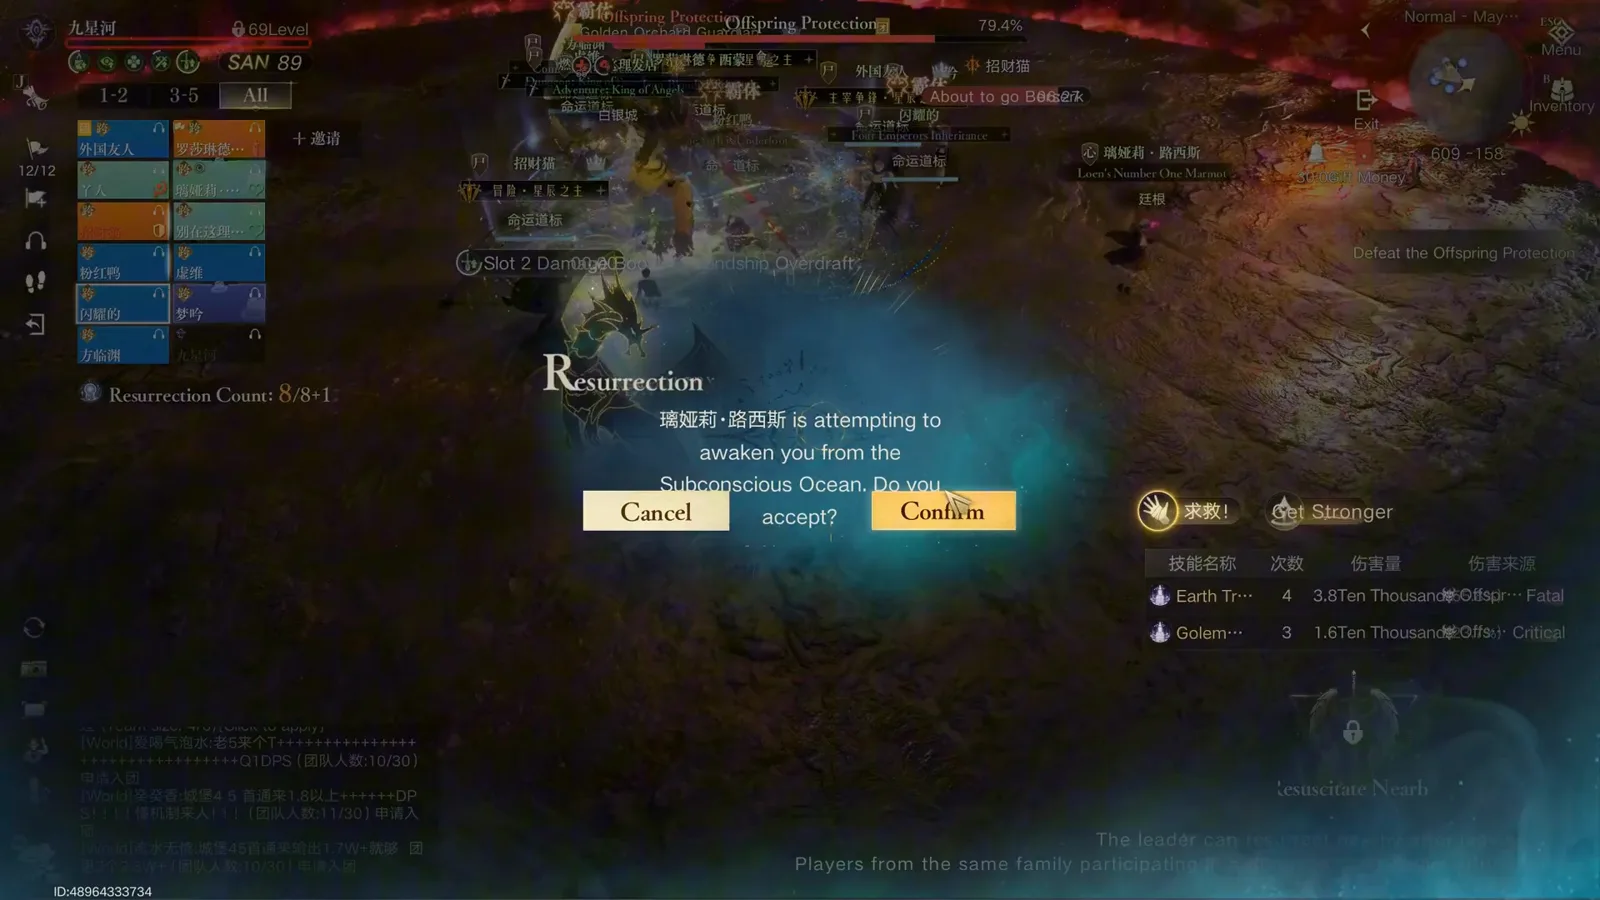
The death recap is the only place the game tells you exactly what killed you — and the shared resurrection count drops with it.Watch from 1:30 - 06
Top both teams before the next pattern
The pattern does not stop when the soak resolves. A follow-up sweep crosses the arena and the raid walks out of it on small heal ticks, with the HUD already down to 7/8+1. The narrator's instruction is explicit: the healer puts both teams back to full immediately, because the boss launches another attack straight after the raid-wide. While the group is still split in two, keep each team inside heal range of the other so the next hit does not catch one circle at half health.
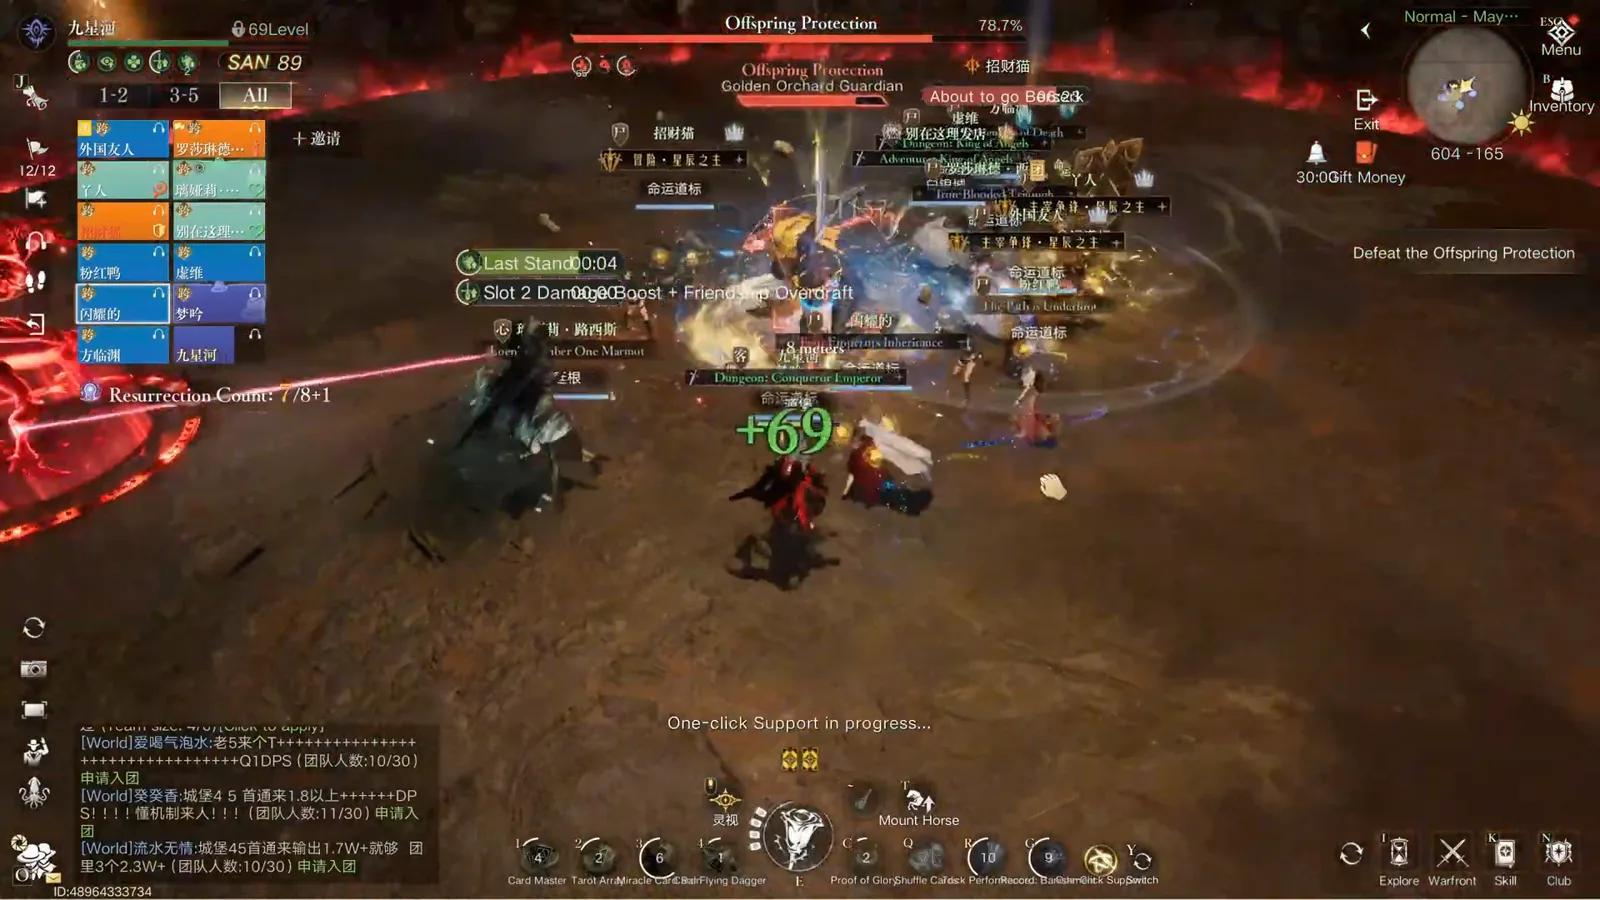
The heal window is short: the sweep resolves, and the next pattern is already loading behind it.Watch from 1:34 - 07
The damage check: 26k run, 18k reported as enough [unverified]
Watch from 0:31The only hard number in the recording is the damage check. As of this run the creator measured 26k DPS on the butler dummy in the training ground and says all you need is probably around 18k. Both figures are one player's own parses, spoken on the recording rather than shown — no in-game meter appears anywhere in the footage — so hold them as community-reported targets [unverified] and sanity-check them against your own group's clear times instead of treating 18k as a published requirement.
- 08
Phase three starts when the professor speaks
The narrator's phase trigger is audio, not visual: when the professor starts talking, the third phase is about to go. The footage catches that line as an in-game subtitle — 'Professor: He will risk everything to guard the offspring of the Great Mother.' — with the boss at 45.4% and the arena still lit red. From the voice line the group has a few seconds to collapse onto the boss before the offspring appear, so use the subtitle as the countdown rather than waiting to see the spawns.
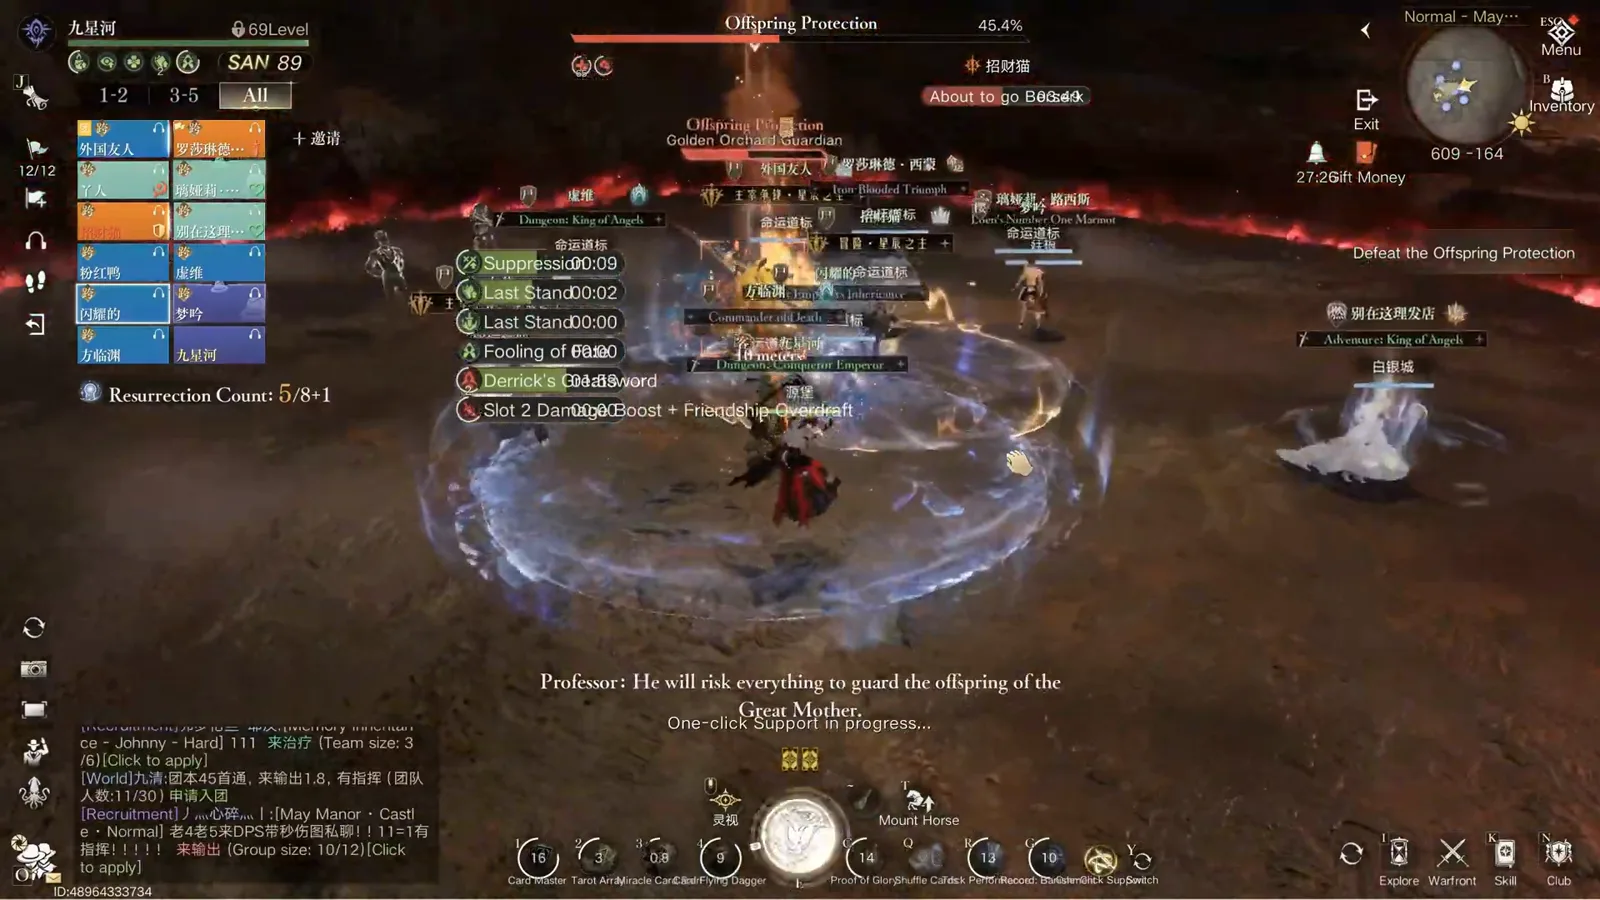
The phase-three tell is a voice line: the professor's subtitle lands seconds before the offspring do.Watch from 2:04 - 09
Stand behind the offspring and keep rotating
Once the offspring are up, the recording's rule is positional: stand behind them and keep rotating the camera as they turn. The frame at 41.7% shows what that looks like in practice — red offspring figures on both flanks, the boss staring the group down through the in-game line 'Offspring Protection is staring at you', and a 'Super Armor Damage Reflection' aura sitting over the pack. Staying behind the offspring is what keeps the raid out of the front arc while damage keeps flowing. The narration and the producer's burned-in caption disagree about which way that rotation goes, so the direction is logged as unverified rather than guessed.
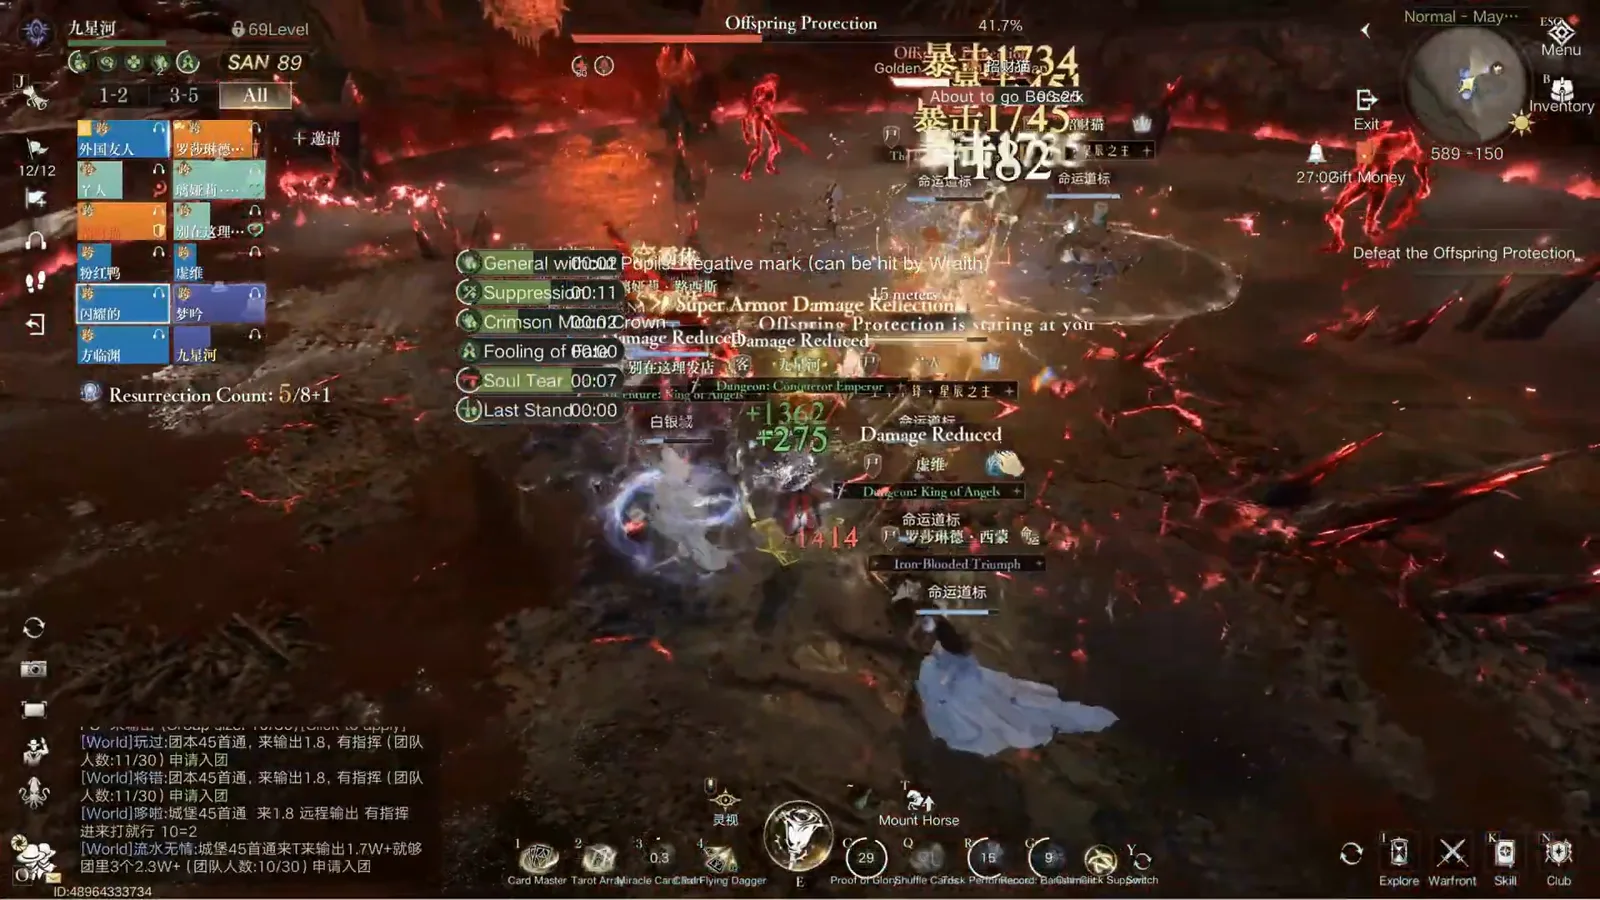
Behind, not beside: the front arc of the offspring is the part the rotation is avoiding.Watch from 2:28 - 10
Phase four: in and out of the ground ring, counter-clockwise
The fourth pattern is the one the narrator says kills a lot of teams, and it is movement rather than damage: alternate between standing inside the ground ring and outside it while travelling counter-clockwise — the opposite direction to the previous phase. The frame shows the ring as the mechanic itself, a dark band on cracked red ground with the player sitting on its inner edge. Walk it slowly and continuously. Sprinting between the edges of the ring is what clips people, and phase four is where the raid's remaining resurrections disappear.
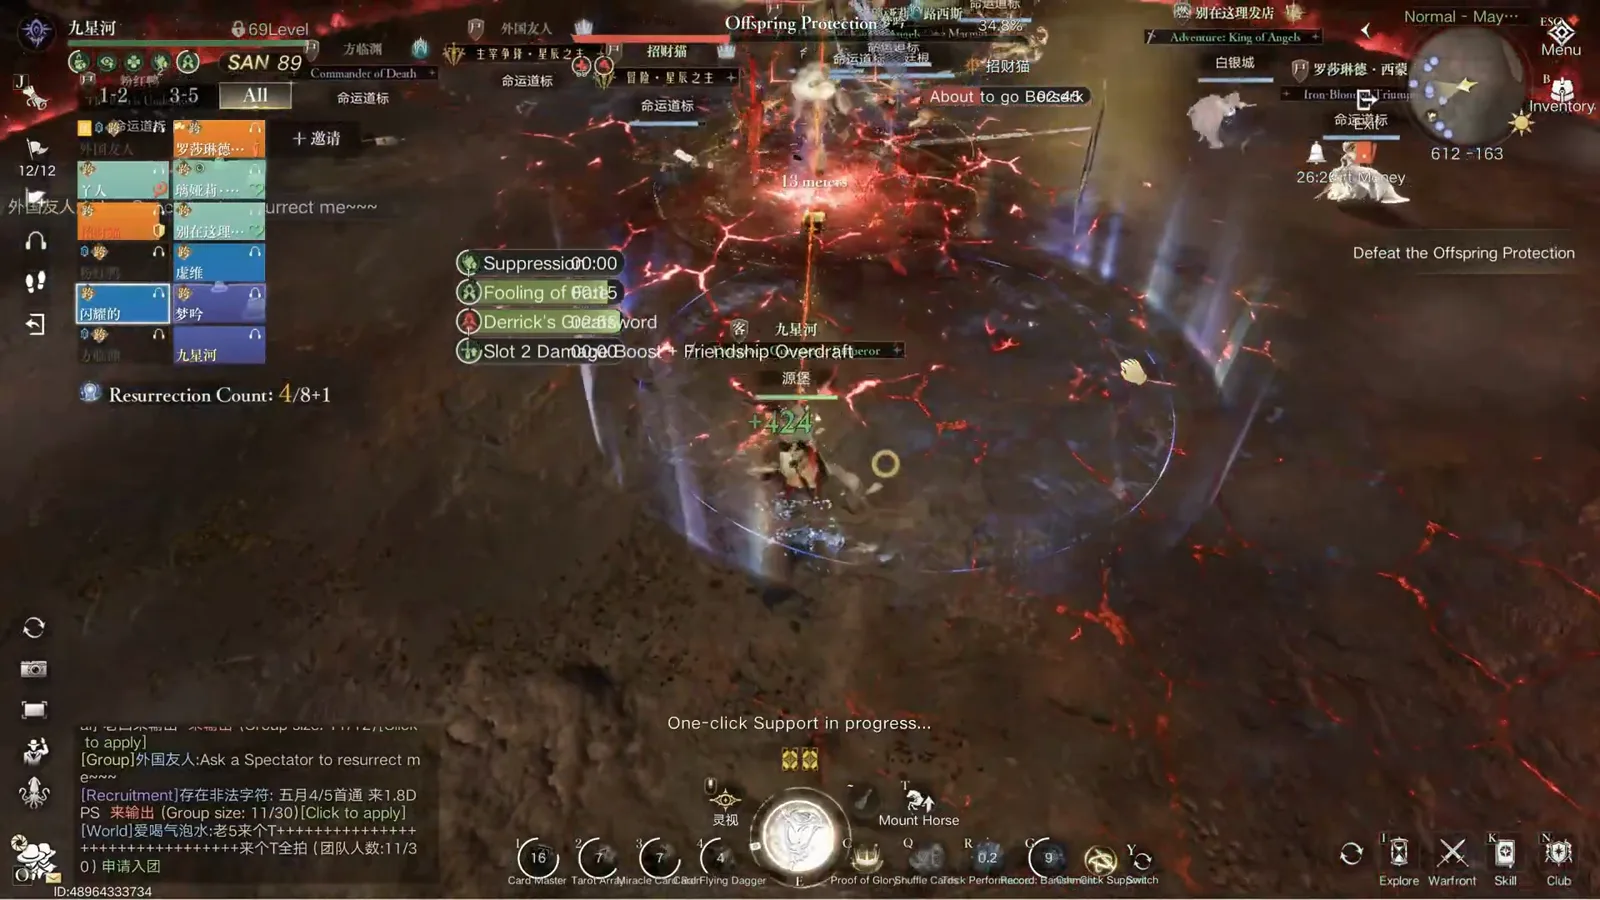
The ring is the whole mechanic: step out, step back in, and keep walking the circle counter-clockwise.Watch from 3:08 - 11
Phase five: find who is being aimed, keep the group clear
The last new pattern is a positioning puzzle. One player is aimed — the frame shows the red line already drawn across the arena, the boss at 34% and a golem add parked on the flank — and the group has to work out who it is, then stand where the line crosses no teammate while still landing damage. The narrator calls this the hardest pattern to position, and the practical version of that advice is to call the target out loud and let everyone else move, rather than expecting the aimed player to solve it alone.
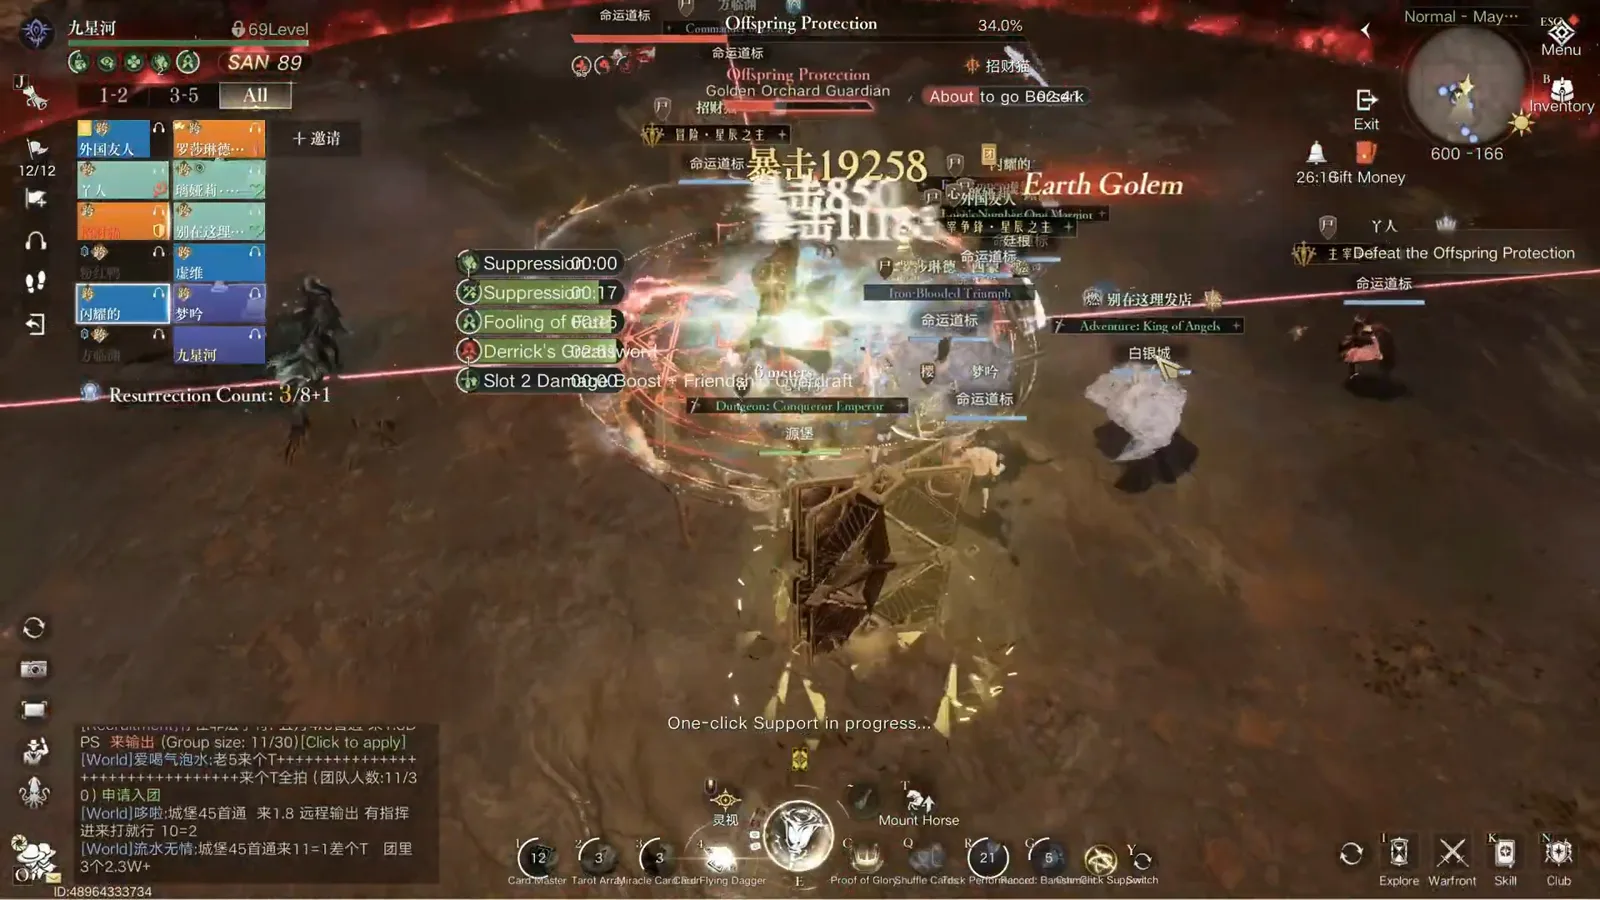
The line is aimed at one player, but the rest of the raid is what actually has to move.Watch from 3:12 - 12
The cut scene is the heal check
Just before the final burn the encounter plays a short cut scene, and the narrator's instruction is to treat it as a timer: when the scene plays, the healer has to put the entire raid back to full as fast as possible, because the boss unleashes a map-wide attack the moment it ends. The frame catches the boss's line — 'Offspring Protection: Trespasser... die!' — with green heal ticks already landing on the group. Top the raid during the scene, not after it; there is no second window between the cut scene and the hit.
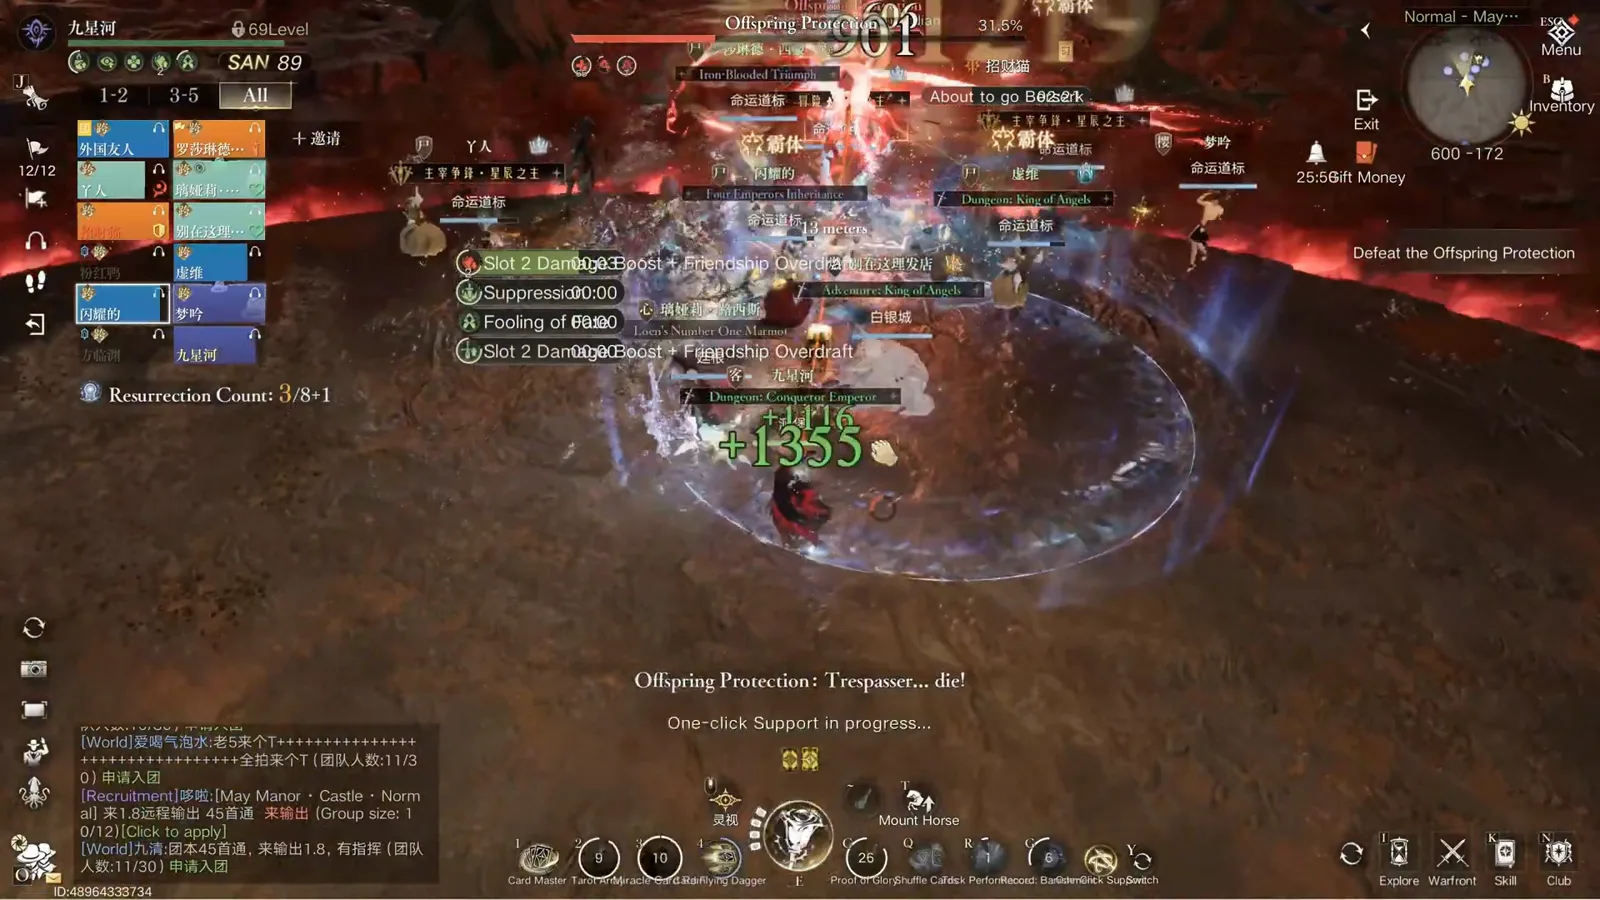
Heal during the scene: the raid-wide hit lands as soon as the cut scene ends.Watch from 3:32 - 13
Eat the raid-wide and keep the stack alive
The raid-wide arrives as a single fire burst over the arena. The frame shows the raid standing inside it at 31.1%, the 'Super Armor Damage Reflection' tag still up on the boss, and the group chat asking for a spectator resurrection — the cost of one missed heal. There is no soak circle and no safe corner here, so the counter-play is preparation rather than movement: both teams at full when the burst lands, and everyone stacked tightly enough that group heals cover the whole raid at once.
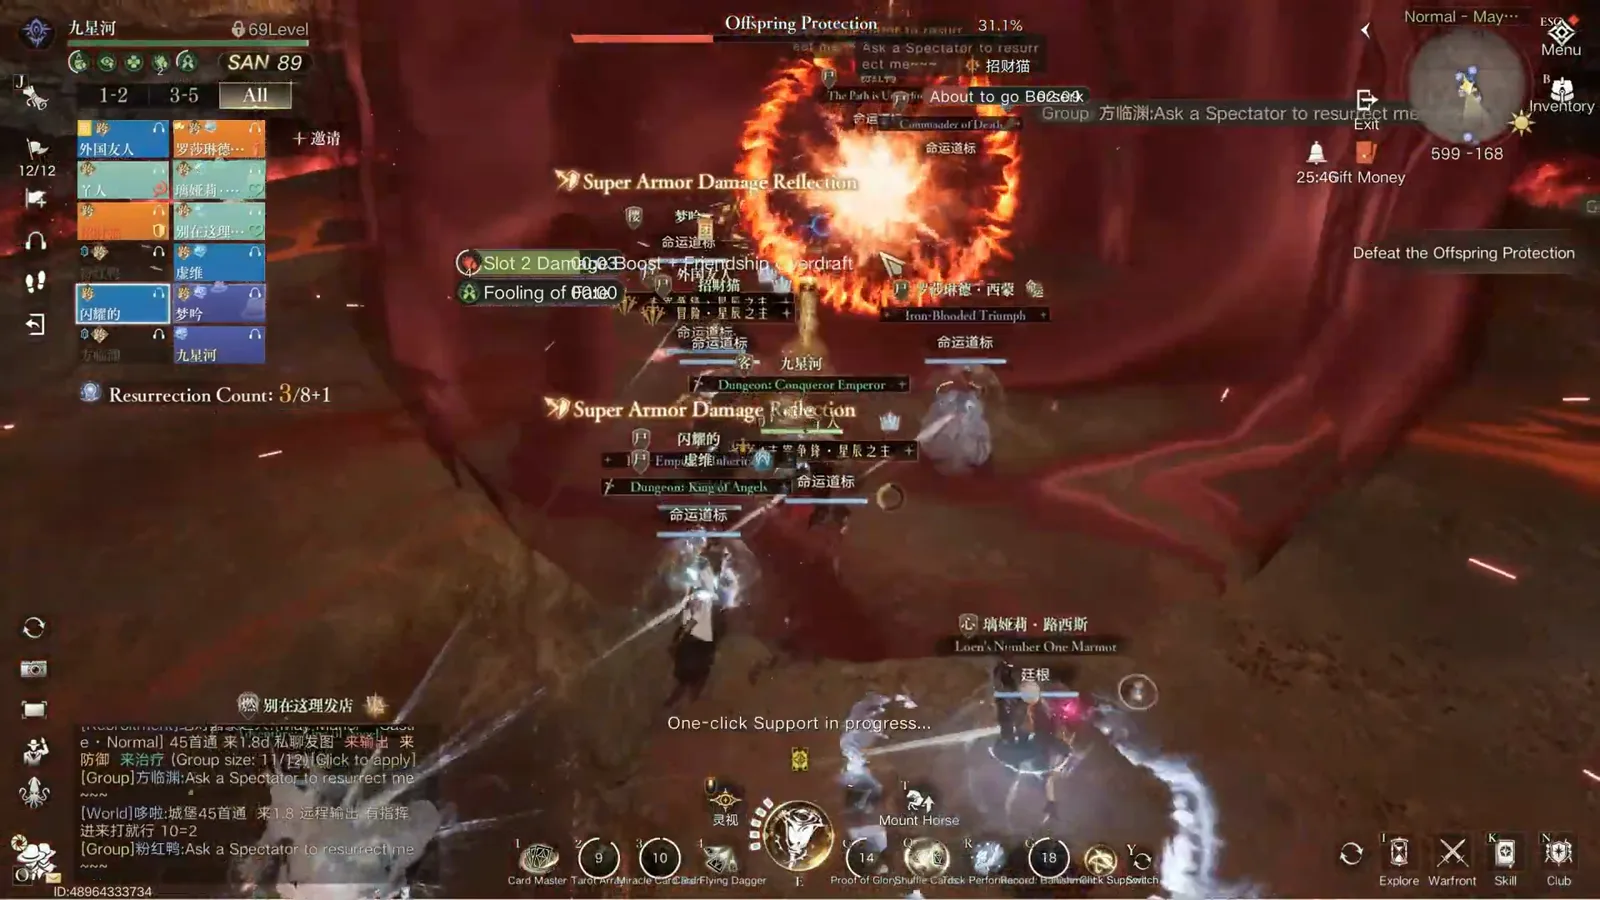
Nothing to dodge: the answer to the raid-wide is health, stacking and healer throughput.Watch from 3:44 - 14
Last quarter: burn it and stop spending resurrections
Once the fifth pattern resolves, the encounter is over except for the damage — 'all you got to do now is DPS and you've already cleared this,' as the narrator puts it. The last-quarter frame shows the boss at 25.4% with the HUD on 1/8+1, one shared resurrection left for twelve players, so the final burn is exactly where you stop taking greedy lines. Keep the two teams stacked, keep heals rolling, and let the damage check close the fight instead of a corpse run.
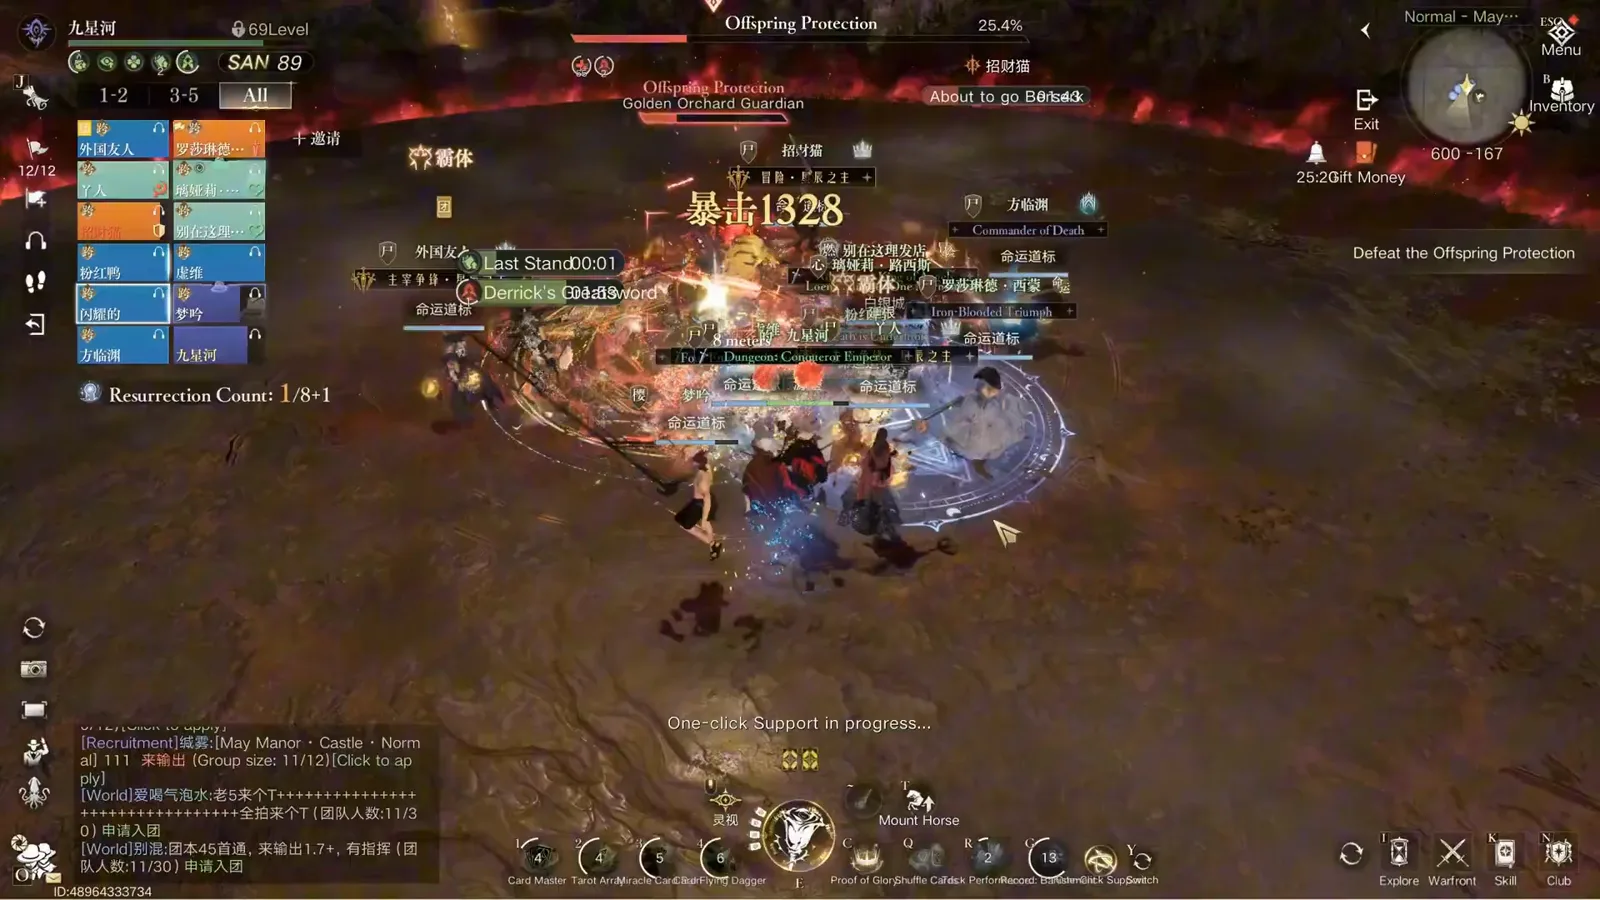
The last quarter is pure damage — and the shared resurrection pool is nearly empty.Watch from 4:10 - 15
The clear pays out through the Group Auction
The run ends in the game's own loot flow rather than a chest. A Group Auction window opens over the post-clear scene, listing the drops with starting bids and a short distribution countdown, next to the clear card for this player. The frames name the visible items — an Elemental Secret Rune Amulet, Cocoon Silk, Honor: Guardian Blade, and stacks of Defensive and Attack Material — which the recording never discusses out loud, so read that list as observed loot from one run rather than a quoted drop table.
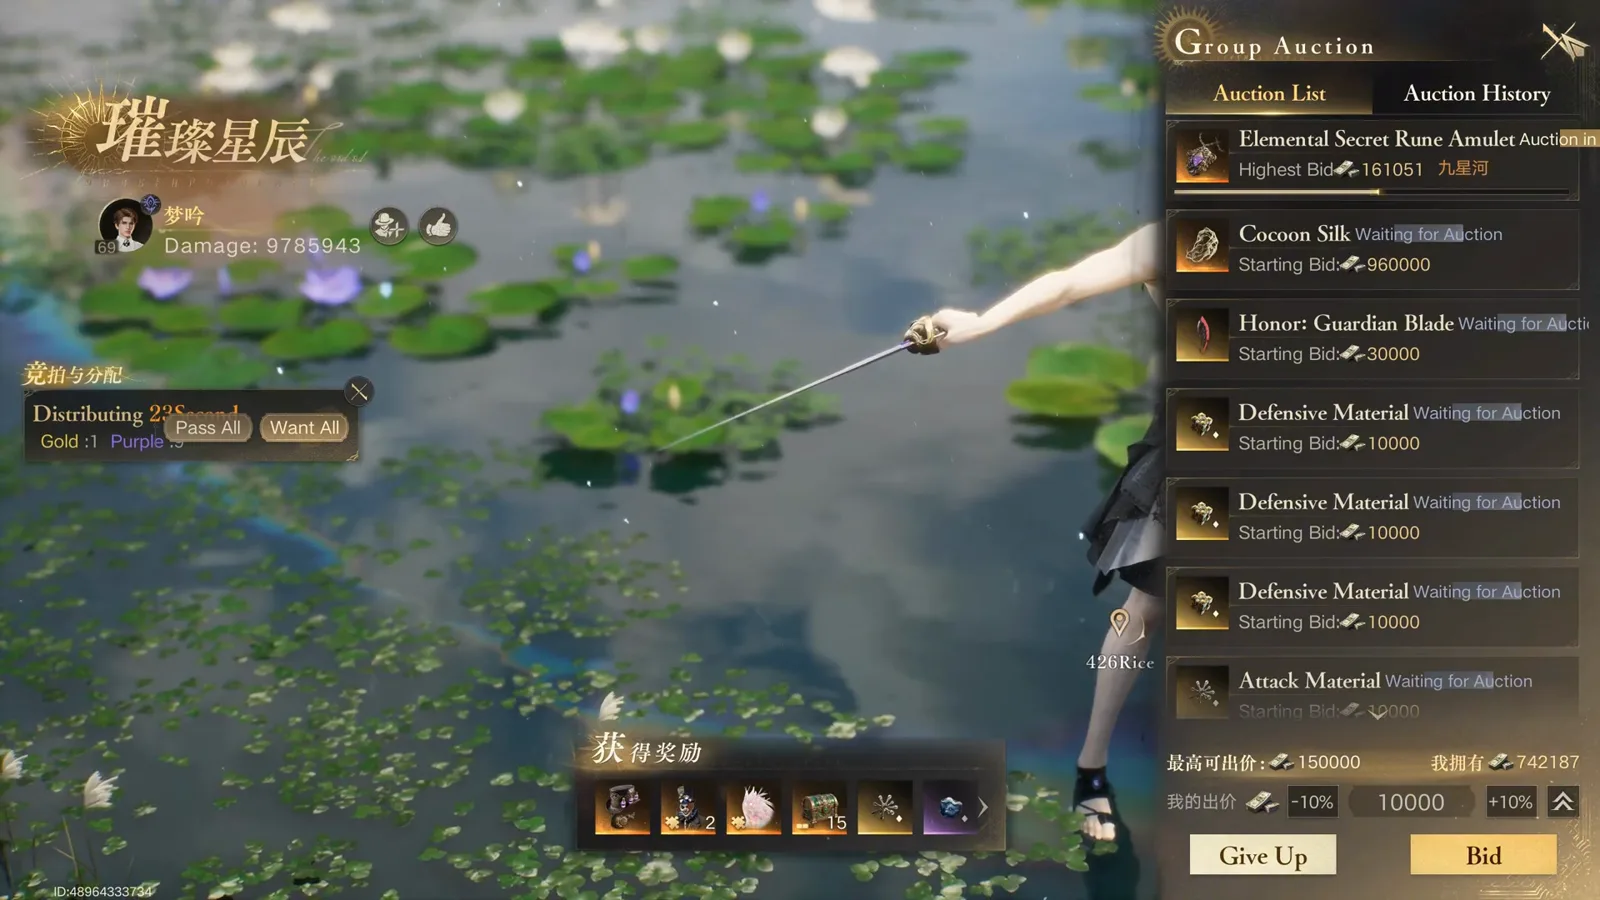
Loot is split in-game: the auction window opens on the clear and runs its own distribution countdown.Watch from 5:04
No frame is published for this step: the recording states the DPS figure out loud and never shows a meter, so the step stays text-only rather than borrowing a near-miss screenshot.
Source ledger
Frames and facts · the only source on this page
M Y A N E E — 12 Player Raid: Offspring Protection Mechanics
Fifteen frames, one source: the same run supplies both the pictures and the mechanics, so the two are never in tension.
One recording carries this entire page. Every published frame is a capture of it, every spoken rule is quoted from it, and every step deep-links back to the second it happened. Nothing here has been cross-checked against a second video, so wherever the run is ambiguous the copy says so instead of filling the gap.
Pending verification ledger
Everything below was seen in the footage or heard in the recording and could not be sourced. Read it as the list of things to confirm in your own client.
- Boss name
- The Chinese name for this boss is 子嗣守护. The client in the footage prints the health bar as 'Offspring Protection' with 'Golden Orchard Guardian' underneath, and 'Offspring Guardian' is this site's working English title — the game publishes no official English name. Note the collision inside this site: the May Manor raid overview already uses 'Offspring Projection' for a different boss name (子嗣投影), and the two are separate encounters.
- DPS floor
- 26k DPS on the butler dummy and 'probably around 18k' needed are both spoken by the recording's creator and are that player's own parses on the CN client. No in-game meter, item level or clear timer appears in the footage, so neither number is a published requirement.
- Phase numbering
- Third, fourth and fifth phase are the narrator's own shorthand. The boss bar shows no phase marker, and although the client prints ability tags such as 'Earth Tremor' and 'Earth Fission', the footage never maps a tag to a numbered phase.
- Rotation direction
- The narration says to keep rotating towards the left on the camera in the offspring phase and counter-clockwise in the following one, calling the second the opposite direction. The producer's burned-in caption on the offspring phase reads 'Stand Behind & Rotate Clockwise'. Both sources agree on counter-clockwise for the later phase; the offspring phase's direction is unresolved.
- Resurrection Count
- The HUD reads 'Resurrection Count: 9/8+1' at the pull and falls to 1/8+1 by the final burn, so the pool is shared and finite. What the +1 represents, and whether it regenerates, is never explained in the recording or shown in the frames.
- Super Armor Damage Reflection
- A 'Super Armor Damage Reflection' tag sits over the boss and its offspring for long stretches, with 'Damage Reduced' tags on the boss while it is up. The aura is clearly real in the frames, but the narration never describes how the reflection works or what to do about it, so no counter-play is stated on this page.
- Add names and count
- The recording says three offspring spawn in phase three. The frames also show an 'Earth Golem' nameplate and in-game text about pups and a knockdown state that prevents dodging. Which adds are the offspring, whether the golem is a separate spawn, and how many of each appear are not confirmed by the recording.
- Drops and auction
- The clear ends in the Group Auction window, where the frames show an Elemental Secret Rune Amulet, Cocoon Silk, Honor: Guardian Blade and stacks of Defensive and Attack Material. The recording never discusses drops, so this is observed loot from one run — not this boss's drop table, rates or bid rules.
- Global release
- Every frame and every spoken figure comes from one recorded run, published as a CN-server clear, and the interface in the footage is English. Whether this boss, the DPS expectations or the auction flow are identical on every regional client is unverified.
Offspring Guardian FAQ
- Q1.What is the Offspring Guardian boss and where does it sit in May Manor Castle?
- It is the fourth boss of the May Manor Castle 12-player raid — 子嗣守护 in Chinese. The English client prints the name as 'Offspring Protection' on the health bar with 'Golden Orchard Guardian' underneath, and this page follows the run recorded by M Y A N E E. Keep it separate from the 'Offspring Projection' encounter named on this site's May Manor raid overview: that is a different boss name (子嗣投影), not this fight.
- Q2.How much DPS do you need for the Offspring Guardian?
- The recording's creator measured 26k DPS on the butler dummy in the training ground and says about 18k is probably enough to clear. Both figures are one player's own parses, spoken rather than shown, and no in-game meter appears in the footage, so hold them as community-reported targets [unverified] rather than published requirements, and check them against your own group's clear times.
- Q3.How do you dodge the sweep and the straight-line slash?
- Leave the half-arena sweep first, then stand in a corner the straight-line follow-up does not cross. The line is aimed at one ranged DPS, so the safe spot is the one where that line hits nobody else. The in-game subtitle names the swing 'Earth, refine. Great Sword Slash.' and a red 'Earth Tremor' tag sits on the boss while the pattern resolves.
- Q4.Why does the group have to split into two teams of four?
- Because the share-soak that follows the AoE swap only pays out when the circles are filled. The client prints the requirement itself — 'Split into two teams and gather to share the damage' and 'Requires 4 people to share the damage' — and the narrator adds that an under-filled circle hurts. Fix both teams before the pull rather than re-sorting them mid-mechanic.
- Q5.What happens when the professor starts talking?
- That voice line is the trigger for phase three. An in-game subtitle — 'Professor: He will risk everything to guard the offspring of the Great Mother.' — appears with the boss around 45%, and three offspring spawn a few seconds later. From that point the group stands behind the offspring and keeps the camera rotating. The direction of that rotation is disputed between the narration and the producer's caption, so it is logged as pending verification.
- Q6.Which way do you rotate during the offspring phases?
- Partly unverified. The narration says to keep rotating towards the left on the camera in the offspring phase, then counter-clockwise in the following phase, calling the second one the opposite direction — but the burned-in caption on the offspring phase reads 'Stand Behind & Rotate Clockwise'. Both sources agree on counter-clockwise for the later ring phase. For the offspring phase, try left first, then clockwise, and confirm which one keeps you out of the front arc in your own client.
- Q7.Is there a raid-wide attack I have to soak?
- Yes, twice, and neither can be soaked away. One lands after the share-soak in phase one and one after the fifth pattern's cut scene. The counter-play is healer throughput in both cases: put the whole raid back to full immediately, once for both split teams and once during the cut scene, because the boss fires the raid-wide as soon as the scene ends. There is no soak circle and no safe corner for either hit.
- Q8.What does Super Armor Damage Reflection mean on this fight?
- It is logged, not explained. The frames repeatedly show a 'Super Armor Damage Reflection' tag over the boss and its offspring while 'Damage Reduced' tags sit on the boss, but the recording's narration never describes how the reflection works or how to play around it. Treat the aura as real and unverified: do not assume your damage is going where you expect until you have tested it yourself.